
How to Mix Grout: 15 Steps
Introduction:
When it comes to tiling, the final step is often grouting. Grouting ensures a smooth, finished look and helps protect your tiles from dirt, moisture, and debris. Learning how to mix grout properly is essential for a successful and long-lasting tile job. This step-by-step guide will help you master the art of mixing grout in no time.
Step 1: Choose the right grout
There are different types of grout available, including sanded, unsanded, epoxy, and acrylic. Consider the needs of your specific tiling project to determine the best type of grout for you.
Step 2: Gather your materials
You’ll need a clean bucket, water, a measuring cup or scales, an electric drill with a paddle attachment or a hand mixer, a margin trowel or putty knife, rubber gloves, safety glasses, and the grout of your choice.
Step 3: Read the instructions
Before you begin mixing, thoroughly read the manufacturer’s instructions on your bag of grout. This will provide you with important information such as mixing ratios and drying times.
Step 4: Measure the water
Measure out the recommended amount of water using your measuring cup or scale and pour it into your clean bucket.
Step 5: Measure the grout
Following the manufacturer’s instructions, measure out the correct amount of grout powder for your project.
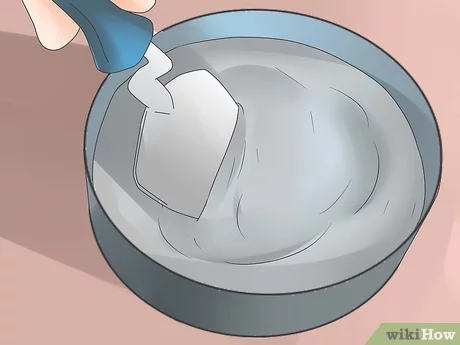
Step 6: Pour the grout into the water
While gradually adding the powdered grout to the bucket, slowly mix it into the water with your margin trowel or putty knife.
Step 7: Mix thoroughly
Continue mixing until all lumps are removed and you achieve a uniform consistency similar to peanut butter. You can use a hand mixer or an electric drill with a paddle attachment for this process.
Step 8: Allow the grout to slake
Let the mixed grout sit or “slake” for 5-10 minutes, depending on the manufacturer’s instructions. This allows the grout to fully absorb the water and improves its overall performance.
Step 9: Mix again
After the slaking period, give your grout one more thorough mix to ensure it has a smooth and consistent texture.
Step 10: Check the consistency
The ideal consistency of your grout should be relatively thick but still easily spreadable, like peanut butter. If your grout is too thick or too thin, adjust the consistency by adding small amounts of water or more grout powder as needed.
Step 11: Clean your tools
Wipe down your mixing tools using a damp rag or sponge to remove any excess grout before it dries.
Step 12: Begin applying grout
With your mixed grout ready, you can begin the process of applying it to your tiles using a rubber float at a 45-degree angle.
Step 13: Remove excess grout
Scrape away excess grout from tiles using your rubber float at a 90-degree angle.
Step 14: Allow time to dry
Allow the grout to dry according to the manufacturer’s instructions before attempting to clean the tiles.
Step 15: Clean and buff tiles
Once your grout has dried, use a damp sponge to wipe away any remaining residue from your tiles. Buff them with a clean, dry cloth for a final touch.
Conclusion:
Mixing and applying grout might seem intimidating at first, but with practice and patience, you’ll quickly learn how simple and rewarding this essential tiling skill can be. Follow these steps for a professional-looking tile job that will stand up to years of use.
