How to Master the Etch a Sketch: 9 Steps

Introduction:
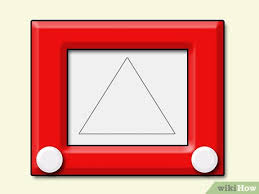
The Etch a Sketch is a mechanical drawing toy invented in the early 1960s, featuring two knobs that control a stylus moving on the inside surface of the red frame. The iconic toy has captured the imagination of both children and adults for generations. If you have ever wondered how to master this unique device, we have broken it down into 9 easy steps.
Step 1: Understand the Etch a Sketch mechanics
Before you start, it’s important to understand how the knobs control the movement of the stylus. Each knob is connected to either the horizontal or vertical rails. Turning one knob moves the stylus horizontally while turning the other moves it vertically, allowing you to create a variety of shapes and designs.
Step 2: Familiarize yourself with the controls
Practice turning each knob individually and together to get accustomed to moving the stylus on the Etch a Sketch screen. The more comfortable you are with controlling its movements, the easier mastering it will be.
Step 3: Start with simple lines and shapes
Begin by drawing basic shapes such as horizontal and vertical lines, squares, and rectangles. This foundational practice will build your skills in controlling both knobs simultaneously.
Step 4: Practice curves and circles
To create curves or circles on an Etch a Sketch, you will need to turn both knobs at varying speeds. Practice creating different sizes of circles and curves by turning one knob faster or slower than the other.
Step 5: Master diagonals
Drawing diagonal lines requires turning both knobs at precisely equal speeds. Get comfortable with this technique by practicing different angles of diagonals, gradually increasing their complexity.
Step 6: Connect shapes with continuous lines
To keep your drawing clean and seamless, practice connecting multiple shapes with continuous lines by turning corners without lifting the stylus off the screen.
Step 7: Get creative with shading
Creating intricate designs and images on an Etch a Sketch requires understanding how to create shading using parallel lines or crosshatching techniques. Practice these methods to add depth and dimension to your drawings.
Step 8: Erase and start again
Mistakes are inevitable while learning a new skill, but luckily the Etch a Sketch makes it easy to erase your drawings by simply shaking the device. Use this feature often to learn from your mistakes and improve through practice.
Step 9: Challenge yourself with advanced techniques
Once you’re comfortable with basic shapes, curves, and shading, explore additional advanced techniques to elevate your Etch a Sketch art. Learn from other artists by studying their work or watching instructional videos for inspiration.
Conclusion:
Mastering the Etch a Sketch is all about practice, perseverance, and creativity. By following these 9 steps, you can unlock your inner artist and impress others with your newfound skills. Remember, the Etch a Sketch provides endless possibilities for artistic expression, so keep exploring and having fun with this unique toy!


