How to make lotion
“`html
Have you ever looked at the labels of store-bought lotions and wondered what all those ingredients really are? If so, you’re not alone. Many people are turning to DIY projects, and making your own lotion is not just a fun endeavor but also a rewarding one. In this article, you’ll learn how to make lotion in seven straightforward steps. You’ll discover the benefits of making your own, the essential ingredients you’ll need, and tips for customizing your lotion to suit your skin’s specific needs.
1. Understanding the Benefits of Homemade Lotion
Making your own lotion can be incredibly beneficial for several reasons. First, it allows you to control the ingredients, ensuring that you are using natural, skin-friendly components without harmful additives. Many commercial lotions contain synthetic chemicals, preservatives, and fragrances that can irritate sensitive skin or lead to allergies.
Moreover, you can customize your lotion to target specific skin concerns, whether it’s dryness, sensitivity, or aging. Using high-quality oils, butters, and essential oils lets you create a product that is tailored to your unique needs. Plus, making lotion at home can be more economical in the long run while also being a fun activity that can involve family and friends.
Additionally, there’s an undeniable satisfaction that comes from creating something from scratch. You’ll feel a sense of accomplishment seeing the fruits of your labor, and this can foster a greater connection to your self-care rituals. Homemade lotion can also make thoughtful gifts for friends and family, showcasing your creativity and care.
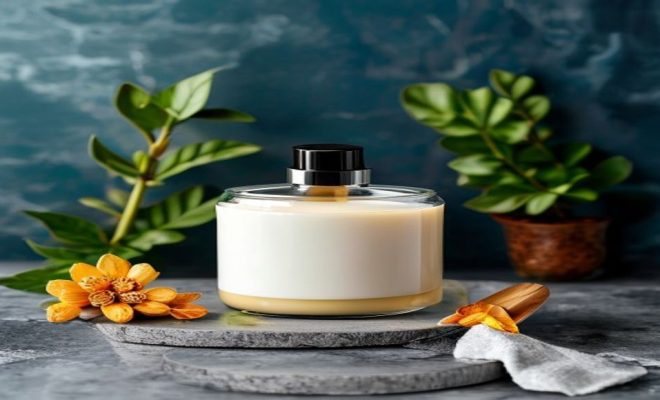
2. Gathering Your Ingredients
Before diving into the world of DIY lotion, you’ll need to gather some essential ingredients. At its core, most lotions contain three main components: water, oil, and emulsifier. Here’s a breakdown of what you will need:
- Water: The base of your lotion. Distilled water is preferred for its purity.
- Carrier Oils: These oils, such as almond oil, jojoba oil, or coconut oil, provide hydration and nourishment to the skin.
- Butters: Ingredients like shea butter or cocoa butter add thickness and additional moisturizing properties.
- Emulsifiers: Beeswax or emulsifying wax helps blend water and oils to create a smooth lotion.
- Essential Oils: For fragrance and therapeutic benefits. Lavender, tea tree, and eucalyptus are popular choices.
- Preservatives: If you plan to store your lotion for an extended period, consider adding a natural preservative.
Having everything ready will streamline the process, making it more enjoyable. For those who want to take it a step further, consider researching organic and ethically sourced ingredients that align with your values.
3. Necessary Equipment for Lotion-Making
Once you’ve got your ingredients sorted, the next step is to gather your equipment. Here’s what you’ll need:
- Double Boiler: This is essential for melting oils and butters without overheating.
- Measuring Cups and Spoons: Accuracy is key when it comes to creating the right consistency.
- Whisk or Stick Blender: Either will help combine the water and oil mixtures into a smooth emulsion.
- Containers: Choose glass or BPA-free plastic containers for storing your lotion.
- Thermometer: Useful for ensuring your oils and water are at the right temperature before mixing.
- Spatula: A spatula will help you scrape the sides of your containers, ensuring you don’t waste any lotion.
Having the right tools will not only make the process easier but also ensure that your final product is top-notch. If you’re serious about lotion-making, consider investing in high-quality tools that will last for many batches. (See: Benefits of homemade skincare products.)
4. Step-by-Step: How to Make Lotion
Now that you have all your ingredients and equipment, it’s time to dive into the actual process of making lotion. Follow these steps:
- Melt Your Oils and Butters: In a double boiler, combine your chosen carrier oils and butters, heating them gently until fully melted. Keep an eye on the temperature; you don’t want to overheat.
- Heat the Water: In a separate container, heat your distilled water to a similar temperature as your oils (around 70°C or 160°F).
- Combine the Mixtures: Once both mixtures are at the right temperature, slowly add the water to the oils while whisking continuously to create an emulsion.
- Cool and Whisk: Allow the mixture to cool slightly. As it thickens, whisk or use a stick blender to achieve a creamy consistency.
- Add Essential Oils and Preservatives: Once the lotion has cooled to around 45°C (113°F), add your chosen essential oils and any preservatives.
- Transfer to Containers: Pour the lotion into your prepared containers while it’s still warm and fluid.
- Let It Set: Allow your lotion to cool completely before sealing the containers. This helps improve consistency.
Congratulations! You’ve just learned how to make lotion from scratch. As you gain experience, you can start to experiment with different techniques, such as whipping your lotion for a lighter texture or adding natural colorants for a unique look.
5. Customization: Tailoring Your Lotion for Skin Type
One of the biggest advantages of making your own lotion is the ability to tailor it to your skin type. For dry skin, consider adding more butters like shea or cocoa, which provide intense moisture. If you have oily skin, lighter carrier oils like grapeseed or jojoba work well. For sensitive skin, opt for fragrance-free options and soothing essential oils like chamomile or calendula.
Additionally, think about adding botanical extracts or vitamins to enhance your lotion’s benefits. Vitamin E is a fantastic antioxidant, and extracts from green tea or aloe vera can offer further skin-soothing properties. Don’t hesitate to experiment until you find the perfect combination for your skin’s unique needs.
To take customization a step further, consider creating seasonal lotions. In winter, you might want a richer, thicker formula to combat dryness, while in summer, a lighter, cooling lotion with peppermint essential oil can refresh your skin after sun exposure. You can even explore the use of natural colorants like beet powder or turmeric to give your lotions a unique appearance.
6. Storage and Shelf Life of Homemade Lotion
Knowing how to make lotion is just the beginning. Proper storage is crucial to maintaining your lotion’s integrity. Homemade lotion typically lasts around 3-6 months, depending on the ingredients used and whether preservatives were added. To extend the shelf life, store your lotion in a cool, dark place, away from direct sunlight. Glass containers are often preferable as they don’t leach chemicals like some plastics can.
If you notice any changes in smell, color, or texture, it’s best to discard the lotion. Make smaller batches initially to avoid waste and find the right balance for your usage. If you’re particularly concerned about shelf life, consider using ingredients like vitamin E oil, which acts as a natural preservative.
7. Common Mistakes to Avoid When Making Lotion
Even with a clear guide, mistakes can happen when learning how to make lotion. Here are some common pitfalls to watch out for:
- Incorrect Measurements: Precision is vital when mixing ingredients. Always measure carefully to ensure the right consistency.
- Ignoring Temperatures: Mismatched temperatures can inhibit the emulsification process. Ensure both your oil and water are at similar temperatures before combining.
- Not Whisking Enough: Proper mixing is crucial for creating a stable lotion. Take the time to whisk or blend thoroughly.
- Using Expired Ingredients: Always check expiration dates on oils and butters to avoid spoilage and maintain effectiveness.
- Skipping Preservation: If you’re storing lotion for any length of time, consider adding a natural preservative to prevent bacterial growth.
Learning to avoid these mistakes will enhance your lotion-making journey, giving you better results and more confidence in creating your own skincare products. If you find that your lotions often separate, try adjusting your emulsifier or temperature techniques.
8. Exploring Advanced Techniques
Once you’ve mastered the basics of how to make lotion, you might want to explore advanced techniques. Consider trying a cold process method, which uses raw ingredients and avoids heat to preserve the natural properties of oils and butters. You might also experiment with infusing oils with herbs or flowers to add extra benefits and unique scents. (See: Health effects of skin irritants.)
Creating lotion bars is another exciting avenue. These solid moisturizers are easy to make and are perfect for on-the-go hydration. To make a lotion bar, simply follow the same recipe but pour the mixture into molds instead of containers to solidify. This also allows you to control the shape and size of your product.
You can also experiment with creating a lotion with added SPF for sun protection. Using natural ingredients like zinc oxide can help shield your skin from UV rays. However, ensure you research proper usage and concentrations to maintain effectiveness and safety.
9. Frequently Asked Questions (FAQ)
Q1: Can I use essential oils in my lotion if I have sensitive skin?
A1: While some essential oils can be beneficial for sensitive skin, others may cause irritation. It’s best to do a patch test before incorporating any new essential oils into your lotion. Opt for gentler oils like chamomile or lavender that are known for their soothing properties.
Q2: What are some good natural preservatives for homemade lotion?
A2: Natural preservatives include Vitamin E, rosemary extract, and grapefruit seed extract. Each of these can help extend the shelf life of your lotion while maintaining its integrity.
Q3: How can I thicken my lotion if it turns out too runny?
A3: If your lotion is too runny, you can reheat and add more emulsifying wax or butters to achieve your desired consistency. Whisk thoroughly to ensure a smooth emulsion.
Q4: How do I know if my lotion has gone bad?
A4: Signs of spoilage include an off smell, discoloration, or a change in texture. If you notice any of these signs, it’s best to discard the lotion to avoid skin irritation or infections.
Q5: Can I make lotion without emulsifiers?
A5: While it is technically possible to make a lotion without emulsifiers, the result will likely be a mixture of oil and water that separates easily. Emulsifiers are crucial for achieving a stable and creamy consistency. (See: Research on natural ingredients in cosmetics.)
10. Tips for Success in Lotion Making
Once you’ve gotten the hang of the basics, here are some additional tips to enhance your lotion-making experience:
- Document Your Recipes: Keep a notebook handy to jot down your recipes, ingredient ratios, and any adjustments you make. This will help you replicate successful batches and learn from any missteps.
- Research Ingredients: Spend some time understanding the properties of different oils, butters, and essential oils. For example, some oils can clog pores while others can help with acne. Tailoring your ingredient choices can lead to a more effective product.
- Join a Community: Engaging with other DIY enthusiasts can provide you with valuable tips and inspiration. Online forums or social media groups dedicated to skincare formulation are great places to share experiences and learn from others.
- Test Small Batches: When experimenting with new ingredients or ratios, start with small amounts. This minimizes waste and allows you to test your formulation before committing to larger quantities.
- Be Patient: Perfecting your lotion may take some trial and error. Don’t get discouraged if your first few attempts don’t turn out as expected; it’s all part of the learning process.
11. Exploring Ingredients: The Science Behind Lotion Components
To truly understand how to make lotion, it helps to know the role each ingredient plays. Here’s a closer look at some key components:
- Water: Acts as a hydrating agent while providing a medium for other ingredients to blend. It’s the most common solvent used in lotions.
- Carrier Oils: These oils transport the nutrients and benefits of the ingredients into the skin. For example, jojoba oil closely resembles human sebum and is easily absorbed, making it ideal for many skin types.
- Butters: These are rich in fatty acids and offer intense hydration. They can help to lock moisture in and protect the skin barrier.
- Emulsifiers: They stabilize the mixture of oil and water, ensuring a smooth and even texture. Without emulsifiers, the oil and water would separate.
- Essential Oils: Beyond scent, they bring therapeutic properties. For instance, tea tree oil is known for its antibacterial effects, while lavender oil can promote relaxation.
Understanding these components can help you make informed decisions about which ingredients to include based on your skin’s needs.
12. Eco-Friendly Practices and Sustainability in Lotion Making
As awareness of environmental issues grows, more people are looking to adopt eco-friendly practices in their daily lives, including skincare. When learning how to make lotion, consider the following sustainable practices:
- Choose Quality Ingredients: Opt for organic and sustainably sourced oils and butters. This not only benefits your skin but also supports environmentally friendly production practices.
- Use Recyclable Packaging: Instead of plastic, consider using glass containers or biodegradable options for storing your lotion. This reduces waste and is better for the planet.
- Minimize Water Usage: Use only the amount of water necessary for your formulation. This helps to conserve this precious resource.
- Experiment with Bulk Ingredients: Buying in bulk can reduce packaging waste and often saves money. Look for local suppliers who offer bulk options.
By implementing these practices, you can create a lotion that not only nourishes your skin but also aligns with your values toward sustainability.
13. Conclusion: Enjoy the Benefits of Your Homemade Lotion
Now that you know how to make lotion, you can enjoy the numerous benefits of creating your own skincare products. Not only will you save money and avoid harsh chemicals, but you’ll also have the satisfaction of knowing exactly what goes into your lotion. So get creative, customize your formulas, and enjoy the nourishing properties of your homemade skincare. Whether you share your creations with friends and family or keep them all to yourself, the journey of making your own lotion is rewarding in countless ways. As you continue this exciting venture, remember to document your recipes and experiences, so you can refine your technique and share your successes with others.
“`
Trending Now
Frequently Asked Questions
What are the benefits of making your own lotion?
Making your own lotion allows you to control the ingredients, ensuring they are natural and free from harmful additives. It also enables customization for specific skin concerns, can be more economical, and offers a satisfying DIY experience.
What ingredients do I need to make lotion?
To make lotion, you'll need three main components: water (preferably distilled), carrier oils for moisturizing, and an emulsifier to blend the oil and water. Additional ingredients like essential oils can be added for fragrance and skin benefits.
Is homemade lotion better for your skin?
Yes, homemade lotion can be better for your skin as it typically contains natural ingredients without synthetic chemicals or preservatives, reducing the risk of irritation and allergies. You can also tailor it to your unique skin needs.
Can you customize homemade lotion for specific skin types?
Absolutely! One of the key benefits of homemade lotion is the ability to customize it. You can choose oils and additives that target specific concerns like dryness, sensitivity, or aging, making it suitable for your skin type.
How can I make lotion at home?
To make lotion at home, gather your ingredients including water, carrier oils, and an emulsifier. Follow a simple step-by-step process to blend these components, allowing you to create a personalized lotion that meets your skincare needs.
What’s your take on this? Share your thoughts in the comments below — we read every one.