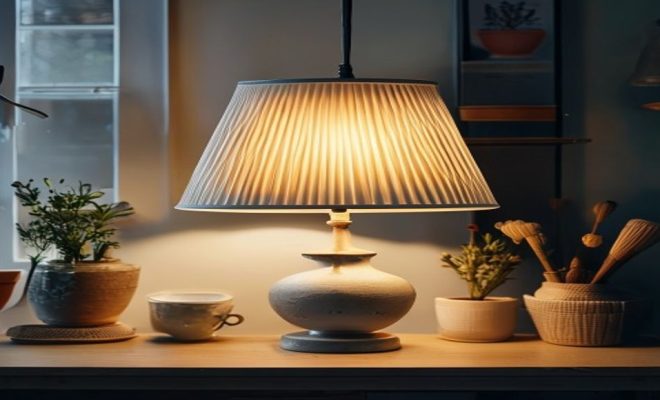
How to make lampshade
“`html
If you’ve ever walked into a room and felt that something was missing, it might just be the lighting. A lampshade can dramatically alter the atmosphere of a space, adding warmth, style, and personality. If you’re looking to elevate your decor without breaking the bank, learning how to make a lampshade is a satisfying and creative project. In this comprehensive guide, we’ll explore the essentials of lampshade making, from materials to techniques, and even tips for personalizing your creation.
1. Understand the Basics of Lampshade Design
Before diving into the actual process of how to make a lampshade, it’s vital to understand the different types of lampshades available. You’ll encounter styles such as drum, bell, empire, and more, each with its unique features and aesthetics. The choice of design will affect not only the look but also the light diffusion in your space.
For instance, drum shades offer a modern look and provide even light distribution, making them ideal for contemporary decor. Bell-shaped shades tend to create a more traditional feel, often suitable for classic or vintage interiors. Knowing these basics can help you choose a design that complements your decor style.
Additionally, there’s the option of choosing a shade with an open top versus a closed top. Open-top shades allow light to escape upward, creating a more ambient glow, while closed-top shades focus the light downward, making them ideal for task lighting. Consider the purpose of your lamp when selecting your design.
2. Gather Your Materials
Now that you’re familiar with the designs, it’s time to gather your materials. The foundation of your lampshade will typically be a frame, which can be purchased or repurposed from an old lamp. Beyond the frame, you will need fabric (cotton, linen, silk, or even paper), a shade adhesive, scissors, and potentially a glue gun for added support.
Consider the color and texture of the fabric you select. Light-colored fabrics will allow more light to shine through, brightening up your space, while darker fabrics can create a cozy, intimate atmosphere. If you’re feeling creative, don’t hesitate to mix textures or patterns for a unique touch!
In addition to fabric and glue, you may also want to consider embellishments like beads, sequins, or stencils for a more distinct look. These small details can completely transform the final product, allowing you to express your personal style even further.
Don’t forget about lighting fixtures as well. The type of bulb you choose can significantly impact how your lampshade looks when lit. LED bulbs typically produce less heat, making them safer and more energy-efficient for fabric shades.
3. Measure and Cut Your Fabric
With your materials at the ready, it’s time to measure and cut your fabric. Start by measuring the height and circumference of your lampshade frame. A common method is to take the circumference measurement and determine how wide your fabric needs to be. For extra allowance, cut the fabric about an inch wider and longer than your initial measurements. This will provide some leeway for mistakes and make it easier to attach the fabric securely.
Once you have your measurements, lay your fabric flat and use chalk or a fabric marker to mark the cutting lines. Sharp fabric scissors will make your job easier and ensure clean edges. After cutting, it’s advisable to iron the fabric to remove any wrinkles, providing a smoother surface for the next steps.
Keep in mind that certain fabrics might fray or have a stretch. If you’re using a fabric that tends to fray, such as linen or burlap, consider using pinking shears to prevent fraying. This will also give your lampshade a more finished appearance.
For those who might be a bit nervous about measuring, consider creating a template out of paper or cardboard first. This can help you visualize the shape of your lampshade and make it easier to transfer measurements to your fabric. (See: Lampshade design and types.)
4. Secure the Fabric to the Frame
Now comes the fun part—attaching the fabric to the lampshade frame. Start by laying your fabric over the frame and securing one edge with adhesive. Fabric glue is a great choice for this step, as it provides a strong bond and dries clear. Once the first edge is secured, gradually wrap the fabric around the frame, pulling it taut to avoid any sagging or wrinkles.
If you’re using a more structured shade, consider using a hot glue gun for added support. Just be cautious; hot glue can be difficult to remove if you make a mistake. Work your way around the frame, ensuring the fabric covers it completely before moving on to the bottom edge.
Make sure to check your fabric placement periodically as you go. Sometimes, the fabric can shift, leading to uneven coverage. Adjust as necessary while you work to ensure a seamless finish.
For added security, some makers like to use a combination of fabric glue and sewing. If you’re comfortable with a sewing machine, sewing the fabric onto the frame can provide a durable solution, especially for taller shades.
5. Finishing the Edges
After securing the fabric to the frame, it’s time to finish the edges. This step is crucial for achieving a polished look. Fold the excess fabric inward and glue it down, making sure to cover any raw edges. If you’re using a fabric that frays easily, you may want to consider sewing a straight stitch along the edges before gluing them down for extra durability.
For a more decorative touch, you can add trim or ribbon along the edges. This not only helps to hide imperfections but also adds a stylish element to your lampshade. Choose a trim that complements your fabric choice—contrast can be striking, while matching colors can provide a more cohesive look.
Consider also adding a lining to the inside of the lampshade. This can help diffuse the light more evenly and adds an extra layer of professionalism to your finished product. Use a lighter fabric for the lining to help reflect more light.
Another idea is to use fabric stiffener on your fabric before attaching it to the frame. This can help maintain the shape of your lampshade and give it a more structured appearance.
6. Let It Dry
Once you’ve attached your fabric and finished the edges, it’s time to let everything dry. This phase is crucial, as it ensures that the adhesive sets properly. Depending on the glue you used, this might take anywhere from a few hours to overnight. While waiting, you can clean up your workspace, prepare your lamp base, or even start planning your next lampshade project!
Make sure to handle the shade carefully during this time. Avoid putting any pressure on the fabric, as it may still be vulnerable until the adhesive fully cures. Once dry, your lampshade will be ready for the final touches!
While your lampshade is drying, take this opportunity to think about where you’ll place it. The right location can enhance the effect of your new lampshade. Think about areas that need a little lift or where you want to create a specific ambiance.
If you’re feeling ambitious, consider making multiple lampshades to coordinate with different rooms or styles in your home. This can create a unified look across your decor.
7. Install Your New Lampshade
Now that your lampshade is complete and thoroughly dried, it’s time to bring it into your space. Carefully attach the lampshade to your lamp base. Depending on the design, this could involve simple fittings or more complex attachments. Ensure that it sits securely and doesn’t wobble.
Once installed, turn on your lamp and take a moment to appreciate your work! The transformation it brings to your space can be striking. You can even experiment with bulbs of different wattages to see how they affect the ambiance. With your new lampshade, you can create various moods, whether it’s a cozy night in or an energized morning. (See: Understanding home lighting safety.)
Don’t forget to think about how your new lampshade interacts with other elements in the room. The reflection it creates and how it fits with your furniture can really make a difference in your overall decor.
Finally, consider the height of your lampshade in relation to your seating or furniture. An appropriately sized shade can help create a balanced look that complements your existing decor.
Additional Tips and Considerations
While you now know how to make a lampshade, there are always additional pointers to enhance your project. First, consider the type of light bulb you’re using. Some fabrics may not withstand high heat if paired with the wrong bulb, leading to potential hazards. Always check that your lampshade is safe for the bulb type you choose.
Additionally, don’t shy away from experimenting with unconventional materials. Think outside the box—can you use recycled paper, repurposed fabric, or even natural elements like dried leaves? These can add an artistic flair to your lampshade. Personalizing your project is what makes it truly yours!
Also, keep in mind your environment. If your lampshade will be in a high-traffic area, it may need to be more durable. Consider using a stronger adhesive and sturdier materials to ensure longevity.
For those with limited time, consider simpler designs that use fewer materials or simpler cutting techniques. A straightforward design can still look great, especially when you choose a striking fabric.
Current Trends in Lampshade Design
As you embark on your lampshade-making journey, it’s worth noting the current trends in the world of lighting. Sustainability is becoming a cornerstone in design, with many people opting for eco-friendly materials and techniques. Vintage and upcycled designs are also gaining traction, adding character to modern spaces.
Color blocking, geometric patterns, and even minimalist designs are popular choices for those looking to make a statement. Explore various styles and see what resonates with you—your lampshade should reflect your personality and taste, making it an extension of your home decor.
Textured materials are now popular too—think of fabrics like burlap, velvet, or patterned cotton. These can help create a more inviting atmosphere in your living room or bedroom. You may also find that mixing and matching different styles can lead to an eclectic look that makes your space feel unique.
Another emerging trend is the use of smart lighting. Some lampshades now incorporate tech features like dimmers and color-changing bulbs, allowing you to customize the ambiance even further. As you create your lampshade, consider how you might integrate these technologies into your design.
FAQs about How to Make a Lampshade
1. What types of fabric work best for lampshades?
Lightweight fabrics like cotton or linen are excellent choices for lampshades as they allow light to filter through while providing a soft look. If you’re looking for something more substantial or textured, consider burlap or velvet. Just be cautious with darker shades, as they can reduce light output.
2. Can I use a pre-made lampshade frame?
Absolutely! Pre-made frames can save you time and ensure that you’re starting with a solid structure. You can find them at craft stores or online, and they come in various shapes and sizes to fit your design vision. (See: Lighting design and home decor.)
3. How can I personalize my lampshade?
Personalization can come from the fabric choice, embellishments, or even the shape of the lampshade itself. Consider adding lace, beads, or painted designs to the fabric to make it truly yours. Don’t hesitate to use stencils or fabric markers for added creativity!
4. Is it safe to use a fabric lampshade with a high-wattage bulb?
It’s crucial to use the right wattage for your lampshade. High-wattage bulbs can generate too much heat, potentially leading to a fire hazard. Always check the manufacturer’s recommendations for the maximum wattage your lampshade can handle.
5. How do I clean my lampshade?
Cleaning depends on the material used. For fabric lampshades, a gentle vacuum or a lint brush can help remove dust. For stains, a damp cloth and mild fabric cleaner should suffice. Always test a small area first to ensure that the fabric doesn’t get damaged.
6. What if I want to change the design later?
One of the great things about making your own lampshade is that you can always update or change it! If you decide to refresh its look, you can simply re-cover the shade with new fabric or even paint over it if the material allows.
7. Can I use paint on my lampshade?
Yes, fabric paint is a great option for adding designs or colors to your lampshade. Just ensure that the paint is safe for use on fabric and won’t interfere with the light quality. Painting can also give your lampshade a unique look without needing to change the fabric entirely.
8. How do I know if my lampshade is safe?
Always double-check that the materials used are heat-resistant and appropriate for use with lighting. Avoid materials that might catch fire easily, and pay attention to the bulb wattage recommendations. If unsure, consult with a lighting specialist.
9. Can I make a lampshade for outdoor use?
Yes, but you’ll want to choose weather-resistant materials and ensure that your electrical connections are suitable for outdoor use. Waterproof fabric options can help make your lampshade durable in different weather conditions.
10. What’s the cost of making a lampshade?
The cost can vary based on materials and whether you use a pre-made frame. Generally, you can expect to spend anywhere from $20 to $100, depending on fabric quality and additional embellishments you choose.
Making a lampshade is not just a fun DIY project, but it’s also a fantastic way to put your personal stamp on your living space. With the right materials, some creativity, and a little patience, anyone can learn how to make a lampshade that not only illuminates but also inspires.
“`
Trending Now
Frequently Asked Questions
What materials do I need to make a lampshade?
To make a lampshade, you'll need a lampshade frame, fabric (such as cotton, linen, or silk), shade adhesive, scissors, and possibly a glue gun. Choosing the right fabric color and texture is essential for achieving the desired look and light diffusion.
How do I choose the right lampshade design?
When selecting a lampshade design, consider styles like drum, bell, or empire. Each has unique aesthetics and light diffusion properties. Drum shades offer a modern look with even light distribution, while bell shades provide a traditional feel. Your choice should complement your decor and the lamp’s purpose.
Can I repurpose an old lampshade frame?
Yes, repurposing an old lampshade frame is a great way to save money and add a personal touch to your project. Ensure the frame is in good condition, and then you can cover it with new fabric to create a fresh look that suits your decor.
What types of fabric are best for lampshades?
The best fabrics for lampshades include cotton, linen, silk, and even paper. Light-colored fabrics are preferable as they allow more light to diffuse, creating a warm atmosphere. The choice of fabric will also influence the overall aesthetic and feel of the lampshade.
How does the shape of a lampshade affect lighting?
The shape of a lampshade significantly influences how light is diffused in a room. Drum shades provide even light distribution, making them ideal for contemporary spaces, while bell-shaped shades focus light downward, perfect for task lighting. Choose a shape based on the desired ambiance and functionality.
What’s your take on this? Share your thoughts in the comments below — we read every one.