How to make bath bombs
“`html
Bath bombs have become a beloved staple in the world of self-care, offering a simple way to transform a regular bath into a luxurious experience. If you’ve ever wondered how to make bath bombs that not only fizz but also nurture your skin and elevate your mood, you’re in the right place. This guide will delve into the origins of bath bombs, essential ingredients, and practical steps to create your own delightful concoctions at home.
1. The Origins of Bath Bombs
Bath bombs were invented in the 1980s by Mo Constantine, co-founder of the popular cosmetics company Lush. The idea was inspired by the fizzing reaction of baking soda and citric acid, which can be traced back even further to old-school bath fizzy recipes. These colorful spheres are not just about aesthetics; they are designed to enhance the bathing experience by adding fragrances, skin-nourishing oils, and even therapeutic properties.
The concept of soaking in a bath dates back to ancient civilizations, where bathing was seen as a ritual of relaxation and healing. Bath bombs take this tradition a step further, merging the pleasures of aromatherapy with the physical benefits of warm water. As the bath bomb dissolves, it releases essential oils and other ingredients that can help soothe sore muscles and promote relaxation.
2. Essential Ingredients for Your Bath Bombs
To successfully learn how to make bath bombs, it’s crucial to understand the ingredients involved. Here’s what you need:
- Baking Soda: This is the primary ingredient and acts as a base, giving your bath bomb its fizz.
- Citric Acid: When combined with baking soda, citric acid creates the effervescent reaction that bath bombs are known for.
- Epsom Salt: Not only does it enhance the fizz, but it also provides therapeutic benefits, helping to relax muscles.
- Essential Oils: These oils add fragrance and can have calming or invigorating properties depending on your choice.
- Food Coloring: For those who want their bath bombs to be visually appealing, food coloring can be added in this stage.
- Water: Just a small amount is needed to help bind the ingredients together.
Understanding the role of each ingredient is vital. For instance, using too much liquid can cause your bath bomb mixture to fizz before you even get it into the tub! The balance of these ingredients is what ultimately leads to a successful bath bomb.
3. Equipment You’ll Need
Making bath bombs at home can be as simple or elaborate as you choose. The following equipment will help streamline the process:
- Mixing Bowls: A large bowl for mixing dry ingredients and a smaller bowl for wet ingredients works best.
- Whisk or Spoon: For combining the ingredients thoroughly.
- Bath Bomb Molds: Silicone molds or plastic molds in various shapes are perfect for creating your desired bath bomb look.
- Measuring Cups and Spoons: Accurate measurements ensure the right chemical reaction occurs.
- Gloves and Apron: These protect your hands and clothes from color and oils.
Having the right equipment not only makes the process easier but also allows for creative expression. You can experiment with different molds to create unique shapes suitable for gifts or personal use.
4. Step-by-Step Process to Make Bath Bombs
Here’s a straightforward method for how to make bath bombs:
- Mix Dry Ingredients: In a large bowl, combine 1 cup of baking soda, 1/2 cup of citric acid, and 1/2 cup of Epsom salt. Use a whisk to blend them well, ensuring there are no clumps.
- Combine Wet Ingredients: In a separate bowl, mix 2-3 teaspoons of essential oils and a few drops of food coloring with a small amount of water. Use just enough to dampen the mixture without causing it to fizz.
- Add Wet to Dry: Slowly add the wet ingredients to the dry mixture while stirring continuously. The mixture should hold together when squeezed. If it starts to fizz, you’ve added too much liquid.
- Pack the Mixture into Molds: Firmly pack the mixture into your molds. Overfilling can cause them to puff up and lose shape.
- Let Them Dry: Leave the molds in a cool, dry place for 24 hours. Afterward, gently remove your bath bombs and let them air dry for an additional 24 hours.
- Store Properly: Store your bath bombs in an airtight container until you’re ready to use them.
This simple process allows for plenty of room for creativity. You can adjust the scents and colors to match your mood or the season. (See: Wikipedia article on bath bombs.)
5. Creative Variations on Bath Bombs
Once you’ve mastered the basics of how to make bath bombs, you can explore various creative twists. Here are some ideas:
- Herbal Infusions: Add dried flowers like lavender or chamomile to your mixture for a calming effect.
- Color Swirls: Use a dropper to add different colors at different stages of packing to create a marbled effect.
- Moisturizing Oils: Incorporate skin-loving oils such as coconut or olive oil to give extra hydration.
- Themed Bombs: Create bath bombs with holiday themes using seasonal scents and colors.
With these variations, you can personalize your bath bombs not just for yourself but also for gift-giving. Handmade gifts are always cherished, especially when infused with thoughtfulness and care.
6. Aromatherapy Benefits
The use of essential oils in bath bombs goes beyond delightful fragrances; they also offer various aromatherapy benefits. Different oils can evoke different responses:
- Lavender: Known for its calming effects, lavender oil can help reduce anxiety and promote sleep.
- Eucalyptus: This oil can help clear the mind and improve respiratory function.
- Ylang Ylang: Often used to reduce stress, ylang ylang can also help improve mood.
- Peppermint: Energizing and refreshing, peppermint oil can help alleviate headaches and boost mental clarity.
When you create bath bombs tailored to your mood or specific needs, it turns your bathing routine into a holistic self-care ritual. It’s fascinating how a simple bath can become a refuge for the mind and body.
7. Common Mistakes to Avoid
Even the most seasoned DIYer can run into trouble when learning how to make bath bombs. Here are some common pitfalls to watch out for:
- Too Much Liquid: Adding too much water can start a fizzing reaction before the bomb is even in the bath.
- Incorrect Ratios: Ensure you’re following the recipe closely. Adjusting the proportions of baking soda to citric acid can affect the fizzing quality.
- Not Using Molds Properly: Failing to pack your molds tightly might result in crumbly bath bombs that won’t hold shape.
- Short Drying Time: Rushing the drying process may lead to a weak structure that crumbles easily.
By being aware of these potential issues, you can improve your bath bomb-making skills and ensure a successful outcome every time.
8. Storing and Using Your Bath Bombs
Proper storage is essential for maintaining the integrity of your bath bombs. Here are some tips:
- Keep Them Dry: Store in a cool, dry place away from moisture to prevent premature fizzing.
- Airtight Containers: Use airtight containers or wrapping to preserve potency and fragrance.
- Avoid Direct Sunlight: Exposure to sunlight can fade colors and diminish the effects of essential oils.
When it’s time to indulge, simply drop one into a warm bath and watch it fizz and dissolve, releasing delightful scents and skin-loving ingredients. Enjoy the experience as a time to unwind and recharge.
9. The Growing Popularity of Bath Bombs
As self-care continues to gain importance in our busy lives, the demand for bath bombs has surged. This trend is fueled by social media platforms showcasing DIY tutorials and luxurious bath routines. According to a report by Grand View Research, the global bath bomb market is expected to grow significantly in the coming years, reflecting a growing interest in self-care products. (See: CDC on the health benefits of bathing.)
Moreover, the versatility of bath bombs makes them appealing to a broad audience. From children to adults, everyone can enjoy the sensory delight they provide. Whether you’re looking to create a spa-like experience at home or treat someone special, bath bombs offer an accessible way to indulge.
Ultimately, learning how to make bath bombs opens up a world of creativity and relaxation. It’s an art form that combines science, creativity, and the joy of self-care. So why not give it a try? Your next bath could be your most delightful experience yet!
10. DIY Bath Bomb Recipes
If you want to start making bath bombs right away, here are a couple of simple recipes to get you started. Each recipe uses slightly different ingredients to create unique experiences.
Recipe 1: Lavender Relaxation Bath Bombs
- Ingredients: 1 cup baking soda, 1/2 cup citric acid, 1/2 cup Epsom salt, 2-3 teaspoons lavender essential oil, 1-2 teaspoons dried lavender buds, purple food coloring (optional), water as needed.
- Instructions:
- Mix the dry ingredients in a bowl.
- Add essential oil and lavender buds. If using food coloring, add it here.
- Slowly add water until the mixture holds together when squeezed.
- Pack into molds and let dry.
Recipe 2: Citrus Energizing Bath Bombs
- Ingredients: 1 cup baking soda, 1/2 cup citric acid, 1/2 cup Epsom salt, 2-3 teaspoons citrus essential oil (like lemon or orange), yellow food coloring (optional), water as needed.
- Instructions:
- Mix the dry ingredients together thoroughly.
- Add essential oil and food coloring, mixing well.
- Add water gradually until the mixture holds shape.
- Pack into molds and allow to dry.
11. Benefits of Making Your Own Bath Bombs
There are numerous benefits to crafting your own bath bombs rather than purchasing them. Here are a few:
- Customizable: You can control the ingredients, ensuring they are all natural, organic, or hypoallergenic, depending on your preferences.
- Cost-Effective: After the initial investment in ingredients and molds, making bath bombs can be significantly cheaper than buying them regularly.
- Creative Outlet: Experimenting with different colors, scents, and ingredients can be a fun and relaxing creative process.
- Presents with a Personal Touch: Handmade bath bombs make thoughtful gifts for friends and family, allowing you to share your creativity and care.
12. Frequently Asked Questions
As you embark on your bath bomb-making journey, you might have some questions. Here are answers to some common queries:
Q: What can I use instead of Epsom salt?
A: If you don’t have Epsom salt, you can use sea salt or Himalayan salt as a substitute. Just keep in mind that they may not have the same muscle-relaxing properties as Epsom salt.
Q: Can I use fragrance oils instead of essential oils?
A: Yes, you can use fragrance oils. However, ensure they are skin-safe and suitable for bath products. Essential oils are often preferred for their therapeutic benefits.
Q: How long do bath bombs last?
A: When stored properly in a cool, dry place, bath bombs can last for several months. The fresher they are, the better the fizzing reaction will be when used. (See: NIH study on aromatherapy and relaxation.)
Q: Why did my bath bombs crumble?
A: Crumbling can occur for a few reasons: too much moisture was added, they didn’t dry long enough, or they weren’t packed tightly enough in the molds.
Q: Can I add glitter to my bath bombs?
A: Yes, biodegradable glitter is a great option for adding sparkle. Just be aware that some glitters can clog your drain, so choose wisely!
13. Features of a Great Bath Bomb
When you’re learning how to make bath bombs, it’s helpful to know what characteristics define a great bath bomb. Here are some features to look for:
- Effervescence: The hallmark of a great bath bomb is its ability to fizz and dissolve quickly in water, releasing its fragrance and beneficial ingredients.
- Skin Benefits: A quality bath bomb nourishes the skin, offering hydration, soothing properties, and relief from tension.
- Lasting Aromas: The scent that lingers during and after your bath can significantly enhance your experience, so choose essential oils that you love.
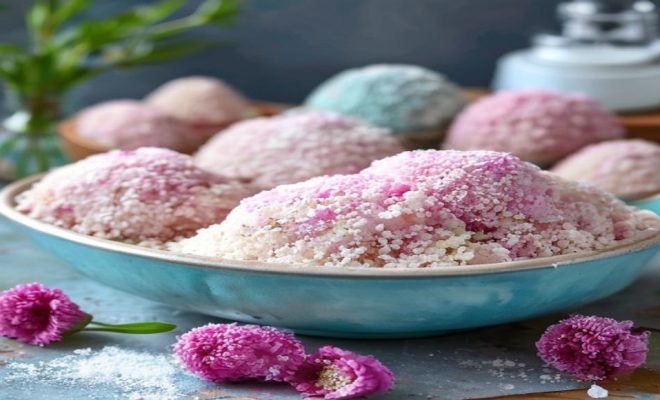
- Visual Appeal: The vibrant colors and fun shapes are essential for making bath time feel special and luxurious.
14. Combining Bath Bombs with Other Self-Care Rituals
Bath bombs can be an exciting addition to your overall self-care routine. Here are some ideas for combining bath bombs with other wellness activities:
- Mindfulness and Meditation: Use your bath time as an opportunity to practice mindfulness or meditation. Focus on your breath, the sensation of the water, and the scents around you.
- Reading or Journaling: Bring a book or journal into your bathing routine. The calming environment can enhance creativity and reflection.
- Skin Rituals: Combine your bath with a face mask or hair treatment for a full pampering experience. The warm water opens pores, allowing skincare products to penetrate deeper.
15. Eco-Friendly Bath Bombs
As environmental awareness grows, many people are looking for ways to make their bath bombs more eco-friendly. Here are some tips:
- Natural Colors: Instead of synthetic food coloring, try using natural colorants like beetroot powder, turmeric, or spirulina.
- Organic Ingredients: Opt for organic and sustainably sourced ingredients whenever possible to reduce your environmental impact.
- Biodegradable Packaging: If you’re gifting bath bombs, consider using biodegradable wrapping or containers to minimize waste.
16. Conclusion: Elevate Your Bathing Experience
Making your own bath bombs is not just a fun DIY project; it’s a way to enhance your self-care routine. With each bath bomb, you’re adding a touch of luxury and relaxation to your life. Whether you choose to make them for yourself or as gifts, bath bombs can elevate your bathing experience and bring a sense of joy and creativity to your routine. So gather your ingredients, get your molds ready, and dive into the world of bath bomb making today!
“`
Trending Now
Frequently Asked Questions
What ingredients do I need to make bath bombs?
To make bath bombs, you'll need baking soda, citric acid, Epsom salt, essential oils for fragrance, and food coloring for aesthetics. These ingredients combine to create the fizzing reaction and therapeutic benefits that bath bombs are known for.
How do bath bombs work?
Bath bombs work through a chemical reaction between baking soda and citric acid. When the bomb dissolves in water, it creates fizzing bubbles that release essential oils and other beneficial ingredients, enhancing your bathing experience with aromas and skin-nourishing properties.
Can I customize my bath bomb recipes?
Yes, you can customize your bath bomb recipes by varying the essential oils, colors, and additional ingredients like dried flowers or herbs. This allows you to create unique scents and benefits tailored to your preferences.
Are bath bombs good for your skin?
Bath bombs can be beneficial for your skin, especially if they contain nourishing oils and Epsom salt. These ingredients help to hydrate the skin, soothe sore muscles, and provide a relaxing experience, depending on the essential oils used.
Where did bath bombs originate?
Bath bombs were invented in the 1980s by Mo Constantine, co-founder of Lush. They were inspired by the fizzing reaction of baking soda and citric acid and aim to enhance the bathing experience with added fragrances and therapeutic properties.
What did we miss? Let us know in the comments and join the conversation.