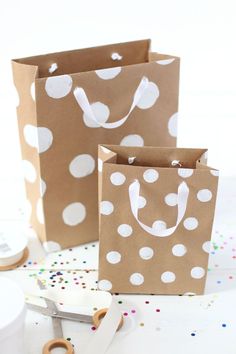
How to Make a Gift Bag
Gift bags are a versatile and attractive way to present gifts, whether it’s for birthdays, holidays or any special occasion. Making your own gift bag is not only an eco-friendly option but also adds a personal touch to your present. Follow these simple steps on how to make a gift bag using materials you have at home.
Materials needed:
– Paper (colored, wrapping paper, or recycled paper)
– Scissors
– Adhesive (glue or double-sided tape)
– Hole puncher
– Ribbon or string
Step 1: Choose the right size and type of paper
Select a sheet of paper large enough to cover the gift. If using colored or wrapping paper, consider the occasion and recipient. For an eco-friendly choice, use old newspapers or magazines. Ensure the paper is sturdy enough to hold the gift without tearing.
Step 2: Measure and cut the paper
Place the gift in the center of the paper and measure its size—there should be enough space around it for folding. Mark and cut the paper accordingly.
Step 3: Fold and create seams
Once you have measured and cut the paper, fold it in half width-wise so that both ends (top and bottom) line up with each other. This will create a seam down the center of your sheet.
Next, fold about an inch of one side towards the inside, creating another seam—this will be where you’ll glue or tape together both ends of the bag.
Step 4: Glue or tape together
Apply glue or double-sided tape on one seam (the one-inch panel you just created). Carefully line up both halves of the bag against each other, making sure that everything aligns properly before pressing down firmly so that the glue adheres.
Step 5: Create the bottom fold
Now it’s time to create a base for your gift bag. With the glued side facing you, fold the bottom part of the paper towards the inside, creating approximately a 2-inch flap. Then, open up this flap and fold its corners inwards, forming a diamond shape.
Step 6: Close the base
Fold in both upper and lower triangles of the diamond shape towards each other, making sure they overlap a little. Glue or tape them together to secure the base of your gift bag.
Step 7: Reinforce and expand
Gently open up your newly created gift bag and use your fingers to reinforce the corners for added sturdiness. Additionally, press down on the base to expand it fully.
Step 8: Punch holes and attach ribbon or string
Using a hole puncher, create holes in the top center edges of your gift bag—these will be used for attaching handles. Thread a ribbon or string through each hole, knotting it on the inside to ensure it stays in place.
Your handmade gift bag is now ready to hold that special present and make someone’s day even more memorable. With these easy steps, you can create a unique and personalized touch for any occasion!