How to Make a Game on Roblox

Introduction:
Roblox is a unique platform where players not only enjoy a variety of games but also create and share their own. Thanks to its user-friendly interface, even beginners can dive into the world of game development. In this article, we will walk you through the process of making a game on Roblox, step by step.
Step 1: Sign Up for Roblox
Before creating your game, you need to have a Roblox account. Signing up is simple – visit the Roblox website and provide a username, password, email address, and your date of birth. After completing the registration process, log in to your account.
Step 2: Install Roblox Studio
Roblox Studio is essential for creating your game. Download it from the ‘Develop’ tab on the Roblox website and follow the installation instructions.
Step 3: Familiarize Yourself with the Interface
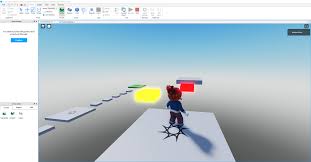
Once you open Roblox Studio, familiarize yourself with its interface. Some essential components include:
– Explorer: Displays every object in your game in tree format.
– Properties: Allows you to edit an object’s attributes.
– Toolbox: Provides premade objects to use in your game.
– Advanced Objects: Enables advanced users to search for specific objects.
– Main Screen: The central workspace for editing your game.
Step 4: Choose a Game Template
Roblox Studio offers several templates as starting points for your project. To choose one, click on ‘File’ > ‘New Project,’ which will open a window with various templates like racing, obby (obstacle course), and role-playing.
Select an appropriate template based on your desired game genre and wait for it to load.
Step 5: Customize Your Game World
To make your game unique, customize its appearance using the various tools available in Roblox Studio. You can add, delete, or modify the objects found in the template.
– Move Tool: Move objects around your world.
– Scale Tool: Resize objects to your desired dimensions.
– Rotate Tool: Rotate objects around their axes.
– Select Tool: Select multiple items at once.
Step 6: Add New Models and Objects
Use the Toolbox to find and add new models, objects and characters to your game world. You can also create customizations by modifying existing objects found in the Studio’s library.
Step 7: Apply Scripting
Scripting is essential for adding interactivity and functionality to your game. Roblox uses its scripting language called Lua. To add a script:
1.Click on ‘Workspace’ in the Explorer.
2.Right-click and choose ‘Insert Object.’
3.Select ‘Script.’
Once the script opens, delete the default “print(‘Hello, world!’)” text and enter your own Lua code.
If you are unfamiliar with Lua scripting, there are countless tutorials available online tailored specifically for Roblox game creation.
Step 8: Test Your Game
Test your game by clicking ‘Play’ (located under the ‘Home’ tab) to ensure everything works as intended. It’s essential to debug any issues before publishing.
Step 9: Publish Your Game
Once you’re satisfied with your game:
1.Click ‘File’ on the toolbar
2.Select ‘Publish to Roblox…’
3.Provide a title, description, an optional image, and then click ‘Finish.’
Your game will now be live on the Roblox platform for players worldwide.
Conclusion:
Creating a game on Roblox is not only fun but also a great way to learn game development fundamentals firsthand. This step-by-step guide provides you with enough knowledge to get started, so put on your developer hat and bring your ideas to


