How to Make a Car Seat Cover: 15 Steps
A car seat cover is an excellent way to protect your car seats from daily wear and tear, as well as giving your car interior a fresh and customized look. Making your own car seat cover allows you to choose the fabric and style that suits you best. In this article, we’ll take you through the 15 steps needed to create your very own car seat cover.
1.Measure the dimensions of your car seat: Take accurate measurements of your car seat’s height, width, depth and any other relevant measurements of your specific car model.
2.Choose the fabric: Opt for a durable and washable fabric that suits your taste and complements your car’s interior.
3.Source the necessary sewing supplies: You will need a sewing machine, thread, scissors, pins, and measuring tape.
4.Create a pattern: Using your measurements from Step 1, draw out the basic shape of your car seat cover onto a large sheet of paper or cardboard.
5.Cut out the pattern pieces: Cut out each individual piece from the pattern you have created in Step 4.
6.Pin the pattern pieces to the fabric: Lay out your chosen fabric on a flat surface and place the pattern pieces on top. Secure them in place with pins.
7.Cut out the fabric pieces: Following the edge of the pattern pieces, cut out each piece from the fabric using sharp scissors.
8.Add seam allowance: When cutting out fabric pieces, make sure to leave an extra margin (approximately 1/2 inch) for seam allowance.
9.Sew together large pieces: For multi-part sections (e.g., backrest and seat cushion), join each piece together by pinning right sides facing together and sewing along the edges with a straight stitch, leaving an opening for turning later on.
10.Add elastic or ties: To ensure a snug fit around your car seat, include elastic or fabric ties on the edges. Sew these onto the appropriate section(s) of your cover piece(s).
11.Attach Velcro strips or buttons: To further secure your car seat cover, attach Velcro strips or buttons where necessary. This can be done by sewing them onto the fabric pieces before joining them together.
12.Turn the cover right side out: After sewing all sections and fastenings, turn your car seat cover right-side-out through the opening left in Step 9.
13.Iron and finish seams: Smooth out any wrinkles by ironing the fabric on low heat (following the manufacturer’s instructions). Finish seams by sewing them shut using a ladder stitch.
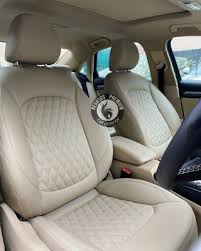
14.Attach the completed cover to your car seat: Place your new car seat cover over the seat, ensuring it fits snugly and securely. Utilize elastic edges or fabric ties to fasten it firmly in place.
15.Admire your handiwork: With your custom car seat cover now installed, step back and appreciate the personal touch you’ve added to your vehicle’s interior!
With these 15 steps, you’ll be well on your way to creating a stylish and functional car seat cover that not only protects but adds a unique custom flair to your vehicle’s interior. Happy sewing!