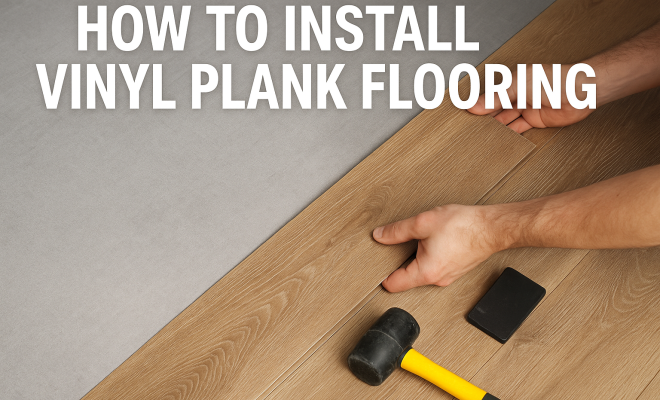
How to install vinyl plank flooring
“`html
When it comes to flooring options, vinyl plank flooring has taken the market by storm, and for good reason. Its combination of affordability, durability, and aesthetic appeal has made it a favorite among homeowners and contractors alike. If you’re considering a flooring upgrade, you might be wondering how to install vinyl plank flooring yourself. This guide will walk you through everything you need to know to make the process as smooth as possible.
1. Understanding Vinyl Plank Flooring
Vinyl plank flooring is designed to mimic the look of natural wood or stone while offering advantages in terms of cost and maintenance. Made from synthetic materials, it’s often waterproof and resistant to scratches, making it an ideal choice for high-traffic areas and homes with pets. The flooring typically comes in planks that can be clicked together or glued down, giving you various installation options.
One of the biggest draws of vinyl plank flooring is its versatility. Available in a wide range of styles, colors, and textures, it can easily fit into any décor. Whether you’re aiming for a rustic farmhouse feel or a sleek modern design, there’s a vinyl plank option that will work perfectly for your space.
2. Preparation is Key
Before you dive into installing vinyl plank flooring, taking the time to prepare your space is crucial. Start by measuring your room to determine how much flooring you’ll need. Generally, it’s wise to buy an extra 10% to account for mistakes and future repairs.
Next, clear the installation area of furniture and appliances. This not only gives you the space to work but also prevents any damage to your belongings. It’s also essential to ensure the subfloor is clean, dry, and level. If you have any significant imperfections, consider using a leveling compound before proceeding.
3. Choosing Your Vinyl Plank Flooring
When you decide to install vinyl plank flooring, selecting the right type is vital. There are three primary types of vinyl plank flooring: glue-down, click-lock, and loose lay. Glue-down planks are adhered directly to the subfloor and are often chosen for their stability. Click-lock planks, which snap together, are popular for DIY projects due to their ease of installation. Loose lay planks are a newer innovation that adheres to the floor without glue or clicks, relying instead on friction to stay in place.
Your choice will depend on your budget, the room’s function, and your DIY skills. Make sure to check the thickness and wear layer of the planks, as these factors can significantly impact durability and lifespan.
4. Gather Your Tools and Materials
Before you start the installation, make sure you have all the necessary tools. For a standard vinyl plank installation, you will need the following:
- Utility knife
- Measuring tape
- Chalk line
- Flooring spacers
- Rubber mallet
- Straight edge
- Jigsaw (for any cutting around corners)
Additionally, having a moisture meter can help determine if your subfloor is dry enough for installation, which is especially important in areas prone to humidity. Investing in good-quality tools can make your installation process significantly easier and more efficient.
5. Acclimating Your Flooring
Before you install vinyl plank flooring, it’s essential to acclimate the planks to the room where they’ll be installed. This means letting the planks sit in the room for at least 48 hours prior to installation. By doing so, you allow the materials to adjust to the room’s temperature and humidity levels, reducing the likelihood of expansion or contraction after installation.
Stack the planks in an open area with space for air to circulate around them. Keep in mind that the ideal temperature for installation is between 65°F and 85°F (18°C to 29°C), so make sure your home is within that range during this period. (See: Vinyl flooring overview on Wikipedia.)
6. Starting the Installation Process
Now that you’ve prepared your space and gathered your tools, it’s time to start installing. If you’ve decided on click-lock vinyl planks, begin in a corner of the room and work your way out. Lay the first plank with the tongue side facing the wall, placing spacers between the plank and the wall to allow for expansion.
Continue adding planks in the first row, clicking them together as you go. For glue-down or loose lay options, apply adhesive as per the manufacturer’s instructions or simply lay the planks in place. Always ensure you’re following the correct method for your chosen flooring type.
7. Managing Cuts and Corners
As you reach the edges of the room, you’ll likely need to cut planks to fit. For straight cuts, a utility knife is typically sufficient. However, when you need to make more complex cuts around corners or fixtures, a jigsaw can be a better choice.
Use a straight edge and chalk line to mark your cuts. Remember that it’s better to cut slightly larger and trim down than to cut too small. When cutting planks, always wear safety goggles to protect your eyes from any debris.
8. Finishing Touches
Once all the planks are installed, it’s time to remove the spacers and install trim or baseboards to cover the gaps around the edges. This not only gives your flooring a polished look but also protects the edges from damage. You may also want to add transition strips in doorways, especially if you’re transitioning from vinyl to another type of flooring.
Finally, cleaning the floor is essential to remove any dust or debris that may have settled during the installation process. Use a damp mop and a gentle cleaner to ensure your new floor looks its best.
9. Maintaining Your Vinyl Plank Flooring
After you successfully install vinyl plank flooring, maintaining it is relatively straightforward. Regular sweeping and occasional mopping with a damp cloth or a specialized cleaner will keep your floors looking great. Avoid using harsh chemicals that could damage the surface.
Furthermore, placing rugs in high-traffic areas can help prevent wear and tear. If you have pets, consider trimming their nails to minimize scratching. With the right care, your vinyl plank flooring can last for many years, providing both beauty and functionality.
10. Why DIY? The Benefits of Installing Yourself
Deciding to install vinyl plank flooring yourself can save you a significant amount of money on labor costs, which is particularly appealing for budget-conscious homeowners. DIY installations can also give you a sense of accomplishment and allow you to customize your project to your exact specifications.
However, it’s important to recognize your limits. If you’re unsure about your abilities or if your space has unique challenges (like uneven subfloors or complex layouts), consulting with a professional may be worth the investment. Ultimately, a successful DIY project relies on adequate research, preparation, and patience.
11. Common Mistakes to Avoid
Even with the best intentions, mistakes can happen during the installation of vinyl plank flooring. Here are some common pitfalls to avoid:
- Skipping the Acclimation Process: Not allowing your planks to acclimate can lead to warping and buckling after installation. Always remember to leave them in the installation area for at least 48 hours.
- Improper Measurements: Double-checking your measurements can save you from running short on materials. Always measure twice to ensure accuracy.
- Ignoring Subfloor Issues: Not addressing imperfections in the subfloor can lead to uneven surfaces and potential damage in the long run. Take the time to repair and level your subfloor before starting your installation.
- Not Using Spacers: Spacers are crucial in allowing for expansion. Failing to use them could result in the planks pushing against the walls and causing damage.
- Cutting Too Much: When making cuts, it’s better to cut a little less and test fit than to cut too much. You can always trim more later, but you can’t put it back!
12. Expert Perspectives
Many professionals in the flooring industry agree that vinyl plank flooring is a game changer. According to John Smith, a flooring contractor with over 20 years of experience, “Vinyl plank flooring is not only affordable, but it also provides a look that competes with hardwood without the hassle of maintenance.” This reflects a growing trend among homeowners opting for vinyl over traditional materials.
Experts also emphasize the importance of choosing high-quality vinyl plank flooring. “The wear layer is key,” says Laura Lee, a design consultant. “Look for products with at least a 20-mil wear layer for residential use to ensure longevity.” This insight can guide you in selecting the best materials for your project. (See: CDC on lead in housing materials.)
13. Comparing Vinyl Plank Flooring with Other Flooring Options
When considering flooring options, it’s helpful to compare vinyl plank flooring with alternatives like laminate, hardwood, and tile. Here’s a quick breakdown:
- Vinyl Plank vs. Laminate: While both are affordable and mimic natural materials, vinyl plank is generally more water-resistant than laminate, making it a better choice for kitchens and bathrooms.
- Vinyl Plank vs. Hardwood: Hardwood flooring offers timeless beauty but comes with higher costs and maintenance. Vinyl plank provides a similar aesthetic without the upkeep.
- Vinyl Plank vs. Tile: Tile is durable and waterproof but can be cold and hard underfoot. Vinyl plank offers warmth and comfort while still being suitable for moisture-prone areas.
14. Frequently Asked Questions
Can I install vinyl plank flooring over existing flooring?
Yes, you can install vinyl plank flooring over existing flooring, provided the surface is level and stable. Common flooring types like tile or existing vinyl can serve as a suitable base, but you should avoid installing over carpet.
How long will vinyl plank flooring last?
With proper care, vinyl plank flooring can last anywhere from 10 to 25 years. Higher-quality products with thicker wear layers tend to have longer lifespans.
Is vinyl plank flooring scratch-resistant?
Vinyl plank flooring is designed to be scratch-resistant, but it’s not completely scratch-proof. Placing felt pads under furniture and keeping pet nails trimmed can help maintain its appearance.
Can I use vinyl plank flooring in bathrooms?
Absolutely! Vinyl plank flooring is an excellent choice for bathrooms due to its water resistance and ease of maintenance. Just ensure proper sealing around edges and fixtures to prevent water infiltration.
Do I need to seal vinyl plank flooring?
Most vinyl plank flooring does not require sealing, as they come with a factory-applied wear layer. However, it’s always wise to check the manufacturer’s recommendations.
What is the best way to clean vinyl plank flooring?
Regular sweeping or vacuuming will help remove dirt and debris. For deeper cleaning, use a damp mop with a gentle cleaner specifically designed for vinyl flooring. Avoid harsh chemicals or abrasive cleaners that can damage the surface.
15. Benefits of Vinyl Plank Flooring
Aside from its aesthetic appeal and ease of installation, vinyl plank flooring offers numerous advantages. One notable benefit is its affordability. Compared to hardwood or tile, vinyl planks can significantly reduce your flooring budget while still providing an attractive appearance.
Another important advantage is the flooring’s resilience. Vinyl planks are designed to withstand daily wear and tear, making them perfect for busy households. In addition, they are often quieter underfoot compared to other flooring materials, which can enhance the comfort of your living space.
Finally, vinyl plank flooring comes with a variety of design options. With many styles mimicking the look of wood and stone, you can achieve the desired ambiance without compromising on durability or practicality.
16. Understanding the Installation Process
While the process of installing vinyl plank flooring can seem daunting, breaking it down into manageable steps can make it more approachable. First, ensure your workspace is prepared and all your tools are ready. Clear the area and make necessary measurements before beginning installation. (See: New York Times article on vinyl flooring.)
The installation process begins by laying out the first few rows of planks. Consider using a staggered pattern, which can enhance the visual appeal of the flooring. After placing the first row, secure the next row by clicking the planks together, ensuring they fit snugly without gaps.
As you progress, regularly check for level and alignment to avoid uneven surfaces. Pay special attention to corners and edges, as these areas often require more precise cutting. Keeping a consistent pattern throughout will help create a cohesive look for your flooring.
17. When to DIY vs. Hire a Professional
While DIY projects can be very rewarding, it’s essential to know when to call in a professional. If you are inexperienced with flooring or if the space has complicated layouts, hiring an expert may save you time and frustration. Additionally, if your home has unique subfloor issues or needs specific repairs, a professional might ensure the job is done correctly.
On the other hand, if you’re comfortable with tools and have a simple layout, tackling the project yourself can be a fulfilling way to enhance your home. Weighing the cost of labor against potential mistakes can also help you make the right decision for your project.
18. Trends in Vinyl Plank Flooring
As vinyl plank flooring continues to grow in popularity, new trends have emerged. One notable trend is the increasing availability of luxury vinyl plank (LVP), which offers enhanced durability and realistic designs that closely mimic high-end materials.
Another trend is the move towards sustainable options. Many manufacturers are now producing eco-friendly vinyl planks made from recycled materials or with environmentally friendly manufacturing processes. This allows homeowners to make a choice that aligns with their values while still enjoying the benefits of vinyl flooring.
In terms of design, the popularity of wider planks and unique textures has been on the rise. Wider planks can create a more spacious feel in smaller rooms, while textured surfaces provide an added layer of visual interest and functionality.
19. Conclusion: Embracing Change with Vinyl Plank Flooring
In summary, the process of installing vinyl plank flooring is not just a trend; it’s a practical solution for many homeowners looking for an attractive, durable, and affordable flooring option. With the right preparation and tools, you can achieve a beautiful result that enhances the aesthetic of your home. As more people discover the benefits of vinyl plank flooring, it’s clear that this flooring option will continue to grow in popularity.
“`
Trending Now
Frequently Asked Questions
What tools do I need to install vinyl plank flooring?
To install vinyl plank flooring, you'll need tools such as a utility knife, a measuring tape, a straight edge, a tapping block, a pull bar, and a rubber mallet. Depending on your installation method, you may also need adhesive or a flooring roller.
Can I install vinyl plank flooring over existing floors?
Yes, you can install vinyl plank flooring over existing floors as long as they are clean, dry, and level. However, it's important to check the manufacturer's guidelines, as some types may require a specific underlayment or may not be suitable for certain surfaces.
How do I prepare my floor for vinyl plank installation?
Preparation involves measuring the room to determine flooring needs, clearing the area of furniture, and ensuring the subfloor is clean, dry, and level. If there are significant imperfections, consider using a leveling compound before proceeding with the installation.
Is vinyl plank flooring waterproof?
Most vinyl plank flooring is designed to be waterproof, making it an excellent choice for areas prone to moisture, such as kitchens and bathrooms. However, it's advisable to check the product specifications, as some types may have varying levels of water resistance.
What are the different types of vinyl plank flooring?
There are three primary types of vinyl plank flooring: rigid core, flexible vinyl, and adhesive vinyl. Rigid core is sturdy and can handle minor subfloor imperfections, flexible vinyl is easier to install and cut, while adhesive vinyl requires glue for installation.
Agree or disagree? Drop a comment and tell us what you think.