How to install extensions in VS Code
“`html
If you’re diving into the world of software development, you’ve probably heard about Visual Studio Code (VS Code). This powerful open-source code editor has quickly gained popularity among developers for its versatility and rich feature set. One of the standout features that makes VS Code so appealing is its robust extension marketplace. But how do you install extensions in VS Code? Whether you’re a newbie or an experienced coder, this guide will walk you through everything you need to know about enhancing your VS Code experience with extensions.
1. Understanding VS Code Extensions
Before we explore the process of installing extensions in VS Code, it’s essential to understand what these extensions are and why they are so beneficial. Extensions are essentially small software packages that add new features or functionality to VS Code. They can range from simple themes that change the appearance of your editor to complex tools that help with debugging, linting, and even connecting to remote servers.
The Extensions Marketplace in VS Code boasts thousands of options, allowing you to tailor the editor to your specific needs. For instance, if you’re a web developer, you might want to install extensions that help with HTML, CSS, and JavaScript. Conversely, if you work in Python, you can find extensions that enhance your coding experience with Python-specific tools.
2. Exploring the Extensions Marketplace
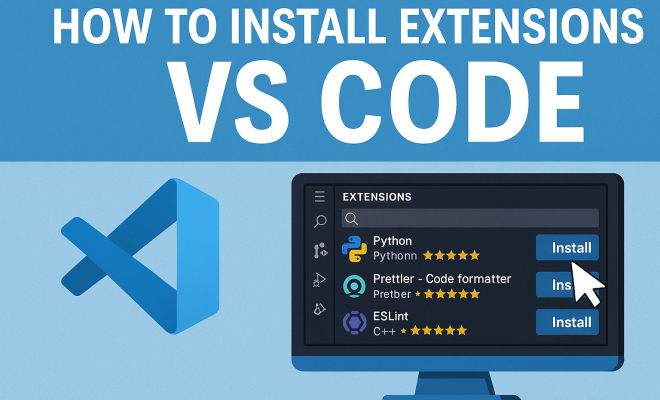
The first step in installing extensions in VS Code is exploring the Extensions Marketplace. You can access it directly from the editor. Simply click on the Extensions icon in the Activity Bar on the side of the window or use the shortcut Ctrl+Shift+X (or Cmd+Shift+X on macOS). This will open the Extensions view, where you can browse popular extensions, recommended tools, and even search for specific extensions using the search bar.
The marketplace categorizes extensions, making it easier for you to find what you need. Some popular categories include debugging, themes, formatting, and language support. If you’re uncertain which extensions to try first, consider checking out the top-rated and most installed options, as these often provide significant benefits to your workflow.
3. Installing Extensions Directly from VS Code
Once you’ve found an extension you want to install, the process is quick and straightforward. Click on the extension in the marketplace, and you’ll see an Install button. Hit this button, and VS Code will take care of the rest, downloading and installing the extension automatically.
After installation, it’s typically a good idea to reload the editor for the changes to take full effect. You can either close and reopen VS Code or click the Reload button that appears after installation. Once reloaded, you can start using the extension immediately, often without needing additional configuration.
4. Using the Command Palette to Install Extensions
An alternative method to install extensions in VS Code is through the Command Palette. This feature is handy for those who prefer using keyboard shortcuts. Open the Command Palette by pressing Ctrl+Shift+P (or Cmd+Shift+P on macOS) and type Extensions: Install Extensions. This command will bring up the Extensions view, similar to the previous method.
From here, you can search for and install extensions just as you would from the Extensions view. This method is particularly useful if you know the name of the extension you want to install but don’t want to navigate through the menus to find it.
5. Installing Extensions Manually
Sometimes, you might encounter a situation where you need to install an extension manually, such as when you’re working in a restricted environment or need a specific version. Fortunately, VS Code allows for manual installation. To do this, you first need to download the extension’s .vsix file from the Visual Studio Marketplace or a trusted source.
Once you have the .vsix file, you can install it by opening the Command Palette again and typing Extensions: Install from VSIX…. Select the downloaded file, and VS Code will handle the installation. This method grants you the flexibility to manage extensions that aren’t available directly through the marketplace. (See: Visual Studio Code on Wikipedia.)
6. Managing Installed Extensions
Once you’ve started installing extensions, you’ll likely want to manage them effectively. In the Extensions view, you can see all the extensions you’ve installed, along with their status. Extensions can be enabled, disabled, or uninstalled from this menu.
To disable an extension, simply click on the gear icon next to the extension and select Disable. This can be useful if an extension is causing issues or if you want to streamline your workspace temporarily. If you find that an extension isn’t useful anymore, you can uninstall it from the same menu. Removing unnecessary extensions can help improve the performance of VS Code.
7. Configuring Extensions for Optimal Use
Many extensions come with their own settings that you can configure to suit your workflow. Accessing these settings can often be done through the gear icon next to the extension in the Extensions view. Some extensions will also provide commands to access their settings directly.
For example, a popular extension like Prettier, which formats your code, comes with various configuration options. You can tweak settings such as tab sizes, end-of-line characters, and more. By customizing these settings, you ensure that the extension works harmoniously with your coding style and preferences. There’s a fuller look at top tech colleges.
8. Commonly Recommended Extensions for Developers
Now that you know how to install extensions in VS Code, let’s discuss some of the most commonly recommended extensions that can enhance your coding experience. Here’s a quick list of some must-have extensions:
- Live Server: Instantly launch a local development server with live reload capability for static and dynamic pages.
- Prettier: An opinionated code formatter that supports multiple languages and integrates seamlessly with various workflows.
- ESLint: A powerful linting tool for JavaScript and TypeScript, helping you maintain code quality.
- GitLens: This extension supercharges the built-in Git capabilities of VS Code, giving you detailed blame information and repository insights.
- Python: Essential for Python developers, this extension provides rich support for the Python language, including IntelliSense and debugging.
These extensions can significantly enhance your productivity and coding experience. Depending on your specific needs, consider exploring additional extensions tailored to your preferred programming languages or frameworks.
9. Staying Updated with Extensions
The tech world moves fast, and keeping your tools updated is crucial. Extensions in VS Code often receive updates that introduce new features or fix bugs. You can check for updates in the Extensions view, where you’ll see an Update button next to any extensions that need it.
It’s also a good idea to keep an eye on the marketplace for new extensions. Developers continuously release innovative tools that can further enhance your experience in VS Code. By being proactive in updating and discovering extensions, you can maintain a robust and efficient development environment.
10. Advanced Configuration Options
For power users, VS Code allows for advanced configurations that can further enhance your workflow. You can access these configurations through the settings file, which is usually located in the `.vscode` directory in your workspace. This file allows you to set workspace-specific settings that can differ from your user settings, providing a customized environment for each project.
For instance, if you’re working on a project that requires specific linting rules or formatting options, you can define those rules directly in the `.vscode/settings.json` file. This way, anyone who clones your repository will automatically have those configurations applied, ensuring consistency across the development team.
11. Integration with Other Tools
Many extensions for VS Code are designed to integrate seamlessly with other tools and services. For example, the Docker extension allows you to manage Docker containers directly from the editor, while the Remote – SSH extension lets you develop on remote machines. This level of integration can simplify your workflow and save time when switching between tools.
Another noteworthy integration is with version control systems like Git. Extensions such as GitLens not only enhance the built-in Git capabilities of VS Code but also provide insights like commit history, file change tracking, and even code authorship, which can be invaluable for team projects. (See: Research on Visual Studio Code.)
12. Installing Extensions in a Team Environment
When working in a team, it’s vital to ensure that everyone is on the same page regarding which extensions are being used. One effective way to facilitate this is by maintaining an `extensions.json` file in your project. This file can specify which extensions are recommended for the project, helping team members install the same tools you use.
To create an `extensions.json` file, navigate to the `.vscode` directory in your project and add a file named `extensions.json`. You can specify recommended extensions like so:
{
    "recommendations": [
        "dbaeumer.vscode-eslint",
        "esbenp.prettier-vscode",
        "ms-python.python"
    ]
}
When your colleagues open the project in VS Code, they’ll receive prompts to install the recommended extensions, ensuring a consistent development experience across the team.
13. Common Issues and Troubleshooting
Occasionally, you may run into issues while installing or using extensions in VS Code. Here are some common problems and their solutions:
- Extension Fails to Install: If an extension fails to install, check your internet connection. Sometimes, VS Code can also encounter temporary issues with the marketplace. Try restarting VS Code or your machine.
- Extension Not Working as Expected: If an extension is installed but not functioning correctly, ensure that it’s enabled in the Extensions view. Additionally, check for any updates that may be available.
- Performance Issues: Having too many extensions can slow down VS Code. If you’re experiencing lag, consider disabling or uninstalling extensions that you don’t use frequently.
If you continue to encounter problems, visiting the extension’s documentation or GitHub page can provide further insights or solutions.
14. FAQ: Frequently Asked Questions about Installing Extensions in VS Code
What are extensions in VS Code?
Extensions are add-ons that enhance the functionality of Visual Studio Code. They can provide additional features, tools, and support for various programming languages and frameworks.
How do I know which extensions to install?
Consider your specific needs based on the programming languages and tools you use most often. Check the Extensions Marketplace for top-rated extensions or ask colleagues for recommendations.
Can I install extensions offline?
Yes, you can manually install extensions by downloading the .vsix file and using the command Extensions: Install from VSIX… in the Command Palette.
Are all extensions free?
While many extensions are free, some may offer premium features or require a subscription. Always check the extension’s details in the marketplace for pricing information.
How can I uninstall an extension?
To uninstall an extension, go to the Extensions view, find the extension you want to remove, click the gear icon next to it, and select Uninstall.
Do extensions affect the performance of VS Code?
Some extensions can impact performance, especially if you have many installed. If you experience slowdowns, consider disabling or uninstalling extensions that you don’t use regularly.
How can I find new extensions that fit my needs?
Check the Marketplace regularly for new and trending extensions. Filter your search by category or use keywords relevant to your workflow. Don’t hesitate to read user reviews and ratings to gauge the effectiveness of an extension.
Can I create my own extensions for VS Code?
Absolutely! If you have specific needs that existing extensions don’t meet, you can create your own. Microsoft provides comprehensive documentation and a guide for building extensions, making it accessible for developers at all skill levels.
What should I do if an extension conflicts with another?
Sometimes extensions can conflict with one another, resulting in errors or unexpected behaviors. If you suspect a conflict, try disabling extensions one by one to pinpoint the issue. Once identified, you can choose to remove one or look for alternative extensions that provide similar functionality without conflict.
15. Best Practices for Extensions Management
Managing your extensions effectively is essential for maintaining a smooth coding experience. Here are some best practices to consider:
- Regularly Review Installed Extensions: Periodically check the extensions you have installed. Remove any that you no longer use to keep your workspace clean and efficient.
- Limit Extension Scope: Only install extensions that are necessary for your current projects. Overloading your editor with extensions can lead to clutter and confusion.
- Monitor Performance: Keep an eye on how your extensions impact VS Code’s performance. If you notice slowdowns, it might be time to reevaluate your installed extensions.
- Keep Updated with the Community: Join forums or communities related to VS Code to stay informed about the latest extensions and best practices. Engaging with other users can provide valuable insights and recommendations.
16. Conclusion: Enhancing Your VS Code Experience
Installing extensions in VS Code is a straightforward process that can greatly enhance your coding workflow and productivity. Whether you’re looking to streamline your development process, improve code quality, or just customize the appearance of your editor, the right extensions can make a significant difference.
By understanding how to search, install, and manage extensions, you’re well on your way to mastering VS Code. So, explore the marketplace, try out different extensions, and tailor your setup to fit your unique development needs. Happy coding!
“`
Trending Now
Frequently Asked Questions
How do I install extensions in Visual Studio Code?
To install extensions in Visual Studio Code, open the Extensions Marketplace by clicking on the Extensions icon in the Activity Bar or using the shortcut Ctrl+Shift+X (Cmd+Shift+X on macOS). From there, browse or search for the desired extension and click 'Install' to add it to your editor.
What are extensions in Visual Studio Code?
Extensions in Visual Studio Code are small software packages that enhance the editor's functionality. They can range from themes that change the appearance to tools that assist with debugging, linting, and language-specific features, allowing you to customize your development environment.
Where can I find extensions for Visual Studio Code?
You can find extensions for Visual Studio Code in the Extensions Marketplace, accessible through the Extensions icon in the Activity Bar or by using the shortcut Ctrl+Shift+X. The marketplace categorizes extensions, making it easy to browse popular and recommended tools.
Can I install multiple extensions in Visual Studio Code?
Yes, you can install multiple extensions in Visual Studio Code. Simply repeat the installation process for each extension you want to add. The editor allows you to customize your development experience by enabling various features and tools tailored to your coding needs.
Are there free extensions available for Visual Studio Code?
Yes, many extensions in the Visual Studio Code Marketplace are free. You can explore a wide range of free extensions that enhance your coding experience, from language support to productivity tools, making it easy to find what you need without any cost.
Agree or disagree? Drop a comment and tell us what you think.