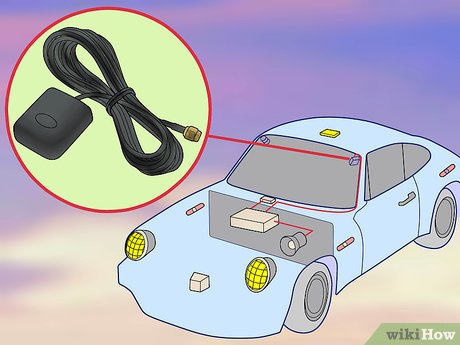
How to Install a Car Alarm: 15 Steps

A car alarm is an essential security feature that helps protect your vehicle from theft and vandalism. Installing a car alarm can be a daunting task, but with the right tools and step-by-step guidance, you can complete this project successfully. Follow these 15 steps to ensure a smooth and successful installation of your car alarm.
1. Gather the necessary tools: Before beginning the installation, make sure you have all the necessary tools, including wire strippers, crimpers, soldering iron, heat shrink tubing, electrical tape, zip ties, and a multimeter.
2. Choose the correct alarm system: Research different car alarm systems to find one that suits your needs and is compatible with your vehicle.
3. Disconnect the vehicle’s battery: To avoid any electrical mishaps or short circuits during installation, disconnect the negative cable from your car’s battery.
4. Find a suitable location for the alarm module: The ideal location should be hidden from plain sight but still easily accessible. Generally, areas under the dash or behind kick panels are good choices.
5. Install and secure the alarm module: Mount the module using screws or zip ties. Consult your alarm system’s installation manual for specific instructions regarding placement.
6. Locate and identify your vehicle’s wiring diagram: You will need this information to properly connect your car alarm system to various vehicle functions (e.g., door locks, ignition, etc.).
7. Start connecting wires: Begin by connecting the 12-volt constant wire from the alarm system to a wire in your vehicle that provides constant power even when the ignition is off.
8. Connect vehicle-specific wires: Attach wires for functions such as door locks and trunk release by referring to your car’s wiring diagram and following the car alarm manufacturer’s instructions.
9. Install sensors and notification components: Mount shock sensors, glass break sensors, or other detection devices that come with your alarm system, as well as audible/visual components like the siren and LED indicator.
10. Connect the siren: Locate a suitable location for the siren, typically in the engine bay, and mount it securely. Route the siren wires back into the cabin and connect them to the appropriate output on your car alarm module.
11. Connect additional sensors or outputs if necessary: Depending on your car alarm system, you may have other inputs or outputs to connect, such as tilt sensors or anti-hijack features.
12. Test your alarms functionality: Before reassembling your vehicle’s interior, reconnect the battery and test all features of your car alarm system to ensure everything is working correctly.
13. Organize and secure wiring: Use zip ties and electrical tape to keep wires tidy and avoid dangling or loose connections that could cause issues later.
14. Reassemble your vehicle’s interior: Carefully reinstall any panels removed during installation.
15. Perform a final test: Test the alarm one more time to ensure everything works properly after reassembling your vehicle’s interior. If all functions work as expected, you have successfully installed your car alarm system!
By following these steps diligently, you can enhance your vehicle’s security with a car alarm system and have peace of mind knowing it is better protected from potential theft or vandalism.


