How to Ink Comics with a Brush: 12 Steps

Introduction:
Inking comics with a brush is a skill that many comic artists prefer to use due to the smooth, flowing lines it produces. Inking is an essential stage in comic creation that adds depth, texture, and contrast to the illustrations. This guide will take you through 12 steps to help you master the art of inking comics with a brush.
Step 1: Choose the Right Brush and Ink
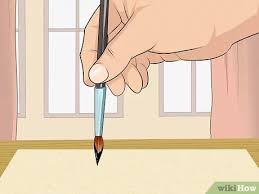
Select a high-quality brush that holds its shape well and can deliver consistent, thin lines. Brush sizes can vary, but a size 0 or 1 should work for most details. As for ink, use an archival, waterproof ink that dries quickly and won’t smudge or bleed.
Step 2: Prepare Your Workspace
Set up your workspace with good lighting and a comfortable chair. Make sure you have enough space to work comfortably and have easy access to all your supplies.
Step 3: Test Your Brush and Ink
Before inking your comic, practice using your brush on scrap paper. Experiment with various line widths, brush pressures, and techniques to get comfortable with your tools.
Step 4: Set Up Your Comic Artwork
Use lightweight tracing paper or a lightbox to transfer your pencil artwork onto a fresh sheet of paper. This will give you a clean surface for inking without erasing the original pencil work.
Step 5: Control Your Hand Pressure
Mastering hand pressure is critical when inking with a brush. A lighter touch creates thinner lines, while pressing harder results in thicker lines. Practice creating consistent line weights before moving on to your actual artwork.
Step 6: Start with Simple Shapes
Begin by practicing on simple shapes like circles, squares, and triangles. Focus on maintaining steady pressure control and smooth strokes as you work.
Step 7: Move on to Details
Once you feel comfortable with basic shapes, practice inking more intricate and complex elements of your illustrations, such as faces, clothing details, and backgrounds.
Step 8: Maintain Good Posture
Proper posture is essential when inking comics to ensure precise and steady lines. Keep your back straight and avoid slouching or leaning too far into your work.
Step 9: Rotate Your Artwork When Needed
To achieve the best angle for your brush strokes, rotate your paper as needed. This allows for smoother lines and prevents your hand from smudging the ink.
Step 10: Use Strokes in the Same Direction
For a cohesive look, try to use brush strokes that follow the same direction as the original pencil lines. This helps maintain the intended flow and shape of your illustrations.
Step 11: Watch Out for Mistakes
Mistakes can happen when inking, but don’t panic! Wait for the ink to dry fully before attempting to correct any errors with a white gel pen or an artist’s editing knife.
Step 12: Clean Your Brush and Care for Your Supplies
Clean your brush thoroughly after each inking session with water and brush cleaner to maintain its quality. Air dry it by hanging it upside down or laying it flat on a clean surface. Properly caring for your supplies will keep them in good condition for future projects.
Conclusion:
Inking comics with a brush is a skill that requires patience and practice. With these 12 steps, you can start honing your abilities and become an accomplished comic inker. Continue practicing and experimenting with different techniques to further develop your personal inking style.


