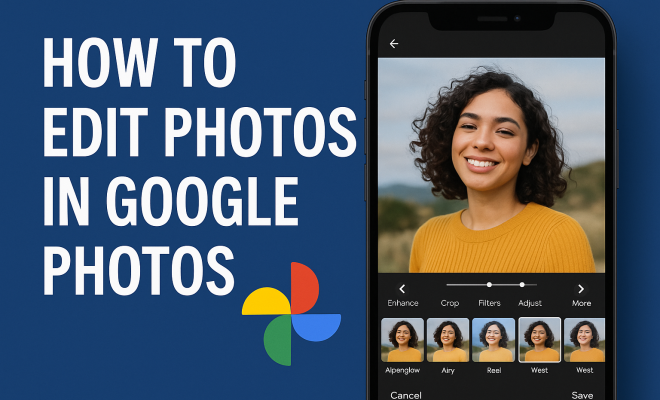
How to edit photos in Google Photos
“`html
Whether you’re a casual photographer or a social media enthusiast, editing photos in Google Photos can elevate your images dramatically. With its user-friendly interface and a variety of editing tools, Google Photos makes it easy to enhance your pictures without needing advanced skills or software. In this article, we’ll explore ten essential tips that will help you master photo editing in Google Photos.
1. Getting Started with Google Photos
If you’re new to Google Photos, the first step is setting up your account. Google Photos is accessible on both mobile devices (iOS and Android) and through a web browser. Simply sign in with your Google account, and you’re ready to upload and manage your photos. You can either upload photos directly from your device or allow the app to back up your images automatically.
Once your photos are uploaded, you can easily access them from any device. Google Photos also provides 15GB of free storage, which can be expanded through a subscription if needed. Make sure to familiarize yourself with the interface, as it will significantly enhance your editing experience.
2. Understanding the Editing Tools
Before you edit photos in Google Photos, it’s essential to know what tools are at your disposal. The editing interface offers several options: Crop, Rotate, Adjust, Filters, and Markup. Each tool serves a specific purpose, allowing you to make detailed adjustments to your images.
- Crop: This tool lets you trim excess parts of your photo, focusing on the subject matter.
- Rotate: Rotate your photos to correct orientation issues easily.
- Adjust: Here, you can adjust brightness, contrast, saturation, and more.
- Filters: Use predefined filters to give your photos a quick makeover.
- Markup: Draw or write on your photos to add a personal touch.
Knowing how to use these tools effectively can transform a simple image into a stunning work of art.
3. Utilizing the Crop and Rotate Tool
The Crop and Rotate tool is one of the most basic yet impactful features in Google Photos. By cropping your images, you can eliminate distracting elements that detract from the main subject. For instance, if you’re taking a portrait, cropping out unnecessary background items can help draw attention to the person in the photo.
Rotating photos is equally crucial. Sometimes, images get uploaded sideways or upside down. Google Photos makes it easy to adjust the orientation with a simple tap. You can also flip images if needed, ensuring the final output meets your aesthetic preferences.
4. Adjusting Light and Color
One of the most powerful ways to enhance your photos is by adjusting the light and color settings. The Adjust tool in Google Photos allows you to tweak brightness, contrast, highlights, shadows, white balance, and saturation. For example, increasing brightness can help illuminate dark areas, while adjusting contrast can make your image pop.
Don’t hesitate to experiment with these settings. A little adjustment can go a long way. If you find that colors look a bit washed out, increasing saturation can restore vibrancy. Similarly, adjusting the white balance can help correct color casts caused by different lighting conditions.
5. Applying Filters for Quick Edits
Sometimes, you want to edit photos in Google Photos quickly without diving into detailed adjustments. That’s where filters come in. Google Photos provides a range of filters that can instantly change the mood of your images. Whether you’re going for a vintage look or a modern aesthetic, there’s likely a filter that fits your vision.
To apply a filter, simply select it from the options available after clicking the Filter icon. You can adjust the intensity of the filter as well, allowing for a customized effect that doesn’t overwhelm your photo. (See: Photo editing overview on Wikipedia.)
6. Using the Markup Tool for Personalization
Want to add a personal touch to your photos? The Markup tool in Google Photos lets you draw or write over your images. This feature is perfect for creating fun social media posts, adding captions, or even doodling for a whimsical effect. You can select different colors and brush sizes, giving you the flexibility to express your creativity.
For instance, if you’re sharing a family photo, you might want to annotate it with names or a funny caption. Using the Markup tool can turn standard photos into engaging content that tells a story.
7. Making Use of the Auto-Enhance Feature
For those who prefer a more automated approach, Google Photos includes an Auto-Enhance feature that analyzes your photo and applies adjustments automatically. This tool is particularly useful for beginners or anyone short on time. It uses machine learning algorithms to improve exposure, color, and contrast in one swift action.
After applying Auto-Enhance, you can still make manual adjustments if you feel certain aspects need further tweaking. This feature is a great starting point, especially if you’re unsure where to begin.
8. Saving and Sharing Your Edited Photos
Once you’ve made your edits, the next step is saving and sharing your photos. Google Photos allows you to save your edited images while keeping the original untouched, ensuring you have both versions available. After editing, simply click on the “Save” button to finalize your changes.
Sharing your photos is just as easy. You can create albums, share directly with friends via Google Photos, or download the images to share through other platforms. Make your edits shine by ensuring they reach family and friends in a format that works best for you.
9. Understanding the Importance of Backup
Editing photos in Google Photos is not just about making them look great; it’s also crucial to back them up. Google Photos has seamless integration with cloud storage, which means your edited images are safe and accessible from any device. Consider setting up automatic backups, so you never lose your treasured memories.
Additionally, if you’re collaborating with other photographers or creatives, sharing albums can be a game-changer. You can invite others to view or contribute to an album, making it easy to share edits and receive feedback.
10. Exploring Advanced Features
For those who want to take their editing skills to the next level, Google Photos has some advanced features worth exploring. For example, its color pop effect emphasizes the subject by keeping it in color while converting the background to black and white. This technique can create striking visual contrasts in your photos.
Additionally, the app frequently updates, introducing new features like automated creations, collages, and animations. Staying updated with these developments can help you utilize Google Photos to its fullest potential, ensuring your images remain fresh and engaging.
11. Common Mistakes to Avoid When Editing Photos
Even with an intuitive platform like Google Photos, it’s easy to make some common editing mistakes. Here are a few to watch out for:
- Over-editing: It’s tempting to use every feature available, but too many adjustments can make photos look unnatural. Aim for subtle enhancements.
- Ignoring Composition: Editing cannot fix a poorly composed photo. Always consider how your subject is framed before editing.
- Neglecting Resolution: Make sure that your edited images maintain a high resolution. Resizing can lead to pixelation.
- Failing to Save Originals: Always keep an untouched version of your original photo. Once you start editing, it’s easy to lose track of the original quality.
12. Tips for Mobile vs. Web Editing
Editing photos in Google Photos can vary slightly depending on whether you’re using a mobile device or the web version. Here’s how the two compare:
Mobile Editing
Mobile editing is great for on-the-go adjustments. The interface is designed for touch gestures, making it easy to slide to adjust brightness or pinch to crop. However, the smaller screen can make it harder to see fine details, so zooming in is often necessary to get precise edits. (See: Healthy eating and photo editing.)
Web Editing
Editing on the web offers a larger canvas and sometimes more control over the adjustments. You can see your edits in greater detail, which can help prevent over-editing. Additionally, navigating through the interface can be quicker with a mouse than with touch gestures, allowing for faster adjustments.
13. Integrating Google Photos with Other Platforms
To enhance your editing workflow, consider how Google Photos can integrate with other applications. For instance, you can use Google Drive to back up your images seamlessly, or use Google Docs to organize your editing notes and ideas. Additionally, exporting edited photos to social media platforms directly from Google Photos saves time and effort.
You might also explore third-party apps that connect with Google Photos for more extensive editing options. Many photographers use tools like Snapseed or Lightroom, which can synchronize with your Google Photos library for advanced editing capabilities.
14. Best Practices for Organizing Your Photos
Good organization makes it easier to find and edit photos efficiently. Here are some best practices:
- Albums: Create albums for different events, trips, or themes. This not only helps you locate photos easily but also gives you a clear context for editing.
- Tags: Use features like facial recognition to tag people in your photos. This helps when searching for specific individuals later on.
- Regular Cleanup: Periodically review your photo library and delete duplicates or images that don’t meet your standards. This keeps your collection manageable and easy to navigate.
15. FAQs About Editing Photos in Google Photos
Q1: Can I recover deleted photos in Google Photos?
A: Yes, Google Photos has a Trash feature where deleted images are stored for 30 days before permanent deletion. You can retrieve photos from there if you act quickly.
Q2: Does Google Photos support RAW image files?
A: Google Photos can store RAW files, but the editing tools are limited compared to editing JPEG or PNG files. If you’re serious about editing RAW images, consider using dedicated software.
Q3: Is there a limit to the edits I can make?
A: Technically, there’s no limit on edits, but be cautious. Excessive adjustments can degrade image quality, so it’s best to keep edits reasonable.
Q4: Can I create collages or animations in Google Photos?
A: Absolutely! Google Photos has built-in features for creating collages and animations from selected images, helping you present your edits in creative ways.
Q5: How do I ensure my edits are saved?
A: After editing a photo in Google Photos, always click the “Save” button to ensure your changes are applied. Google Photos will keep the original file intact unless you use the “Save as new” option.
16. Advanced Techniques for Professional-Looking Edits
If you’re looking to refine your editing skills even further, consider these advanced techniques that can help you achieve professional-looking results: (See: Google Photos features in The New York Times.)
Color Grading
Color grading is a technique typically used in film and photography that involves adjusting the colors in your image to create a desired mood or atmosphere. While Google Photos doesn’t offer full-fledged color grading tools, you can still achieve a similar effect by playing around with the color settings in the Adjust tool. For instance, lowering warmth can give a cooler, more clinical feel, while increasing it can create a cozy, inviting warmth.
Focus and Depth of Field
While Google Photos may not have sophisticated lens blur features, you can use cropping intelligently to mimic the depth of field effect. By cropping to center your subject more tightly, you can draw the viewer’s attention and create a pseudo-focus effect that enhances the image’s overall aesthetics.
17. Utilizing Google Photos for Creating Storytelling Albums
Google Photos isn’t just a place for storing and editing; it can also be used to tell stories through well-curated albums. Create themed albums that guide the viewer through an experience—be it a vacation, a wedding, or a family gathering. Include a mix of candid moments and posed shots, and don’t shy away from adding text or Markup to provide context or commentary.
As you compile your album, think about the narrative you want to convey. Using the editing tools to harmonize the colors and styles of the images can create a more cohesive story. For instance, if your theme is “Summer Road Trip,” you might want to use similar filters across all photos to maintain a consistent look.
18. Statistics on Photo Editing Trends
Understanding the broader trends in photo editing can help you refine your style and approach. According to recent surveys, over 60% of people now use smartphone apps for photo editing, with Google Photos being one of the top choices due to its accessibility and feature set. Furthermore, a significant 75% of social media users believe that aesthetically pleasing images garner more engagement, highlighting the importance of good photo editing.
In terms of demographics, younger audiences (aged 18-34) are particularly inclined to use filters and automatic enhancement features, while older users tend to prefer manual adjustments. This information can guide your approach to editing based on the audience you’re aiming to impress.
19. Community Engagement: Learning from Others
Engaging with online communities can significantly enhance your photo editing skills. Websites like Reddit, photography forums, and Facebook groups dedicated to Google Photos editing are great places to share your edits and receive feedback. Be open to constructive criticism, and don’t hesitate to share tips that have worked for you too. You can learn a lot by observing how others edit their photos and the styles they use.
By mastering these tips on how to edit photos in Google Photos, you can enhance your imagery, share your creativity, and make every photo count. Whether you’re preparing for a special occasion or just wanting to spruce up everyday moments, Google Photos has the tools to help you achieve stunning results.
“`
Trending Now
Frequently Asked Questions
How do I edit photos in Google Photos?
To edit photos in Google Photos, first select the photo you want to edit, then click on the edit icon. You can use tools like Crop, Rotate, Adjust, Filters, and Markup to enhance your image. Each tool allows for specific adjustments, making it easy to improve your photos.
What editing tools are available in Google Photos?
Google Photos offers several editing tools including Crop, Rotate, Adjust, Filters, and Markup. These tools allow you to trim images, correct orientation, adjust brightness and contrast, apply filters, and add personal notes or drawings to your photos.
Can I edit photos on my phone using Google Photos?
Yes, you can edit photos on your phone using Google Photos. The app is available for both iOS and Android devices, providing a user-friendly interface to access and edit your images directly from your mobile device.
Is Google Photos free to use for editing?
Google Photos is free to use for editing with 15GB of storage. You can upload and edit your photos without any cost, although additional storage is available through a subscription if you need more space.
How do I crop a photo in Google Photos?
To crop a photo in Google Photos, open the photo you want to edit, click on the edit icon, and select the Crop tool. You can then adjust the cropping frame to focus on the desired part of the image and apply the changes.
Have you experienced this yourself? We'd love to hear your story in the comments.