How to Dry Birdhouse Gourds: 14 Steps

Birdhouse gourds are a popular natural housing option for birds and an attractive garden ornament. Before you can create a birdhouse, you’ll need to properly dry the gourds. Here is a step-by-step guide on how to dry birdhouse gourds.
1. Harvesting: Pick the gourds when their stem turns brown and the skin hardens. Be careful not to damage the surface of the gourd while harvesting.
2. Cleaning: Wipe off any dirt or debris from the surface of the gourd using a dry cloth.
3. Labeling (Optional): If you’re drying multiple gourds, label them with a permanent marker so you can track their progress.
4. Preparing for drying: Cut a small hole in the bottom of the gourd to allow air circulation and moisture to escape. This will speed up the drying process and reduce the risk of mold growth.
5. Drying location: Choose a well-ventilated area that is protected from rain and direct sunlight to hang your gourds, such as a garage or shed.
6. Spacing: Hang your gourds at least 6 inches apart to ensure proper air circulation and prevent mold growth.
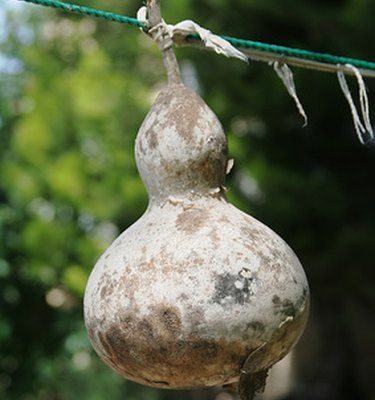
7. Hanging method: Use heavy twine or wire to hang your gourds by their stems, making sure they are tightly secured.
8. Rotating: Rotate your hanging gourds every few days to promote even drying and discoloration prevention.
9. Inspecting for mold: Check your gourds periodically for any signs of mold growth, marked by white or green fuzzy patches on their surface.
10. Treating mold: If you detect mold on your birdhouse gourd, brush it off gently with a soft-bristled brush and wipe down the surface with rubbing alcohol or bleach solution diluted with water (1 part bleach to 10 parts water).
11. Drying time: Allow your gourds to hang in a well-ventilated area for 3-6 months, or until the outer skin is completely dry and the seeds rattle inside when shaken.
12. Final cleaning: Once fully dried, remove any remaining residue or mold using a wire brush. Wipe down the gourd with a damp cloth and let it air dry completely.
13. Sanding (Optional): If you want a smoother surface on your dried gourd, use fine sandpaper to gently sand the outer skin.
Ready for crafting: After completing the drying process, your birdhouse gourds are now ready to be transformed into beautiful, functional birdhouses.
With these 14 steps, you can have a successful drying process and enjoy helping local birds find a natural home in your garden by creating unique birdhouses. Happy drying!


