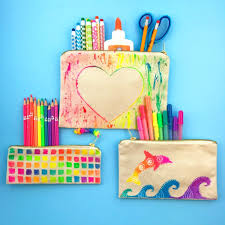
How to Decorate School Supplies: 8 Steps

Step 1: Gather Your Materials
Before starting, gather all the necessary materials such as notebooks, binders, pencils, colorful pens, markers, washi tape, stickers, and any other supplies you’ll be using. Keep these in a dedicated space or container so you can easily access everything you need for your decorating project.
Step 2: Choose a Theme or Color Scheme
To create a cohesive look across all your decorated school supplies, choose a theme or color scheme to follow. This could be anything from your favorite colors to patterns and motifs such as plants or animals. This will help guide your design decisions as you progress through the decorating process.
Step 3: Decorate Your Notebooks and Binders
Begin by customizing your notebooks and binders. You can use washi tape to create borders around the edges or make patterns on the front cover. If you prefer something more artistic, use markers or acrylic paint to draw designs or doodle. Alternatively, add a layer of colorful paper or fabric and use glue to attach it to the cover.
Step 4: Design Your Pencils and Pens
Add some style to your writing tools by wrapping washi tape around them or by using markers to draw unique patterns. Make sure that the design doesn’t affect their functionality — for example, avoid covering erasers or pen tips.
Step 5: Personalize Other Supplies
In addition to your primary school supplies, consider customizing related items such as rulers, pencil cases, and scissors. You can apply similar methods like using washi tape or drawing designs with markers to add personality to these objects too.
Step 6: Use Stickers for Instant Decoration
Stickers are an easy way to add character and individuality without the need for much skill. Purchase themed stickers that match your desired aesthetic or create DIY stickers using printable sticker paper and a cutting tool.
Step 7: Add Labels
Ensure your supplies are both organized and personalized by adding labels to your binders, notebooks, and pencil cases. Use a label maker or create your own with colorful pens, cardstock, and scissors. Include your name, subject, or class for easy identification.
Step 8: Maintain Your Decorated Supplies
Keep your unique decorations intact by being mindful of how you handle and store your supplies. Store decorated items in designated areas and avoid putting too much weight on them to prevent the decorations from being damaged or coming apart.
By following these eight steps, you’ll have stylish and one-of-a-kind school supplies that showcase your personality and make the academic year more fun. Happy decorating!


