How to Change the Default Web Browser on Android

Android devices often come with a pre-installed web browser, such as Google Chrome or Samsung Internet. While these browsers are great options, they may not be the preferred choice for everyone. Fortunately, changing the default web browser on an Android device is a simple process.
Step 1: Install a New Web Browser
To change your default web browser on an Android device, you first need to have another browser installed. You can download a new browser from the Google Play Store. Some popular options include Mozilla Firefox, Microsoft Edge, and Opera.
Step 2: Access the Browser Settings
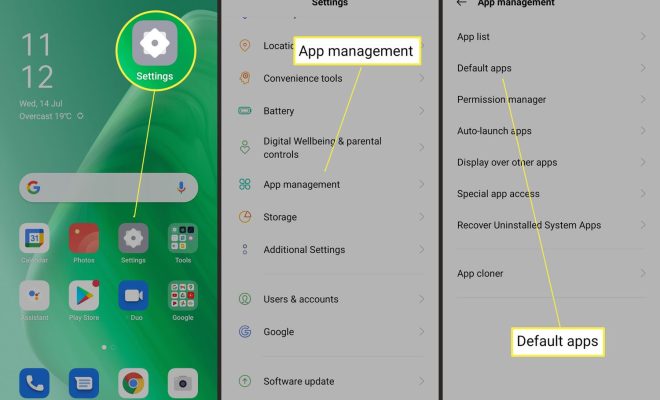
Once you have installed a new web browser, open the “Settings” app on your Android device. Scroll down until you see the “Apps” option and tap on it. This will bring up a list of all the apps installed on your device.
Step 3: Choose the Current Default Browser
In the list of installed apps, locate the current default web browser. This may be Google Chrome or another browser that came pre-installed on your device. Tap on the browser to access its settings.
Step 4: Clear Defaults
Once you are in the browser’s settings, scroll down until you see the “Clear defaults” button. Tap on it to remove the browser as the default option.
Step 5: Choose the New Default Browser
Next, go back to the “Settings” app and select “Apps” again. This time, locate the new web browser you installed and tap on it. In the browser’s settings, scroll down until you see the “Set as default” button. Tap on this button to make the new browser your default option.


