How to Change Default Apps and Settings in Windows 10
Are you tired of using the same default apps and settings on your Windows 10 computer? Luckily, it’s possible to customize your preferences and make changes to your preferred apps with just a few clicks.
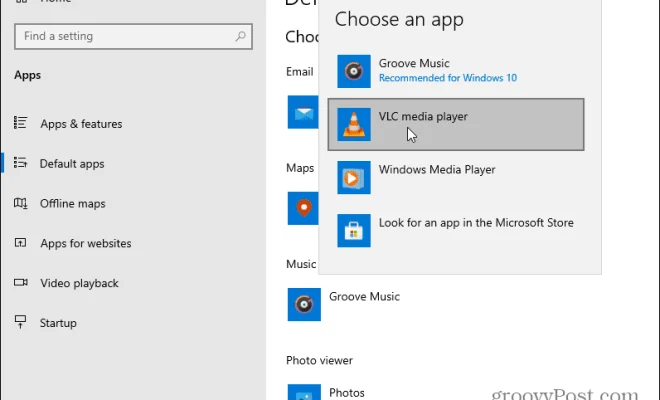
To change your default apps on Windows 10, click on the Start menu and select Settings. From there, click on “Apps” and then scroll down to the bottom of the page and click on “Default Apps.” You will see a list of default apps such as web browser, email client, and media player.
To change any of these apps, simply click on the default app and a list of options will appear. Select the app you want to use instead and it will become your new default.
Similarly, to change your settings on Windows 10, click on the Start menu and select Settings. From there, click on the setting you want to change such as “System” or “Devices.” You will see a list of options that you can customize according to your preferences.
For example, if you want to change your display settings, click on “System” and then select “Display.” You can choose a custom resolution, toggle on or off the Night Light feature, and adjust your screen’s brightness.
Another important setting you might want to change is your privacy settings. Click on “Privacy” in the Settings menu and you can adjust your camera, microphone, and location settings. You can also control app permissions and diagnostic data collection.
It’s important to note that some apps may not have the option to be changed as a default. In this case, you will have to manually select the app each time you want to use it.

