How to Change an Oil Filter: 12 Steps

Changing your vehicle’s oil filter is a crucial part of maintaining the engine’s performance and longevity. With regular oil changes and filter replacements, you can avoid costly and unexpected engine failures while also boosting your vehicle’s efficiency. This guide will walk you through the 12 steps to change an oil filter in a manner that is both simple and straightforward.
1. Gather the necessary tools
Before you begin, gather all the essential tools, including a new oil filter, wrench, oil drain pan, funnel, clean rag or cloth, and safety gloves.
2. Park on level ground
Find a flat surface to park your vehicle to ensure an accurate oil level reading when adding new oil later.
3. Warm up your engine
Let your car run for about five minutes to warm up the engine oil for better drainage.
4. Turn off the engine and remove the keys
Once the engine has warmed up sufficiently, turn off your vehicle, remove the keys from the ignition, and let it cool down for a few minutes to avoid burns.
5. Locate the oil filter
Consult your owner’s manual to identify the exact location of the oil filter in your vehicle.
6. Place an oil drain pan under the filter
Position your drain pan under the filter to catch any leaking oil during removal.
7. Remove the old oil filter with an appropriate wrench
Using a wrench that fits your specific filter size, unscrew and carefully remove the old oil filter in a counterclockwise direction.
8. Clean surrounding areas of residual oil
Use a clean rag or cloth to wipe away any remaining dirty oil around where the old filter was mounted.
9. Prepare your new oil filter for installation
Take your new oil filter and apply a thin layer of fresh engine oil onto its gasket seating area to form a proper seal when installed.
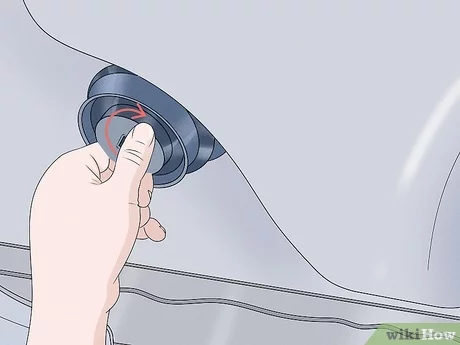
10. Install your new filter by hand (do not use the wrench)
Carefully screw on the new filter by hand in a clockwise direction, ensuring it’s snug and secure but not overly tight.
11. Check for leaks
Start your vehicle and let it run for a few minutes to ensure there are no oil leaks around the new filter. Turn off the engine and carefully inspect the filter area again to confirm the absence of any leaks.
12. Dispose of used oil and filter responsibly
Be sure to properly dispose of used oil filters and drained oil at a designated recycling center or an authorized disposal facility.
By following these 12 steps, you can successfully change your vehicle’s oil filter with ease, prolonging the life of your engine and keeping it running smoothly. Regular maintenance is crucial to enjoying a dependable and efficient ride, so always consult your owner’s manual for guidance on changing intervals, oil specifications, and more.


