Build the Perfect Snowman: A Winter Masterpiece Guide
“`html
There’s something undeniably magical about winter, particularly when the first snowfall blankets the ground and transforms the world into a winter wonderland. Among the many joys of a snowy landscape, building a snowman stands out as a timeless tradition that sparks creativity and joy in people of all ages. If you’ve ever pondered how to build a snowman that will impress your friends and family, you’re in the right place. This guide outlines the essential steps, tips, and tricks to help you create a snowman that’s not just any snowman but a true winter masterpiece.
1. Understanding the Basics of Snow
Before we dive into the nuts and bolts of how to build a snowman, it’s crucial to understand what kind of snow is best suited for this activity. Not all snow is created equal! The ideal snow for building a snowman is wet and packable, which usually occurs when temperatures are around 30°F to 32°F (-1°C to 0°C). This type of snow sticks together, making it easier to form large snowballs.
If the snow is too dry or powdery, your snowman-building efforts may end in frustration, as the snow won’t hold together well. On the other hand, if it’s too slushy, it can lose its shape quickly. So, check the weather and get ready to build when conditions are just right!
2. Gathering Your Supplies
While building a snowman may seem like a straightforward task, having the right supplies on hand can make the experience even more enjoyable. Here’s a quick list of items you might need:
- Scoops or shovels: These can help you gather and shape the snow more effectively.
- Gloves: Keep your hands warm and dry while working in the snow.
- Decorative items: Think about what you might want to use to give your snowman personality — items like buttons, scarves, hats, and even sunglasses.
- Carrots: A classic for the snowman’s nose!
With your supplies ready, you’re all set to start your snowman-building adventure!
3. Choosing the Right Location
Location is key when it comes to how to build a snowman. You’ll want to select a flat area that provides enough space for your snowman to grow. Look for a spot where the snow is somewhat even, avoiding areas where the ground is uneven or icy, as this could affect the stability of your creation.
Additionally, think about visibility. Choose a location that can be admired from your home or by passersby. This will not only boost your pride in your creation but also make the experience more rewarding as others appreciate your hard work.
4. Forming the Snowballs
This is the fun part! To build a snowman, you’ll first need to roll large snowballs. Start with a small clump of snow and roll it on the ground, adding more snow as it picks up dirt and ice. The snowball should gradually grow larger. The general rule is to create three snowballs of different sizes: one large for the base, one medium for the torso, and a smaller one for the head.
As you roll the snowballs, make sure they are compact and smooth. If you notice any loose or fluffy snow, press it down to consolidate it into a solid shape. This will help your snowman stand tall and proud for days to come.
5. Stacking the Snowballs
Once your snowballs are ready, it’s time to stack them up! Start with the largest ball as the base and gently place the medium-sized one on top. It’s crucial to ensure that the two balls connect well; consider using extra snow as glue to help them stick together. If you have a shovel, you can also use it to create a flat surface on top of the base snowball, making it easier to balance the next layer.
After placing the second snowball, repeat the process with the smallest ball for the head. Make sure to pack extra snow around the joints where the balls meet to ensure stability. This step is critical because if the snowman isn’t stable, it could topple over! (See: National Climatic Data Center.)
6. Adding Personality: Decorating Your Snowman
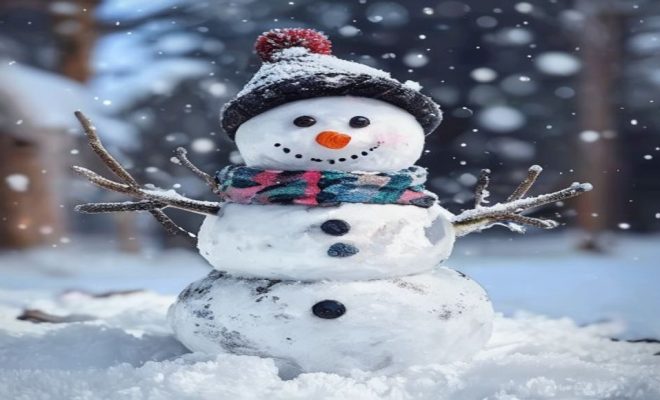
Now comes the best part — giving your snowman personality! You can get as creative as you like with decorations. Use buttons for eyes, twigs for arms, and a carrot for the nose. A scarf or hat can add a touch of flair and make your snowman truly unique.
Feel free to experiment with different materials you have around the house. If you have a spare winter hat or some colorful fabric, don’t hesitate to use those. Some people even use items like old sunglasses to give their snowman a fun character. Just remember to keep it light and playful, as snowmen are all about bringing joy.
7. Maintaining Your Snowman
Your snowman may look magnificent right after it’s built, but the reality is that Mother Nature can be unpredictable. To help maintain your snowman, try to pack extra snow around any weak areas to reinforce it. If you notice it starting to melt, you can also create a snow barrier around the base to keep the heat at bay.
It’s also a good idea to avoid touching your snowman too much after it’s built. The more you handle it, the more likely it is to lose its shape. With a little care, your snowman can stand tall for days, providing a centerpiece for winter fun.
8. Sharing the Joy: Documenting Your Snowman
Once you’ve built your snowman, why not share the experience? Take photos or videos of your creation and share them on social media. You can even host a snowman-building contest with friends or family to see who can create the most impressive snowman.
Documenting your snowman not only allows you to cherish the memories but also encourages others to join in the fun. Building a snowman is more than just a winter activity; it’s a way to bond with friends and family while embracing the beauty of the season.
9. Creative Snowman Ideas
Building a traditional snowman is great, but why stop there? You can take your snowman to the next level with some creative twists. Here are a few fun ideas:
- Animal Snowmen: Instead of a classic snowman, consider making an animal. A snow bunny with long ears or a snow penguin can be a fun challenge!
- Themed Snowmen: Create a snowman that resembles your favorite movie character or a popular figure. Imagine a snow Olaf from “Frozen” or a snow minion from “Despicable Me.”
- Snow Families: Build a whole family of snowmen, each representing different family members! You can even customize their outfits and sizes to match.
- Snowman Sculptures: Get artistic! Try sculpting your snow into unique shapes, like a snow castle or a giant snow creature.
These creative ideas can turn a simple snowman-building day into a memorable event, sparking even more joy and creativity!
10. Fun Facts About Snowmen
Did you know that snowmen have been a part of winter culture for centuries? Here are some fun facts that might surprise you:
- Snowmen date back to the medieval ages, with the earliest known snowman being built in 1380 in the Netherlands.
- The world record for the tallest snowman was set in 2008 in Bethel, Maine, measuring a staggering 122 feet and 1 inch!
- In Japan, there are different types of snowmen called “Yuki Daruma,” which is inspired by a traditional doll known for its ability to stand upright despite being knocked over.
- Snowmen have become a symbol of winter and are often depicted in popular culture, including songs, movies, and literature.
Knowing these fun facts can add to the experience when you share your snowman with others. It’s not just a snow creation; it’s a piece of history!
11. FAQs About Building a Snowman
Here are some frequently asked questions that can help you while you’re building your snowman:
Q1: What type of snow is best for building a snowman?
A1: The best snow for building a snowman is wet and packable snow, typically found when temperatures are around 30°F to 32°F (-1°C to 0°C). Dry powdery snow is difficult to mold, while too much slush can cause your snowman to lose its shape.
Q2: How do I make my snowman last longer?
A2: To help your snowman last longer, pack additional snow around weak areas and create a snow barrier at the base to protect it from heat. Avoid touching it excessively, as this can cause it to melt and lose its shape. (See: CDC on winter activities and health.)
Q3: Can I build a snowman with children? Are there any tips?
A3: Absolutely! Building a snowman is a fantastic activity for kids. Make it a fun family event by assigning different roles, like rolling snow, gathering decorations, or stacking the snowballs. Keep it light and fun, and encourage creativity!
Q4: What can I use for decorations that are eco-friendly?
A4: If you’re looking for eco-friendly decorations, try using natural items like pinecones, berries, and twigs. Old clothes and scarves can also be repurposed for your snowman without adding waste.
Q5: Is there a way to make a snowman indoors?
A5: Yes! If you live in an area where snow is scarce, you can create a mini snowman using artificial snow or even white cotton balls. Get creative with materials you have at home to make a fun indoor version!
12. Snowman Building Techniques From Around the World
Snowman building isn’t just popular in North America; it’s a beloved pastime in many cultures. Each country has unique techniques and traditions surrounding this winter favorite. Let’s explore a few:
1. Japan’s Yuki Daruma
In Japan, snowmen are known as “Yuki Daruma.” This traditional snowman is typically made from two snowballs, with the larger ball at the bottom. Often, Yuki Daruma is decorated with a straw hat and a red scarf, and it symbolizes good luck in the coming year. Some families even add a bamboo branch for a festive touch.
2. Finland’s Snow Figures
In Finland, kids are encouraged to build snow figures that go beyond just the classic snowman. They might create snow animals, snow forts, or other imaginative shapes. The Finnish approach embraces creativity, encouraging kids to think outside the traditional snowman box.
3. Canada’s Snow Sculptures
In Canada, especially in regions with heavy snowfall, snow sculpting competitions are quite popular. Artists create impressive and detailed sculptures from snow, showcasing their skills and creativity. This tradition has grown into annual events, drawing participants from around the world.
Learning about these different traditions can inspire you to add your own unique twist to your snowman building experience!
13. Health Benefits of Playing in the Snow
Building a snowman isn’t just fun; it also provides several health benefits that can enhance your physical and mental well-being. Here are a few:
1. Physical Activity
Playing in the snow is a great way to get active during the colder months. Rolling snowballs requires strength and coordination, while lifting and stacking them works various muscle groups. You’ll get a workout without even realizing it! (See: Scientific articles on snow properties.)
2. Mental Well-being
Spending time outdoors in the winter can boost your mood and reduce feelings of anxiety and depression. Building a snowman allows you to connect with nature and engage in a playful activity, which can have a positive impact on mental health.
3. Social Interaction
Building a snowman is often a group activity. Whether you’re working with family or friends, it promotes teamwork and collaboration. Sharing laughter and creativity creates bonds and can lead to lasting memories during the winter season.
So, the next time you step outside to build a snowman, remember that you’re not just having fun; you’re also benefiting your body and mind!
14. Weather Considerations
When planning your snowman-building day, keep an eye on the forecast. Weather conditions can greatly affect your experience. Here are some things to consider:
1. Temperature
The optimal temperature for snowman building is between 30°F and 32°F. At this temperature, the snow is wet enough to pack but not so warm that it melts quickly. If it’s too cold, the snow can be too powdery, making it challenging to mold.
2. Snow Quality
Check the quality of the snow before you start. If it’s icy or too dry, you may want to wait until a better snowfall occurs. Fresh, wet snow after a storm is usually ideal.
3. Sunlight Exposure
Consider where you build your snowman in relation to sunlight. A shady spot can help prevent melting, allowing your snowman to last longer. If possible, pick an area that will stay shaded throughout the day.
As winter rolls around, remember these steps on how to build a snowman. It’s a simple yet rewarding activity that brings out the child in all of us. So grab your gloves, gather your supplies, and head out to create your frosty friend!
“`
Trending Now
Frequently Asked Questions
What type of snow is best for building a snowman?
The best type of snow for building a snowman is wet and packable snow, which typically occurs when temperatures are around 30°F to 32°F (-1°C to 0°C). This snow sticks together well, making it easier to form large snowballs and create a sturdy snowman.
What supplies do I need to build a snowman?
To build a snowman, gather supplies like scoops or shovels for shaping the snow, gloves to keep your hands warm, decorative items such as buttons and scarves, and a carrot for the snowman's nose. These items will enhance your snowman-building experience.
How do I choose the right location for my snowman?
Choosing the right location for your snowman is important. Look for a flat area with plenty of snow, away from trees or structures that could cause it to melt faster. A sunny spot might be good for visibility, but too much sun can make the snowman lose its shape quickly.
What decorations can I use for my snowman?
You can use a variety of decorations to give your snowman personality. Common items include buttons for eyes, a scarf for warmth, a hat for style, and even sunglasses for a fun look. Get creative with whatever you have on hand!
How do I build a snowman step by step?
To build a snowman, start by rolling three large snowballs of increasing size for the base, body, and head. Stack them on top of each other, ensuring they are well packed. Then, add decorations like eyes, a nose, and accessories to complete your snowman.
What did we miss? Let us know in the comments and join the conversation.