Complete Guide to Running Android in VirtualBox
VirtualBox is a powerful and free virtualization software that allows users to run other operating systems within their current operating system. This article will provide a complete guide to running Android in VirtualBox.
Step 1: Download VirtualBox
First, download and install VirtualBox to your computer. You can download the latest version from the official VirtualBox website.
Step 2: Download Android ISO
Next, you’ll need to download the Android ISO. There are various Android builds available, but we’ll be using the official Android x86 build. You can download it from the Android-x86 project website.
Step 3: Create a New Virtual Machine
Open VirtualBox and click on “New” to create a new virtual machine. Give the VM a name (e.g. Android) and choose “Linux” as the type and “Other Linux (64-bit)” as the version.
Step 4: Configure Memory and Storage
Next, set the amount of memory you want to allocate to the VM. For running Android smoothly, allocate at least 2GB RAM. Next, create a virtual hard disk by clicking “Create a virtual hard disk now”. Choose the “VDI” format and allocate the storage space you want.
Step 5: Change Virtual Machine Settings
Click on the newly created VM and select “Settings”. In the “System” tab, uncheck the “Floppy” option as Android doesn’t use this. In the “Display” tab, increase the video memory to at least 128 MB to have a better video resolution.
Step 6: Add Android ISO
In the “Storage” tab, click on the “Empty” CD/DVD drive, and then click on the CD image on the right. Select “Choose Virtual Optical Disk file” and browse to the downloaded Android ISO. Click “OK” to exit.
Step 7: Start the Virtual Machine
Now click on “Start” to start the VM. The Android installer will boot up, and you’ll be prompted with some installation options. Choose “Installation – Install Android-x86 to harddisk” option. Next, choose the virtual hard disk you created earlier when asked for the install destination.
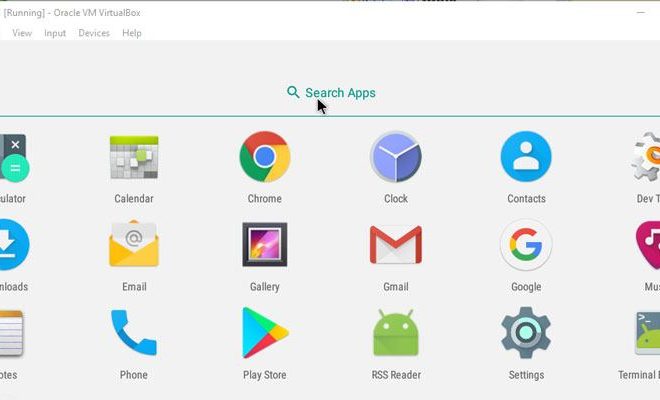
Step 8: Finish the Android Installation
Follow the on-screen prompts to finish the Android installation. After the installation is complete, you should be running Android in VirtualBox!
Conclusion
By following the above steps, you can easily install and run Android in VirtualBox. It’s a great way to try out Android without affecting your primary machine or to test out Android apps without having an Android device.