Best Snapseed filters for portraits
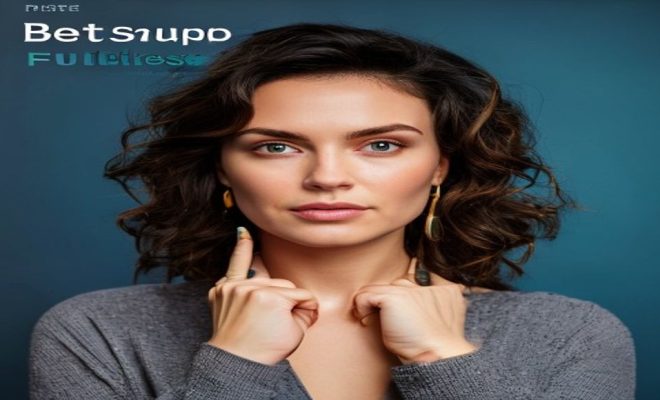
Ever wondered how some smartphone photos just pop, especially portraits? It’s not always about the fancy camera; often, it’s about smart editing. Snapseed, Google’s free photo editing app, is a powerhouse, and its specialized tools for portraits are nothing short of phenomenal. Forget endless apps and complicated menus – Snapseed gives you professional-grade control right from your phone. But with so many options, where do you even begin? We’re going to cut through the noise and highlight the absolute best Snapseed portrait filters that can transform your everyday snaps into stunning, gallery-worthy images.
Whether you’re a casual shooter or an aspiring pro, understanding how to leverage these specific tools can make a huge difference. From subtle skin smoothing to dramatic mood shifts, these Snapseed portrait filters are designed to enhance your subjects without making them look artificial. We’ll explore each one in detail, giving you the insights you need to confidently apply them and achieve truly remarkable results. Let’s dive into the essential toolkit that will elevate your portrait game.
1. Portrait: The Foundation of Flawless Faces
The ‘Portrait’ tool in Snapseed isn’t just a single filter; it’s a comprehensive suite of adjustments specifically designed to enhance faces. Think of it as your first stop for any portrait edit. When you select this tool, Snapseed uses intelligent algorithms to detect faces in your image, allowing you to apply localized adjustments without tedious manual masking. It’s incredibly efficient and often provides a fantastic starting point for further refinements.
Within the Portrait tool, you’ll find three main presets: ‘Spotlight’, ‘Eyes Bright’, and ‘Face Smooth’. ‘Spotlight’ gently brightens the face, drawing attention to your subject and making them stand out from the background. It’s subtle but effective, especially in situations where the lighting might be a bit flat. ‘Eyes Bright’ does exactly what it says – it enhances the whites of the eyes and adds a touch of sparkle, making them appear more alert and engaging. And ‘Face Smooth’ is a godsend for anyone looking to reduce blemishes and even out skin tones without making the face look plastic. The beauty of these presets is that you can adjust their intensity, ensuring your edits look natural and not overdone. It’s a fundamental Snapseed portrait filter that you’ll use constantly.
2. Head Pose: Fine-Tuning Your Subject’s Gaze
This is where Snapseed truly feels like magic. The ‘Head Pose’ tool allows you to subtly adjust the orientation of your subject’s head after the photo has been taken. Ever wished your subject had turned their head just a tiny bit more, or tilted it slightly differently? This tool lets you correct those minor imperfections. It uses advanced 3D modeling to manipulate the face, maintaining a natural appearance even with slight adjustments. You can rotate the head along X, Y, and Z axes, tilt it, and even adjust the focal length to subtly change the perspective.
The key here is subtlety. A little goes a long way. Use ‘Head Pose’ to correct awkward angles, make a direct gaze feel more engaging, or even slightly alter the perceived direction of light on the face. It’s particularly useful for group shots where one person might be looking slightly off, or for solo portraits where a minor adjustment can dramatically improve the composition. This isn’t about transforming someone’s face entirely, but rather about perfecting those small, critical details that define a strong portrait. It’s one of the more advanced Snapseed portrait filters, but incredibly powerful once you get the hang of it.
3. Selective: Precision Adjustments for Specific Areas
While not exclusively a portrait filter, the ‘Selective’ tool is absolutely indispensable for portrait editing. It allows you to place ‘control points’ on specific areas of your image and then adjust brightness, contrast, saturation, and structure for just that area. This means you can brighten only the eyes, darken a distracting background element, or boost the color of a specific piece of clothing without affecting the rest of the image.
For portraits, ‘Selective’ is a game-changer. You can use it to brighten shadowed areas on the face, like under the eyes or chin, without blowing out the highlights on the forehead. You can also use it to reduce saturation in overly vibrant areas of skin, or conversely, to add a touch more warmth to lips. The ability to control the size of the selection area by pinching and zooming gives you incredible precision. It truly mimics the control of professional desktop software, allowing you to address specific imperfections or enhancements with surgical accuracy. Mastering ‘Selective’ will elevate your Snapseed portrait filters workflow significantly. (See: Understanding photography techniques.)
4. Tune Image: The All-Around Enhancer
‘Tune Image’ is the backbone of almost any edit in Snapseed, and portraits are no exception. This tool provides a comprehensive set of global adjustments that affect the entire image. You’ll find sliders for Brightness, Contrast, Saturation, Ambiance, Highlights, Shadows, and Warmth. While ‘Portrait’ and ‘Selective’ handle localized face enhancements, ‘Tune Image’ sets the overall mood and exposure for your shot.
For portraits, start by adjusting the overall exposure with ‘Brightness’. Then, use ‘Contrast’ to add a bit of pop, but be careful not to overdo it, as too much contrast can make skin tones look harsh. ‘Saturation’ can boost colors, but often for portraits, a more subdued saturation looks natural. ‘Ambiance’ is a particularly useful slider, as it intelligently brightens shadows and darkens highlights, making the image feel more balanced and natural. ‘Highlights’ and ‘Shadows’ give you granular control over the brightest and darkest parts, allowing you to recover detail. Finally, ‘Warmth’ can be used to add a pleasing golden glow or a cool, blue tone, dramatically influencing the emotional feel of the portrait. These global adjustments lay the groundwork for any specific Snapseed portrait filters you apply later.
5. Details: Sharpening and Structure for Definition
The ‘Details’ tool offers two primary sliders: ‘Structure’ and ‘Sharpening’. Both are crucial for making your portraits look crisp and professional, but they need to be used with a light touch, especially on faces. ‘Structure’ enhances mid-tone contrast, bringing out texture and definition. For portraits, it can make hair, clothing, or background elements pop, but apply it sparingly to the face itself, as it can accentuate skin imperfections.
‘Sharpening’ makes edges more defined. Again, for portraits, use this with extreme caution on skin. Over-sharpening can introduce an unnatural, grainy look and highlight every pore or wrinkle. The best approach is often to apply a very subtle amount of sharpening globally and then, if desired, use the ‘Selective’ tool to apply more sharpening to specific areas like eyes or hair, while avoiding the skin. Think of ‘Details’ as the finishing touch that adds that professional polish, but remember, less is often more when it comes to refining facial features with these Snapseed portrait filters.
6. Glamour Glow: Soft Radiance for a Dreamy Look
If you’re aiming for a soft, ethereal, or ‘dreamy’ look, ‘Glamour Glow’ is your go-to. This filter applies a subtle blur and glow effect that can beautifully smooth skin, soften harsh lines, and give the image a luminous quality. It’s often used in fashion and beauty photography to create a flawless, radiant aesthetic.
Within ‘Glamour Glow’, you’ll find different glow presets, each with varying intensity and softness. You can also adjust the ‘Glow’, ‘Saturation’, and ‘Warmth’. The ‘Glow’ slider controls the overall intensity of the effect, while ‘Saturation’ can either enhance or subdue the colors within the glow. ‘Warmth’ allows you to shift the color temperature, making the glow feel more golden or cooler. Experiment with the different presets and sliders to find the perfect balance that enhances your subject without making them look blurry or artificial. This particular Snapseed portrait filter can completely change the mood of your photo, making it feel more artistic and sophisticated.
7. Healing: Eradicating Distractions Seamlessly
The ‘Healing’ tool is a non-destructive way to remove small imperfections or unwanted elements from your portraits. Think of it as a magic eraser. It works by sampling surrounding pixels and blending them over the area you ‘paint’ away. This is incredibly useful for removing blemishes, stray hairs, small dust spots on the lens, or even minor distractions in the background.
To use ‘Healing’, simply zoom in on the area you want to fix, then tap or swipe your finger over the imperfection. Snapseed will automatically analyze the surrounding pixels and attempt to seamlessly blend the area. For best results, work on small areas at a time. If the first attempt isn’t perfect, you can undo it and try again, perhaps with a slightly different stroke. While it won’t fix major issues, for minor skin imperfections or small background distractions, ‘Healing’ is an incredibly powerful tool that can significantly clean up your portrait and draw more focus to your subject. It’s one of those essential Snapseed portrait filters that you’ll reach for constantly. (See: Scientific insights on image processing.)
8. Black & White: Timeless Elegance and Emotional Depth
Sometimes, color can be a distraction. ‘Black & White’ conversion isn’t just about removing color; it’s about transforming a portrait into something timeless, emphasizing form, texture, and emotion. Snapseed’s ‘Black & White’ tool offers various filter presets – ‘Neutral’, ‘Contrast’, ‘Bright’, ‘Dark’, ‘Fine Art’, and ‘Grainy’ – each with a distinct mood and tonal range. This allows you to instantly achieve a classic, dramatic, or gritty black and white look.
Beyond the presets, you can fine-tune the brightness and contrast of your black and white conversion. More importantly, it offers ‘Color Filters’ (Red, Orange, Yellow, Green), which simulate the effect of using colored filters on a film camera. For instance, a ‘Red’ filter will darken blues (like skies) and lighten reds (like skin tones, making them appear smoother), adding drama. An ‘Orange’ filter is often great for portraits, enhancing skin tones while darkening blues. Experimentation is key here to see how different color filters affect the tonal range of your specific portrait. A well-executed black and white conversion can elevate a good portrait to a truly iconic one, making it one of the most artistic Snapseed portrait filters at your disposal.
Mastering the Workflow: Combining Snapseed Portrait Filters
Knowing individual tools is one thing; mastering their application in a cohesive workflow is another. When you’re editing a portrait in Snapseed, think of it as a layered process, building up your enhancements step by step. Generally, you’ll want to start with global adjustments and then move to more localized, specific refinements. A common workflow might look something like this:
- Tune Image: Start here for overall brightness, contrast, and color temperature. Get the global exposure and mood right first.
- Portrait: Immediately go to the ‘Portrait’ tool to smooth skin, brighten eyes, and add a subtle spotlight. This addresses the core facial enhancements.
- Healing: Zoom in and use ‘Healing’ to remove any blemishes, stray hairs, or small distracting elements on the face or in the immediate background.
- Selective: Now, use ‘Selective’ for precision. Brighten specific shadowed areas on the face, add a touch of contrast to the lips, or subtly enhance the catchlights in the eyes. Darken any distracting bright spots in the background.
- Head Pose: If needed, make subtle adjustments to the head’s orientation to refine the gaze or composition.
- Details: Apply a very slight amount of ‘Sharpening’ globally, or use ‘Selective’ to sharpen only the eyes or hair. Be cautious with ‘Structure’ on skin.
- Glamour Glow (Optional): If you’re going for a softer, dreamier look, apply ‘Glamour Glow’ now, adjusting its intensity carefully.
- Black & White (Optional): If you decide to convert to black and white, do it towards the end, after most other adjustments, as it will affect the tonal relationships significantly.
This sequence isn’t rigid; sometimes you might jump back and forth. For instance, after applying ‘Glamour Glow’, you might realize you need to adjust the overall ‘Brightness’ again slightly. The beauty of Snapseed’s non-destructive editing is that you can always go back into any tool and tweak your previous adjustments from the ‘Stacks’ menu. Don’t be afraid to experiment, undo, and re-do until you achieve the look you envision.
Beyond the Filters: Essential Portrait Photography Tips for Snapseed Users
While Snapseed’s portrait filters are incredibly powerful, remember that great editing starts with a great photograph. Here are a few foundational tips that will make your Snapseed edits even more impactful:
Lighting is Everything
Good lighting is perhaps the single most important factor in a compelling portrait. Look for soft, diffused light – think a cloudy day, open shade, or near a large window indoors. Avoid harsh midday sun, which creates unflattering shadows. Golden hour (the hour after sunrise and before sunset) offers beautiful, warm light that is incredibly flattering for skin tones. If you have to shoot in challenging light, try to position your subject so the light source is even across their face, or use a reflector (even a white piece of cardstock!) to bounce light back into shadowed areas.
Focus on the Eyes
The eyes are the window to the soul, and in a portrait, they are often the focal point. Ensure your subject’s eyes are sharp and in focus. Many smartphone cameras allow you to tap on the screen to set the focus point. Make sure those catchlights (the reflections of the light source in the eyes) are present, as they add sparkle and life to the gaze. When editing with Snapseed portrait filters, prioritize enhancing the eyes, perhaps with the ‘Selective’ tool or ‘Eyes Bright’ within the ‘Portrait’ tool. (See: Importance of visual representation in health.)
Simplify the Background
A cluttered or distracting background can detract from your subject. Look for clean, simple backgrounds that don’t compete for attention. This might mean a plain wall, a blurred natural setting, or even just a clear sky. Many modern smartphones offer ‘Portrait Mode’ or ‘Aperture Mode’ which creates a shallow depth of field, blurring the background nicely and making your subject stand out. If your background is still too busy, remember Snapseed’s ‘Healing’ tool can remove minor distractions, and the ‘Selective’ tool can darken or desaturate elements to make them less prominent.
Posing and Expression
Work with your subject to find natural and comfortable poses. Often, small adjustments can make a big difference. Ask them to shift their weight, turn their shoulders slightly, or tilt their head. Encourage genuine expressions by engaging in conversation or telling a joke. Candid moments often yield the most authentic and engaging portraits. Remember, the ‘Head Pose’ tool can fine-tune minor head orientations later, but a good starting pose is always best.
Composition Matters
Think about how your subject is placed within the frame. The rule of thirds is a classic guideline: imagine a tic-tac-toe grid over your image and place your subject or their eyes along the lines or at the intersections. Experiment with different angles and perspectives. Sometimes, a slightly low or high angle can add interest. Don’t be afraid to leave some negative space around your subject – it can help draw attention to them and create a sense of calm or drama.
The Power of Snapseed in Your Pocket
The beauty of Snapseed, and these specific Snapseed portrait filters, is that they put professional-level editing capabilities directly into your hands. You don’t need expensive software or a powerful computer to create stunning portraits anymore. With a little practice and an understanding of these key tools, you can dramatically improve the quality and impact of your photographs. Whether you’re looking to smooth skin, brighten eyes, or simply enhance the overall mood, Snapseed provides the precision and flexibility you need.
So, next time you capture a great portrait, don’t just share it as is. Open it up in Snapseed, experiment with these powerful filters, and watch your images transform. You’ll be amazed at the difference a few thoughtful adjustments can make, turning everyday photos into cherished works of art. Happy editing!
Trending Now
Frequently Asked Questions
What are the best Snapseed filters for portraits?
The best Snapseed filters for portraits include the 'Portrait' tool, which offers presets like 'Spotlight', 'Eyes Bright', and 'Face Smooth'. These features enhance facial details, brighten eyes, and smooth skin, providing a professional touch to your smartphone photos.
How do I enhance portraits using Snapseed?
To enhance portraits in Snapseed, start with the 'Portrait' tool. It automatically detects faces and allows you to apply adjustments like brightness and skin smoothing. Use presets like 'Spotlight' to highlight your subject and 'Eyes Bright' to make the eyes pop.
Can Snapseed make my portraits look professional?
Yes, Snapseed can make your portraits look professional with its powerful editing tools. The 'Portrait' filter suite allows for intelligent enhancements, ensuring your photos maintain a natural look while improving overall quality and focus on your subject.
What features does the Snapseed Portrait tool offer?
The Snapseed Portrait tool offers features like 'Spotlight', which brightens the face, 'Eyes Bright' for enhancing eye clarity, and 'Face Smooth' for softening skin. These adjustments are designed to enhance portraits effectively without making them look artificial.
Is Snapseed easy to use for portrait editing?
Yes, Snapseed is user-friendly for portrait editing. Its intuitive interface and automated face detection make it easy to apply localized adjustments without complex menus, allowing both casual users and professionals to achieve stunning results quickly.
Agree or disagree? Drop a comment and tell us what you think.