How to change margins in Google Docs
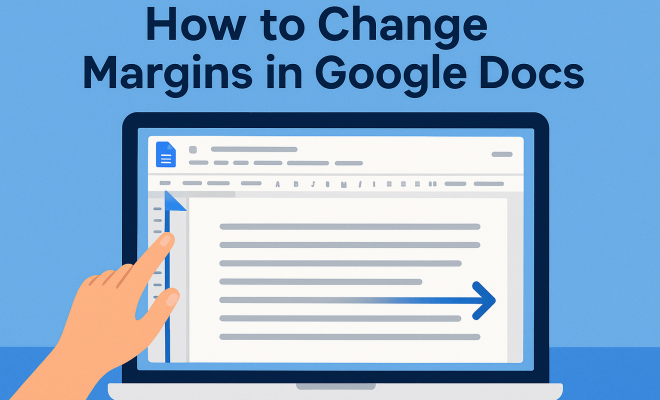
When it comes to creating documents, Google Docs stands as a versatile platform that many prefer due to its ease of use and collaborative features. Yet, one of the fundamental aspects of document formatting, specifically margins, often trips users up. Understanding how to change margins in Google Docs is essential for producing professional documents that meet specific formatting guidelines. Whether you’re drafting a report, an academic paper, or a business proposal, getting your margins right is crucial. In this guide, we’ll explore everything you need to know about changing margins in Google Docs, along with some practical insights.
1. Understanding Margins
Before diving into the nitty-gritty of how to change margins in Google Docs, it’s essential to understand what margins are and why they matter. Margins are the blank spaces surrounding the text on a page. They serve several purposes, including improving readability, providing space for annotations, and ensuring that printed documents don’t have text cut off.
In most cases, standard margins are set at one inch on all sides, but different types of documents may require different settings. Academic papers, for instance, often have specific margin requirements dictated by institutions, while business documents might need wider margins for branding purposes.
2. Accessing the Page Setup Menu
To change margins in Google Docs, the first step is to access the Page Setup menu. This is where all the essential formatting options reside. Here’s how to do it:
- Open your Google Docs document.
- Click on the “File” menu in the upper left corner of the screen.
- From the dropdown menu, select “Page setup.”
This opens a dialogue box where you can modify various aspects of your document, including margins, orientation, and paper size.
3. Changing the Margins
Once you’re in the Page Setup menu, changing the margins is straightforward. You’ll see fields for the top, bottom, left, and right margins. Here’s a step-by-step guide:
- Locate the margin fields (Top, Bottom, Left, Right).
- Enter the desired measurement in inches or centimeters. Google Docs allows you to customize margins to your preference.
- After entering your desired margin sizes, click “OK” to apply the changes.
It’s worth noting that you can also set custom margins for different sections of your document if necessary. This flexibility is particularly useful for longer papers or those divided by headings.
4. Using Ruler for Quick Adjustments
Did you know that Google Docs also provides a ruler for quick margin adjustments? This feature is particularly beneficial for users who prefer a visual approach. To use the ruler, ensure it’s visible at the top of your document. If you don’t see it, you can enable it by clicking on “View” in the top menu and selecting “Show ruler.”
Here’s how to adjust your margins using the ruler:
- Look for the small gray area on the left side of the ruler; this represents the left margin.
- Click and drag the left indent marker to adjust your left margin quickly.
- Repeat this process for the right margin using the right indent marker on the ruler.
Keep in mind that while using the ruler is fantastic for quick adjustments, it’s always a good idea to double-check your settings in the Page Setup menu to ensure accuracy.
5. Adjusting Margins for Specific Document Types
Different types of documents often require different margin settings. For example, academic papers might adhere to strict margin guidelines, whereas business reports may benefit from wider margins for branding. Here’s a breakdown of common documents and their preferred margin settings:
- Academic Papers: Often require 1-inch margins on all sides.
- Business Proposals: Can vary, but many prefer 1.25 to 1.5 inches on the sides for branding.
- Resumes: Typically have 0.5 to 1-inch margins to fit more information while remaining readable.
- Books and Manuscripts: Often feature wider margins, around 1.5 to 2 inches, to allow for binding.
Having a clear understanding of these requirements can save you time and effort in the long run.
6. Margins for Multi-Column Documents
What if you’re creating a multi-column document? Adjusting margins becomes even more crucial in this case. Google Docs allows you to create multi-column layouts seamlessly. However, you’ll want to ensure that your margins are balanced to maintain readability. (See: Understanding margins in typography.)
To set up a multi-column document and adjust the margins accordingly, follow these steps:
- Go to the “Format” menu and select “Columns.”
- Choose the number of columns you want for your document.
- Return to the Page Setup menu to adjust your margins, keeping in mind that narrower margins may work better for multi-column layouts.
Strike a balance between aesthetics and functionality to ensure your document remains professional and easy to read.
7. Storing and Applying Margin Settings
After you’ve customized your margins for a specific document, you might want to keep those settings for future use. Google Docs allows you to save these settings as your default template. This can save you hours of formatting time in the long run.
To set your margin preferences as default:
- Open a new document and adjust your margins using the Page Setup menu.
- Once you’re satisfied, click the “Set as default” button in the Page Setup dialog.
- Click “OK.”
Now, every new document you create will automatically have these margin settings, allowing for greater efficiency.
8. Common Issues and Troubleshooting
While changing margins in Google Docs is generally straightforward, users may encounter a few common issues. Here are some troubleshooting tips:
- Margins Not Applying: Ensure you’re clicking “OK” after making changes in the Page Setup.
- Ruler Not Visible: If the ruler doesn’t appear, check your view settings as mentioned earlier.
- Margins Affecting Print Layout: Always use the print preview option before printing your document. This helps ensure your margins are set correctly for the printed page.
If you encounter persistent issues, Google’s help forums can also be a resource for additional troubleshooting.
9. Conclusion: The Importance of Proper Margins
Changing margins in Google Docs may seem like a minor detail, but it plays a significant role in how your document is received by its audience. Properly formatted margins contribute to readability, professionalism, and overall presentation. Whether you’re working on a personal project, academic assignment, or business documentation, knowing how to adjust and apply margins effectively can set your work apart.
By following the tips outlined in this guide, you’ll be well-equipped to change margins in Google Docs with confidence and ease. So go ahead, put these skills to use, and elevate your document formatting game!
10. The Psychology Behind Good Margins
It’s not just about fitting text on a page; margins actually play a subtle but powerful role in how people perceive and interact with your document. Think about it: a page crammed edge-to-edge with text feels overwhelming, right? That’s because our brains need white space to process information effectively. Good margins provide visual breathing room, reducing cognitive load and making your content feel more approachable.
Consider the “F-pattern” or “Z-pattern” reading behaviors on web pages, which also apply to print. People tend to scan across the top, then down, and then across again. Generous top margins can act as a visual resting spot before the main content begins, while side margins prevent the text from feeling like it’s falling off the page. The consistent frame that margins create helps guide the reader’s eye, establishing a sense of order and professionalism. Documents with well-balanced margins often appear more authoritative and trustworthy, simply because they’re easier on the eyes and demonstrate attention to detail.
11. Advanced Margin Techniques: Section Breaks and Different Margins
Sometimes, a one-size-fits-all approach to margins just doesn’t cut it. Imagine you’re writing a thesis with an introduction that needs wide margins for a title page, followed by chapters with standard 1-inch margins, and then an appendix with narrower margins for data tables. Google Docs handles this beautifully with section breaks.
To apply different margins to different parts of your document, you’ll need to insert section breaks. Here’s how:
- Place your cursor where you want the new margin settings to begin.
- Go to “Insert” > “Break” > “Section break (next page)” or “Section break (continuous)” depending on if you want the new section to start on a fresh page.
- Once the section break is in place, move your cursor into the new section.
- Now, go to “File” > “Page setup.”
- In the Page Setup dialog box, adjust your margin values. Crucially, in the “Apply to” dropdown, select “This section” instead of “Whole document.”
- Click “OK.”
You can repeat this process for as many sections as you need. This technique gives you incredible control, allowing you to tailor the visual layout of each part of your document precisely to its content and purpose.
12. The Impact of Paper Size and Orientation on Margins
Margins don’t exist in a vacuum; they interact directly with your chosen paper size and orientation. A 1-inch margin on a standard US Letter (8.5 x 11 inches) sheet will look very different than the same 1-inch margin on an A4 (210 x 297 mm) page or a legal-sized document. Similarly, switching from portrait to landscape orientation drastically changes the available width for your text and, consequently, how your margins appear.
When you change paper size in Google Docs (also found in the Page Setup menu), the physical dimensions of the page change. This means your fixed margin values will occupy a different proportion of the total page. For instance, if you move from Letter to Legal paper, and keep 1-inch margins, those 1-inch margins will look proportionally smaller because the page is taller. It’s always a good practice to revisit your margins after changing paper size or orientation to ensure the visual balance remains aesthetically pleasing and functional. (See: Importance of clear document formatting.)
For example, if you’re creating a presentation handout that will be printed landscape, you might want to consider slightly wider top and bottom margins to prevent the text from feeling too close to the edges of the shorter side of the page.
13. Accessibility and Margins
Beyond aesthetics and professional appearance, margins play a vital role in document accessibility. For individuals with visual impairments or reading difficulties, sufficient white space around text can significantly improve readability. Cluttered pages with minimal margins can be visually overwhelming and difficult to track.
- Cognitive Load: Ample margins reduce the “busyness” of a page, helping readers focus on the content without feeling overwhelmed by dense blocks of text.
- Eye Tracking: Good margins provide clear boundaries, making it easier for the eye to follow lines of text without jumping or losing its place.
- Annotation Space: Wider margins offer space for readers to make notes, which is especially helpful for students or researchers.
While there aren’t universally mandated accessibility standards for margin sizes, a general guideline is to ensure margins are generous enough to prevent text from feeling cramped. When designing documents for a diverse audience, it’s a good idea to lean towards slightly larger margins rather than smaller ones to enhance overall usability for everyone.
14. Collaborating on Documents with Different Margin Needs
Google Docs shines in its collaborative features, but what happens when multiple authors have different ideas about margins or when an external reviewer needs specific formatting? This is where communication and consistent application of margin rules become crucial.
- Establish Guidelines Early: Before starting a collaborative project, agree on a style guide that includes margin specifications. This prevents last-minute formatting headaches.
- Use “Suggesting” Mode: If a team member needs to comment on margin issues or propose changes, they can use Google Docs’ “Suggesting” mode. This allows them to propose margin adjustments without directly altering the document, and the original author can then accept or reject the suggestions.
- Version History: If someone accidentally messes up the margins, Google Docs’ version history is your best friend. You can revert to an earlier version of the document before the changes were made, saving your work from irreversible formatting errors.
When working on a shared document, remember that any changes you make to the Page Setup (including margins) will affect the entire document for everyone unless you’re specifically using section breaks and applying changes to “This section” only. Clear communication about formatting intentions can prevent a lot of frustration.
15. Margins and Printing Considerations
The digital display of your document isn’t always identical to its printed output, and margins are a prime example of where discrepancies can occur. Printer drivers, physical printer capabilities, and even the paper you use can influence the final printed margins.
- Printer’s Non-Printable Area: Most printers have a small “non-printable” area around the edges of the paper. This means that even if you set your margins to, say, 0.25 inches, the printer might automatically cut off a tiny bit of your content if it falls within this unprintable zone. Always account for this by giving yourself a little extra margin if absolute edge-to-edge printing is critical.
- Print Preview is Your Friend: As mentioned, always use the print preview feature (File > Print, then look at the preview on the right) before sending a document to the printer. This gives you an accurate representation of how your margins will look on paper.
- Scaling Options: In the print dialog, you might see “Scale” options. If your document’s content seems to be cut off, sometimes adjusting the scale (e.g., “Fit to page” or “Custom scale”) can help, though it’s usually better to adjust the document’s margins directly in Page Setup first.
Understanding these printing nuances helps you create documents that not only look good on screen but also translate perfectly to the physical page.
16. Expert Perspectives: Design Principles and Margins
From a graphic design perspective, margins aren’t just empty space; they’re active design elements. Designers often refer to white space as “negative space,” which is just as important as the “positive space” occupied by text and images. Here’s how design principles relate to margins:
- Proportion and Balance: Good margins contribute to the overall balance and proportion of the page. Designers might use principles like the Golden Ratio or the Rule of Thirds to determine ideal margin sizes, creating a harmonious visual flow. For instance, a common design technique is to have larger bottom margins than top margins to ground the content visually.
- Hierarchy: Margins help establish a visual hierarchy. Wider margins around a particular section can subtly emphasize its importance or separate it from surrounding content.
- Branding: In corporate documents, specific margin settings can be part of a brand’s visual identity. Consistent margins across all company documents reinforce professionalism and brand recognition.
Thinking like a designer means viewing margins not as an afterthought, but as a deliberate choice that enhances the overall effectiveness and aesthetic appeal of your document.
17. Future Trends: Responsive Documents and Margins
As documents increasingly move beyond static print to dynamic digital formats, the concept of “margins” is evolving. While Google Docs primarily focuses on print-layout margins, future trends point towards more responsive document design.
- Flexible Layouts: Imagine a Google Doc that automatically adjusts its margins and layout based on whether you’re viewing it on a phone, tablet, or desktop. While not fully implemented for traditional Docs layouts yet, web-based publishing platforms are already doing this.
- Reading Modes: Some platforms offer “reading modes” that strip away unnecessary formatting, often adjusting margins for optimal screen readability.
- AI-Driven Layouts: In the distant future, AI might even suggest optimal margin settings based on your content, target audience, and viewing device.
For now, when you change margins in Google Docs, you’re primarily setting them for a fixed-page layout. But being aware of these trends helps us appreciate the ongoing evolution of document design.
18. Frequently Asked Questions about Changing Margins in Google Docs
Let’s tackle some common questions users have when adjusting margins. (See: Google Docs features and usability.)
Q1: Can I set different margins for odd and even pages, like in a book?
A1: Unfortunately, Google Docs doesn’t natively support different odd/even page margins (often called “mirror margins”) directly within the Page Setup menu like some desktop publishing software. Your best bet for this is to use section breaks very carefully, but even then, it’s a manual and somewhat cumbersome process for extensive documents. For true mirror margins, you might need to use a more advanced word processor or desktop publishing tool.
Q2: Why do my margins sometimes change back after I save and reopen the document?
A2: This is quite rare for Google Docs, as changes are usually saved automatically and persistently. If this happens, double-check that you clicked “OK” in the Page Setup dialog. Also, make sure you’re not accidentally opening an older version of the document from your Drive or if someone else with editing access is reverting changes. Browser issues or extensions could also, on rare occasions, interfere, so try another browser or an incognito window if it persists.
Q3: How do I change margins for just one page?
A3: To change margins for just one page, you’ll need to use section breaks. Insert a “Section break (next page)” before the page you want to modify and another “Section break (next page)” after it. Then, place your cursor within that specific page (which is now its own section), go to Page Setup, adjust the margins, and select “This section” from the “Apply to” dropdown before clicking “OK.”
Q4: My ruler isn’t showing up. How do I enable it?
A4: If you don’t see the ruler, click on “View” in the top menu bar. From the dropdown menu, make sure “Show ruler” has a checkmark next to it. If it doesn’t, click it to enable the ruler. If it’s already checked and still not visible, try refreshing the page or clearing your browser’s cache.
Q5: Can I use centimeters instead of inches for margins?
A5: Yes, Google Docs allows you to enter measurements in either inches or centimeters. You can simply type “2.54cm” instead of “1in” in the margin fields. Google Docs will automatically convert it and display the equivalent in your default unit (which you can change in File > Page setup > Unit). Just be consistent with your chosen unit.
Q6: What’s the difference between adjusting margins and adjusting indents?
A6: Margins define the blank space around the entire page, affecting where the text block starts and ends relative to the page edge. Indents, on the other hand, define the spacing of specific paragraphs or lines of text relative to the current margins. So, margins set the ‘container’ for your text, while indents adjust the content within that container. You can adjust indents using the small triangles on the ruler, independent of the page margins.
Q7: Can I apply margin settings from one document to another?
A7: Not directly as a standalone “margin profile.” However, if you’ve set your preferred margins as the “default” (as described in Section 7), any *new* document you create will use those settings. For existing documents, you’ll need to manually open the Page Setup and adjust the margins, or you could copy the entire content into a new document that already has your default settings.
Q8: My text is getting cut off when I print, even with wide margins. What’s wrong?
A8: This usually points to a printer-specific issue rather than a Google Docs margin problem. Most printers have a small “unprintable area” around the edges.
- First, use Google Docs’ Print Preview (File > Print) to see if the cutoff appears there. If it does, then your margins in Docs might still be too small for your printer’s capabilities, or there’s an issue with scaling.
- If the preview looks fine but the printout is cut off, check your printer settings: look for options like “Fit to page,” “Shrink to fit,” or “Borderless printing” (if your printer supports it and you truly want content to the edge). Sometimes, updating your printer’s drivers can also resolve such issues.
19. Conclusion: The Importance of Proper Margins
Changing margins in Google Docs may seem like a minor detail, but it plays a significant role in how your document is received by its audience. Properly formatted margins contribute to readability, professionalism, and overall presentation. Whether you’re working on a personal project, academic assignment, or business documentation, knowing how to adjust and apply margins effectively can set your work apart.
By following the tips outlined in this guide, you’ll be well-equipped to change margins in Google Docs with confidence and ease. So go ahead, put these skills to use, and elevate your document formatting game!
Trending Now
Frequently Asked Questions
How do I change margins in Google Docs?
To change margins in Google Docs, open your document, click on 'File' in the upper left corner, and select 'Page setup.' In the dialog box, you can adjust the top, bottom, left, and right margin fields to your desired measurements.
What are the default margin settings in Google Docs?
The default margin settings in Google Docs are typically one inch on all sides. However, you can customize these margins based on the specific requirements of your document, such as academic papers or business proposals.
Why are margins important in a document?
Margins are crucial as they provide blank spaces around the text, enhancing readability and ensuring that printed documents do not have text cut off. They also allow space for annotations and can influence the overall presentation of your document.
Can I set different margins for different sections in Google Docs?
Google Docs does not allow for different margins in separate sections within the same document. To achieve different margin settings, you would need to create separate documents or use page breaks to apply different margin settings in a new document.
How do I reset margins to default in Google Docs?
To reset margins to default in Google Docs, go to 'File' > 'Page setup,' and enter one inch for the top, bottom, left, and right margins. Click 'OK' to apply the changes, restoring the document to its standard margin settings.
Have you experienced this yourself? We'd love to hear your story in the comments.