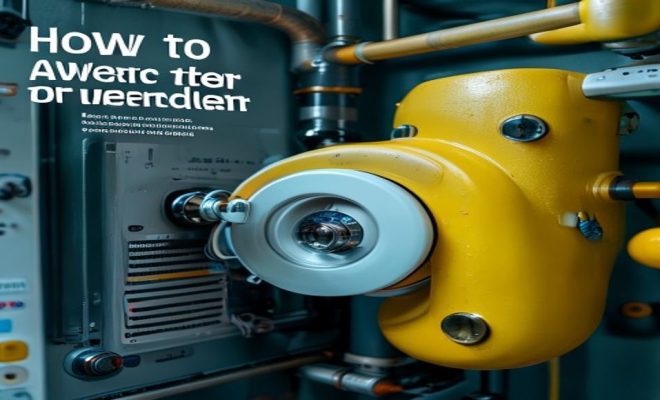
How to replace water heater element
“`html
Water heaters are often the unsung heroes of our homes, providing hot water for everything from showers to washing dishes. However, like any appliance, they may require maintenance and occasional repair. If your water heater is malfunctioning, one common issue could be a faulty heating element. Knowing how to replace the water heater element can save you money and extend the life of your appliance. This comprehensive guide will walk you through the necessary steps, tools, and precautions needed to successfully tackle this DIY project.
1. Understanding Your Water Heater
Before diving into the process of replacing the water heater element, it’s essential to understand how your water heater works. Most residential units are either tank-type or tankless. Tank-type water heaters store a large volume of water and maintain its temperature, while tankless models heat water on demand. Each system utilizes one or more heating elements, typically metal rods that heat the water through electrical resistance.
The heating elements can wear out over time, leading to insufficient heating or even complete failure. Recognizing the signs of a faulty element—like inconsistent water temperatures or strange noises—can help you quickly identify when it’s time for a replacement.
2. Signs You Need to Replace the Water Heater Element
Several indicators can signal that your water heater element is on its last legs. If you notice any of the following, it might be time to replace your water heater element:
- Inconsistent Water Temperature: Fluctuating water temperatures can indicate that one of the heating elements is failing. If you find that your hot water runs out quickly or takes too long to heat up, it’s worth checking the elements.
- No Hot Water: A complete lack of hot water is a clear sign that one or both elements may be defective. This can be caused by a burned-out element or issues with wiring or power supply.
- Strange Noises: If you hear popping or rumbling noises coming from your water heater, it could suggest sediment build-up, which can damage heating elements and lead to inefficiency.
- Visible Corrosion: Regular inspections of the heating elements can reveal signs of corrosion or damage. If you see rust or physical deterioration on the elements, it’s time to replace them.
Being attentive to these signs can help you avoid further damage to your water heater and save on expensive repairs down the line.
3. Tools and Materials Needed
Before beginning the replacement process, gather the necessary tools and materials. Having everything ready will make the job easier and more efficient. Here’s a list of what you’ll need:
- Socket Set: A socket set will help you remove the old heating elements.
- Wrench: A wrench may be needed for tight spaces and stubborn fittings.
- Screwdriver: Depending on your water heater model, a screwdriver may be necessary to detach the access panel.
- New Heating Element: Ensure you purchase the correct type and size for your specific water heater model.
- Multimeter: This tool will help you test the electric current and ensure the power is off before starting work.
- Bucket or Towel: You’ll want to catch any residual water when removing the heating element.
- Safety Gear: Gloves and goggles can protect you from electric shocks and debris.
Having these tools at hand will prepare you for a smooth replacement process.
4. Safety Precautions
Safety should be your top priority when working with electrical appliances. Before starting any work on your water heater, follow these important safety precautions:
- Turn Off the Power: Locate the circuit breaker for your water heater and switch it off. This prevents any risk of electrical shock.
- Turn Off the Water Supply: Shut off the cold water supply to the heater to avoid leaks and spills during the replacement.
- Drain the Water Heater: If necessary, drain the tank to avoid any hot water spills. Connect a hose to the drain valve and let the water flow into a bucket until it’s empty.
- Use Non-Conductive Tools: Whenever possible, use non-conductive tools to reduce the risk of electric shock.
By taking these safety measures, you can work confidently, minimizing risks and ensuring a successful replacement. (See: Energy Efficiency in Water Heating.)
5. Steps to Replace the Water Heater Element
Now that you’re set up with the right tools and safety precautions, it’s time to replace the water heater element. Follow these steps carefully to ensure a successful installation:
- Access the Heating Element: Remove the cover panel of the water heater to reach the heating element. Depending on your model, you may need to unscrew it.
- Disconnect the Wires: Carefully note how the wires are connected to the old heating element. Disconnect them using your screwdriver or wrench.
- Remove the Old Heating Element: Use your socket wrench to unscrew and remove the old element from the tank.
- Install the New Element: Take your new heating element and thread it into the tank. Ensure it’s tightened securely but avoid over-tightening, which can cause damage.
- Reconnect the Wires: Follow your notes to reconnect the wires to the new element, ensuring a secure connection.
- Close Up the Heater: Replace the access panel and secure it with screws.
- Refill the Tank: Turn the cold water supply back on and allow the tank to refill before switching the power back on. This prevents damage to the new element.
- Restore Power: Once the tank is full, switch the power back on at the circuit breaker.
Following these steps will ensure that your new water heater element is installed properly and safely.
6. Testing the New Heating Element
After you’ve replaced the water heater element, testing it is vital to ensure it’s functioning correctly. Here’s how to do it:
- Turn On the Power: Flip the circuit breaker back on and wait for a few minutes.
- Check the Temperature: Run hot water to test if it reaches the desired temperature. If the water heats up adequately, your installation is likely successful.
- Use a Multimeter: If there’s still an issue, use a multimeter to check the voltage at the heating element. If it reads zero, you may need to investigate further electrical issues.
Proper testing will help you identify any lingering problems and confirm that your new water heater element works as intended.
7. Common Mistakes to Avoid
As with any DIY project, there are common pitfalls to watch out for when replacing your water heater element. Avoid these mistakes to ensure a smooth process:
- Skipping Safety Checks: Always ensure the power is off before starting work. Neglecting this can lead to serious injury.
- Not Draining the Tank: Failing to drain the tank can result in spills and complications during the replacement process.
- Improper Sizing: Using the wrong size or type of heating element is a frequent mistake. Always check your water heater manual for specifications.
- Overtightening Connections: While it’s important to secure the connections, overtightening can cause damage to the element or tank.
Being mindful of these common mistakes can save you time and frustration, ensuring a successful repair.
8. When to Call a Professional
While many homeowners can successfully replace a water heater element, there are situations when calling a professional might be the best option. Consider seeking expert help if:
- You Encounter Complex Wiring: If the wiring appears complicated or you’re unsure about making connections, it’s safer to hire a licensed electrician.
- Persistent Issues Remain: If you’ve replaced the element but still experience problems, there may be an underlying issue that requires professional assessment.
- You’re Uncomfortable with DIY Projects: If you feel uneasy about tackling the job yourself, don’t hesitate to call a plumber. The cost of hiring help may be worth the peace of mind.
Knowing when to ask for help can prevent further complications and ensure your water heater operates effectively.
9. The Importance of Regular Maintenance
Replacing your water heater element is just one part of maintaining a well-functioning system. Regular maintenance plays a crucial role in extending the life of your water heater and preventing costly repairs. Here are some maintenance tips:
- Flushing the Tank: Flushing your water heater once a year can help remove sediment build-up, improving efficiency and prolonging the life of the heating elements.
- Checking the Anode Rod: This rod helps prevent corrosion inside the tank. Inspecting and replacing it every few years can enhance your water heater’s durability.
- Insulating Pipes: Insulating hot water pipes can help maintain temperature and reduce energy costs.
By incorporating regular maintenance into your routine, you can avoid unexpected issues and keep your water heater running smoothly for years to come.
10. Understanding Different Types of Heating Elements
When planning to replace a water heater element, it’s crucial to understand that not all heating elements are created equal. The type of element you choose can affect your water heater’s efficiency and heating capabilities. Here are the two main types: (See: Home Water Treatment Guidelines.)
- Standard Heating Elements: These are the most commonly used elements, typically made from copper or stainless steel. They heat water through electrical resistance. Standard elements are usually less expensive and work well for most residential needs.
- Low-Watt Density Heating Elements: These elements are designed to heat water more efficiently. They have a larger surface area, which helps distribute heat evenly and reduces the chances of burning out. They are especially beneficial in locations with hard water, as they are less prone to mineral build-up.
Choosing the right type of heating element involves considering factors such as the hardness of your water, the size of your household, and your budget. Consulting with a professional or a knowledgeable sales associate can help you make the right decision.
11. Cost Considerations
Replacing a water heater element can be a cost-effective solution compared to replacing the entire unit. However, it’s essential to consider the overall cost involved in the process:
- Cost of the Heating Element: Depending on the type and brand, heating elements can range from $20 to $50 each. Low-watt density options may be slightly more expensive but offer long-term savings through improved efficiency.
- Labor Costs (if hiring a professional): If you choose to hire a plumber, labor costs can vary widely based on your location and the complexity of the job. Expect to pay between $50 and $150 for professional installation.
- Additional Repairs or Parts: Sometimes, replacing the heating element may uncover other issues, such as corroded wiring or a malfunctioning thermostat, which may require additional repairs and costs.
It’s a good idea to budget for these potential costs before starting the project.
12. Frequently Asked Questions (FAQs)
1. How often should I replace my water heater element?
The lifespan of a water heater element can vary, but they typically last between 6 to 12 years. Regular maintenance and water quality can influence their longevity. If you notice signs of wear or decreased performance, consider replacing them sooner.
2. Can I replace just one heating element in a dual-element water heater?
Yes, you can replace just one heating element in a dual-element system. However, if one element has failed, the other may not be far behind. It’s often a good idea to replace both elements at the same time to ensure consistent performance.
3. Will replacing the heating element increase my energy efficiency?
Yes, if your old heating element was worn out or damaged, replacing it with a new, efficient element can improve your water heater’s energy efficiency. This can lead to lower utility bills over time.
4. What is the best time of year to replace a water heater element?
While you can replace a heating element any time of the year, many homeowners prefer to do this in the spring or fall when water heater usage may be lower. This can help avoid any inconvenience during peak usage times.
5. What should I do if I still have problems after replacing the element?
If you continue to experience issues after replacing the heating element, it’s advisable to check the thermostat, wiring, and circuit breaker. If you’re unsure, calling a professional can help diagnose any underlying problems.
6. Can I do this myself, or should I hire a professional?
Whether to tackle this project yourself or hire a professional depends on your comfort level with DIY projects and electrical systems. If you have experience, you may find the replacement straightforward. Otherwise, it’s wise to consult a qualified plumber. (See: Understanding Water Heater Technology.)
7. How long does it take to replace a water heater element?
Replacing a water heater element typically takes about 1 to 2 hours, depending on your skill level and the specific model of your water heater. Allow extra time for any unforeseen complications.
8. Are there any warranties on heating elements?
Many heating elements come with manufacturer warranties, which can vary from one to several years. Always check the warranty details before purchasing to ensure you’re covered in case of defects.
13. Understanding the Risks of DIY Water Heater Repairs
While DIY repairs can save you money, they come with risks, particularly when dealing with water heaters. If not handled properly, you could face leaks, electrical hazards, or even fire risks. If you’re not confident in your ability to replace the element safely, consider the potential costs of damages versus hiring a professional.
14. Environmental Impact of Water Heater Elements
When replacing your water heater element, consider the environment. Old heating elements can be recycled, and many retailers offer recycling programs. Additionally, opting for energy-efficient heating elements can reduce your overall energy consumption, helping to lower your carbon footprint.
15. Best Practices for Disposal of Old Heating Elements
Once you’ve replaced your old heating element, it’s important to dispose of it properly. Harmful materials can sometimes be found in heating elements, and local regulations may require you to dispose of them in a specific manner. Check with your local waste management facility for guidance on proper disposal methods.
16. Conclusion
Understanding how to replace a water heater element can empower you to handle one of the most common maintenance tasks for your home. By being proactive and attentive to your water heater’s needs, you can ensure it operates efficiently and lasts for years. Whether you choose to take on this task yourself or enlist the help of a professional, having the right knowledge and tools is essential for a successful repair. Regular maintenance, timely replacements, and being aware of the signs of malfunction will keep your home comfortable and your water heater running smoothly.
“`
Trending Now
Frequently Asked Questions
How do I know if my water heater element is bad?
Signs of a failing water heater element include inconsistent water temperatures, a complete lack of hot water, and strange noises like popping or rumbling. If you experience these issues, it's likely time to inspect or replace your heating element.
What tools do I need to replace a water heater element?
To replace a water heater element, you typically need a socket wrench, a screwdriver, a multimeter for testing, and safety gear such as gloves and goggles. Having these tools ready will help you complete the job efficiently.
Can I replace a water heater element myself?
Yes, replacing a water heater element is a manageable DIY project if you follow the proper steps and safety precautions. Understanding your water heater type and having the right tools will make the process easier.
How long does it take to replace a water heater element?
Replacing a water heater element usually takes about 1 to 2 hours, depending on your experience level and the complexity of the job. Allow time for water to cool and follow the necessary steps carefully.
What happens if I don't replace a faulty water heater element?
If you don't replace a faulty water heater element, you may continue to experience inconsistent hot water, higher energy bills, and potential damage to your water heater. Ignoring the problem can lead to more significant repairs or complete appliance failure.
What’s your take on this? Share your thoughts in the comments below — we read every one.