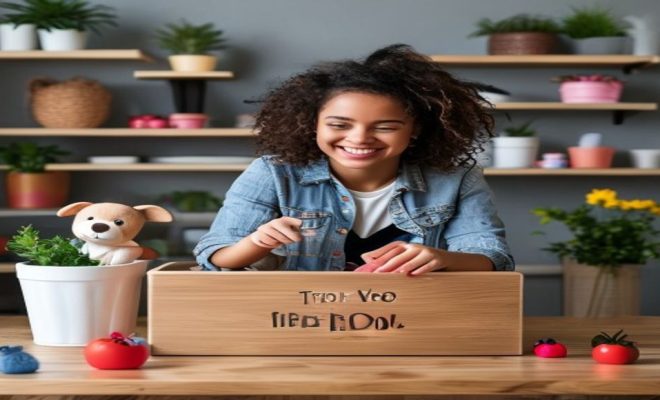
How to make toy box
“`html
Creating a toy box can be a rewarding project that not only declutters your space but also adds a personal touch to your child’s room. In this comprehensive guide, we’ll explore how to make a toy box, from selecting the right materials to finishing touches that make it truly your own. Whether you’re an experienced DIYer or just starting with crafting, this guide will provide you with the insights needed to embark on your toy box project.
1. Why Build a Toy Box?
Before jumping into the nitty-gritty of how to make a toy box, let’s consider why it’s a valuable addition to any home with children. A toy box serves multiple purposes: it organizes clutter, provides a designated storage space for toys, and can often double as a piece of furniture, such as a bench or a decorative chest.
Beyond functionality, a well-made toy box can enhance the aesthetic of a child’s room, fitting seamlessly into various decor styles. Plus, involving children in the process of choosing design elements can make them feel more responsible for their belongings.
2. Materials You’ll Need
When figuring out how to make a toy box, the material you choose can determine both durability and design. The most common materials include:
- Wood: Plywood and solid wood are popular choices due to their sturdiness and ease of customization.
- Plastic: Lightweight and easy to clean, plastic boxes are suitable for younger children.
- Fabric: Soft-sided toy boxes can be made from durable fabric and are easy to move around.
- Cardboard: This is a budget-friendly option but less durable and suitable for temporary use.
Consider the age of your child and the purpose of the toy box when selecting materials. A wooden box might be more suitable for older children while a fabric option can be ideal for toddlers.
3. Essential Tools for the Project
To efficiently construct your toy box, having the right tools is crucial. Here are the essential tools you’ll need:
- Power Drill: Use it for drilling holes and securing screws.
- Saw: A circular saw or jigsaw will help you cut your materials to size.
- Screwdriver: A standard or electric screwdriver will help in assembly.
- Measuring Tape: Accurate measurements are critical for a well-fitting design.
- Sandpaper: Ensures that your toy box has a smooth finish, preventing splinters.
Gathering these tools beforehand will streamline the process and increase the efficiency of your project.
4. Deciding on Design
Design is key when learning how to make a toy box. The design you select should consider functionality, size, and style. Here are some design elements to think about:
- Size: Measure the available space in the room to determine the dimensions of your toy box. Ensure it’s large enough to accommodate toys without overwhelming the space.
- Shape: Traditional rectangular boxes are common, but consider rounded edges for safety or even themed shapes like animals or cars.
- Color and Finish: Choose a color that complements the room. Paint, stain, or even decals can personalize the toy box.
Sketching your ideas before starting can help visualize the final product and make the building process smoother.
5. Step-by-Step Instructions
Now that you’ve prepared, it’s time to dive into how to make a toy box. Here’s a step-by-step process:
- Measure and Cut: Based on your design, measure and cut your materials. For a wooden box, you’ll typically need a top, bottom, two sides, and a back.
- Assemble the Box: Start by attaching the sides to the bottom using wood screws. Drill pilot holes to prevent splitting.
- Add the Back: Secure the back panel to the assembled sides and base.
- Attach the Top: Depending on your design, you can either hinge it or make it removable.
- Finish the Edges: Use sandpaper to smooth out all edges, ensuring safety for little hands.
- Paint or Stain: Apply your chosen finish, allowing adequate drying time before use.
Taking your time with each step will ensure a quality finished product that stands the test of time.
6. Safety First
When learning how to make a toy box, safety should be a top priority. Ensuring your toy box is safe involves several considerations: (See: CDC on lead prevention in toys.)
- Materials: Always use non-toxic paints and finishes to protect children from harmful chemicals.
- Design: Avoid sharp edges and ensure that the lid is light enough to prevent injury. Consider adding a slow-close hinge to prevent slamming.
- Stability: Ensure the box is sturdy and won’t tip over easily when children are reaching for toys.
By prioritizing safety, you can create a toy box that is not only functional but also secure for your child.
7. Decorating Your Toy Box
Once the basic structure is complete, it’s time to personalize your toy box. This is where you can really let creativity shine. Here are some ideas:
- Stickers and Decals: Add fun stickers or decals that reflect your child’s interests, such as superheroes or animals.
- Paint Designs: Consider painting fun patterns like stripes, polka dots, or even a mural that resonates with your child’s theme.
- Labels: Adding labels to categorize toys can help children learn organization while giving a neat appearance.
Remember, the goal is to make the toy box inviting and reflective of your child’s personality, encouraging them to use it regularly.
8. Maintenance Tips
After investing time and effort into how to make a toy box, maintaining it is essential for longevity. Here are some maintenance tips:
- Regular Cleaning: Dust and wipe down the toy box regularly to prevent buildup from toys.
- Check for Damage: Periodically inspect for any signs of wear or damage, particularly if it’s used frequently.
- Reapply Finish: Depending on the material, you may need to reapply paint or varnish over time to keep it looking fresh.
Taking these steps will help ensure your toy box remains a cherished part of your child’s space for years to come.
9. Alternative Ideas for Toy Storage
If building a toy box doesn’t quite fit your needs, don’t worry! There are several alternative options for toy storage that can be just as effective:
- Baskets: Versatile and stylish, baskets can be used to store toys of all sizes and shapes.
- Wall Shelves: Utilizing vertical space with shelves can keep toys organized and easily accessible.
- Storage Ottomans: These multifunctional pieces can provide seating while also hiding toys inside.
Explore different options to find what works best for your home and personal style.
10. Final Thoughts
Making a toy box is not merely a DIY project; it’s an opportunity to enhance your child’s space, promote organization, and encourage responsibility in a fun way. As you embark on your journey of how to make a toy box, keep in mind the importance of safety, creativity, and durability.
Whether you choose a traditional wooden box or a quirky fabric solution, the key is to create a functional and inviting space for your child’s toys. So gather your materials, unleash your creativity, and enjoy the process. You’ll be building not just a toy box, but also memories that last a lifetime.
11. Choosing the Right Size for Your Toy Box
When figuring out how to make a toy box, one of the most important aspects is choosing the right size. The size of the toy box will not only dictate how many toys it can hold but also affect the usability of the space. Here are some factors to consider:
- Room Size: In a small room, a large toy box may overwhelm the space. Conversely, if the room is spacious, you might opt for a larger model that can accommodate more toys.
- Age of the Child: For toddlers, a smaller toy box can be ideal. It allows them to reach in and pull out toys without much hassle. For older children, you may want a larger box that can store games, books, and other equipment.
- Future Needs: Think about how your child’s toy collection may grow over time. It might be worthwhile to invest in a larger box now, rather than needing to build another one later.
Ultimately, consider how the toy box will fit into your home’s layout and how often your child uses it.
12. Incorporating Educational Elements
While a toy box is primarily for storage, it can also provide educational benefits. Here are ways to incorporate learning into your toy box:
- Alphabet or Number Designs: Paint or attach letters and numbers on the sides. This can be an excellent visual aid for young children learning their ABCs or counting.
- Color Coding: Use different colors for various sections of the toy box to teach children about organization and categorization, where each color represents a type of toy.
- Interactive Labels: Instead of just labeling with words, use pictures. This can be an engaging way for children to learn what belongs where.
These small touches can make the toy box more than just a storage solution; it becomes a learning tool in your child’s daily life.
13. Engaging Kids in the DIY Process
Engaging your kids in the DIY process of how to make a toy box can turn this project into a memorable family activity. Here are a few ways to involve them: (See: NIH on toy safety standards.)
- Choosing Colors and Designs: Let your child pick out colors or themes that resonate with them. This ownership can make them more excited about using the toy box.
- Decorating Together: Once the main construction is done, have a decorating day. You can create stencils, use stickers, or even paint together.
- Organization Lessons: Teach your child how to organize their toys as you work. Show them how to categorize items, which can help them develop organizational skills.
Making it a family project not only builds the toy box but also strengthens your bond with your child.
14. Tips for Customizing Your Toy Box
Customization adds a personal touch to your toy box. Here are some tips to consider:
- Themed Boxes: If your child loves dinosaurs, you could paint dinosaurs on the box or use fabric with a dinosaur pattern.
- Personalized Name Plate: Add a nameplate with your child’s name. This helps them feel a sense of ownership and pride in their space.
- Unique Handles: Swap out standard handles for something unique, like rope handles or themed knobs that match the design.
Customizing your toy box can make it a unique piece that stands out in the room while being meaningful to your child.
15. Frequently Asked Questions (FAQ)
1. What is the best material for a toy box?
The best material depends on your needs. Wood is durable and customizable, while plastic is lightweight and easy to clean. Fabric options are softer and often easier for young children to handle.
2. How can I ensure my toy box is safe for my child?
Use non-toxic materials, avoid sharp edges, and ensure it has a slow-close lid to prevent accidents. Always double-check for stability to prevent it from tipping over.
3. Can I use recycled materials to make a toy box?
Absolutely! Using recycled wood or repurposing old furniture can be a sustainable way to create a toy box while being cost-effective.
4. How do I clean and maintain a wooden toy box?
Regularly wipe it down with a damp cloth. If you notice scratches, sand the area lightly and reapply finish as needed to keep it looking fresh.
5. Is it easy to disassemble a toy box if needed?
It depends on how you construct it. If you use screws instead of nails, it will be easier to disassemble. Consider this if you plan to move or reconfigure the toy box later.
6. How can I decorate a toy box on a budget?
Consider using paint in your existing color palette, DIY decals, or inexpensive stickers. You can also use fabric remnants for a fun lining or covering.
7. Can I make a toy box with compartments?
Yes! You can create dividers inside the box to separate different types of toys, making it easier for children to organize their belongings.
8. What age is appropriate for a toy box?
A toy box can be introduced as soon as children start collecting toys, typically around 1-2 years old. Ensure it’s age-appropriate in size and safety features.
9. Where should I place the toy box?
Place it in a spot that is easily accessible to your child. This could be in their bedroom or a playroom, depending on where they spend the most time playing. (See: AP News on child safety in toys.)
10. How can I encourage my child to use the toy box?
Make it part of their routine. Encourage them to put toys away when playtime is over. You could also turn it into a game or challenge to keep things fun.
16. Exploring DIY Toy Box Kits
If you’re looking for an easier alternative to designing and building a toy box from scratch, consider purchasing a DIY toy box kit. These kits come with pre-cut materials and detailed instructions, making it a much more straightforward process. Here’s what to keep in mind:
- Ease of Assembly: Kits often include all necessary components, which can save time and reduce the frustration that comes with measuring and cutting.
- Quality Assurance: Many kits are produced by reputable manufacturers, ensuring quality materials that are safe and durable.
- Customization Options: Some kits allow for customization, letting you paint or decorate as you see fit, which can still involve your child in the creative process.
DIY kits can be a great solution for busy parents or those who may not have all the tools or skills needed for a full build.
17. Learning from Other Projects
Before diving into your own toy box project, it can be helpful to learn from other DIY projects. Websites like Pinterest or DIY blogs often showcase various designs, tips, and mistakes to avoid. Here’s how to get started:
- Explore Different Designs: Look for diverse styles such as modern, rustic, or playful themes to inspire your own design.
- Read Reviews and Comments: Many DIY enthusiasts share their experiences, including what worked well and what didn’t, which can be invaluable for your project.
- Join DIY Forums: Online communities can provide support and advice, plus offer a space to share your own experiences once your toy box is complete.
Learning from others can give you confidence and inspiration as you embark on your toy box creation journey.
18. Celebrating the Finished Product
Once your toy box is complete, don’t forget to celebrate! This can be a great way to teach your child the value of hard work and accomplishment. Here are some fun ideas:
- Reveal Party: Gather family members for a small reveal. Let your child showcase the toy box and explain their favorite features.
- Fill the Toy Box Together: Spend some time with your child filling the toy box with their favorite toys. This activity can reinforce the importance of organization.
- Take Photos: Capture the moment. Take photos of your child with their new toy box to create lasting memories of this DIY project.
Celebrating the completion of the toy box creates a special moment that you and your child can cherish together.
Making a toy box is not merely a DIY project; it’s an opportunity to enhance your child’s space, promote organization, and encourage responsibility in a fun way. As you embark on your journey of how to make a toy box, keep in mind the importance of safety, creativity, and durability.
Whether you choose a traditional wooden box or a quirky fabric solution, the key is to create a functional and inviting space for your child’s toys. So gather your materials, unleash your creativity, and enjoy the process. You’ll be building not just a toy box, but also memories that last a lifetime.
“`
Trending Now
Frequently Asked Questions
What materials do I need to make a toy box?
To make a toy box, you can choose from various materials such as wood, plastic, fabric, or cardboard. Wood is durable and customizable, while plastic is lightweight and easy to clean. Fabric options are soft and portable, and cardboard is budget-friendly but less durable.
Why should I build a toy box?
Building a toy box helps organize clutter, provides designated storage for toys, and can serve as functional furniture. It enhances the aesthetic of a child's room and allows children to feel responsible for their belongings by involving them in the design process.
What tools do I need to build a toy box?
Essential tools for building a toy box include a power drill, saw, measuring tape, sandpaper, and safety gear. Having these tools will help ensure that your construction process is efficient and safe.
Can I make a toy box from cardboard?
Yes, you can make a toy box from cardboard as it is a budget-friendly option. However, keep in mind that cardboard is less durable and is more suitable for temporary use compared to other materials like wood or plastic.
What is the best toy box for toddlers?
For toddlers, a fabric toy box is often the best choice as it is soft-sided, lightweight, and easy to move. Additionally, fabric boxes are safe for young children and can be easily cleaned, making them practical for little ones.
What’s your take on this? Share your thoughts in the comments below — we read every one.