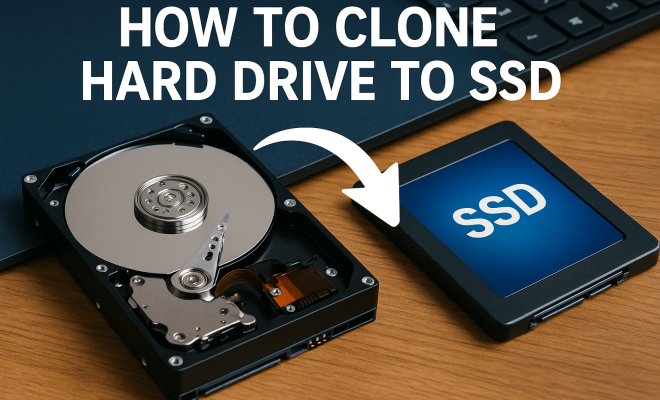
How to clone hard drive to SSD
“`html
Upgrading your storage from a traditional hard drive (HDD) to a solid-state drive (SSD) can dramatically improve your computer’s performance. One of the most efficient methods to make this transition is to clone hard drive to SSD. This process allows you to transfer your entire operating system, applications, and files without the hassle of reinstalling everything from scratch. In this article, we’ll delve into the ins and outs of cloning your hard drive to SSD, discussing methods, tools, benefits, and tips to ensure a smooth transition.
1. Understanding the Need for SSDs
Before diving into the cloning process, it’s essential to understand why SSDs are so advantageous compared to traditional HDDs. SSDs use flash memory to store data, which means they have no moving parts. This results in faster data access speeds, quicker boot times, and a more responsive system overall. For instance, SSDs can read data at speeds of up to 550 MB/s, while HDDs typically max out around 150 MB/s. This significant difference can enhance productivity and gaming experiences.
Moreover, SSDs are more durable and energy-efficient. With no moving components, they’re less susceptible to mechanical failures. This durability makes them ideal for mobile devices and laptops, which face more physical movement than desktops. If you’ve ever experienced the dreaded click of death from an HDD, you’ll appreciate the reliability SSDs offer.
In addition to performance and durability, SSDs have become more accessible in terms of price. While they were once considered a luxury, the cost of SSDs has decreased significantly in recent years, making them a viable option for everyday users. In fact, according to a report from Statista, the average price per gigabyte of SSD storage has dropped from over $1 in 2015 to around $0.10 in 2023. This trend indicates that upgrading to an SSD is not only beneficial for performance but also more affordable than ever.
2. Preparing for the Cloning Process
Before you begin cloning your hard drive to SSD, proper preparation is key. Start by backing up your data. Even though cloning is generally safe, there’s always a risk of something going wrong. A backup ensures that your data remains intact.
Next, make sure your SSD is compatible with your computer. Check the connection type (SATA, NVMe, etc.) and ensure you have the necessary cables and tools. Additionally, it’s crucial to have enough space on your SSD to accommodate your HDD’s data. An SSD that is smaller than your current HDD won’t work unless you selectively clone only certain partitions or files.
Another important aspect of preparation is to check for any updates for your cloning software and the SSD itself. Manufacturers often release firmware updates that can enhance performance and compatibility. Installing these updates before initiating the cloning process can prevent potential issues down the line.
Also, consider doing a quick cleanup of your HDD. Deleting unnecessary files and programs before cloning can not only speed up the cloning process but also ensure that you transfer only the data you truly need to your new SSD. This proactive step can lead to a more organized and efficient computing experience.
3. Choosing the Right Cloning Software
The next step in the process is selecting the right software to clone your hard drive to SSD. There are several reliable cloning programs available, both free and paid. Popular options include:
- Macrium Reflect: A free tool with a user-friendly interface that offers both cloning and imaging features.
- Acronis True Image: A comprehensive backup solution that includes cloning capabilities, but it requires a purchase.
- EaseUS Todo Backup: Known for its straightforward process, this tool offers free and paid versions depending on the features you need.
- Clonezilla: A powerful open-source option, but it may have a steeper learning curve due to its text-based interface.
When selecting software, consider your specific needs, such as whether you want additional features like backup or recovery options. Reading user reviews and tutorials can also provide valuable insights into the easiest and most effective options.
It’s also worth noting that some SSD manufacturers provide their own cloning software that’s specifically designed for their drives. For example, Samsung offers the Samsung Data Migration tool, which is optimized for their SSDs. Using manufacturer-specific software can sometimes yield better results and compatibility.
If you’re unsure which option may work best for you, consider trying out a few different software options. Most cloning tools offer free trials or limited functionality versions that allow you to test the interface and features before committing to a purchase. (See: Solid-state drive overview.)
4. The Cloning Process Step-by-Step
Once you’ve prepared your system and chosen your cloning software, it’s time to proceed with the cloning process. While each software has its unique interface and options, the general steps are typically the same:
- Install the Cloning Software: Download and install the cloning software of your choice on your computer.
- Connect the SSD: Make sure your SSD is connected to your computer, either internally or through a USB enclosure.
- Launch the Cloning Tool: Open the software and select the option to clone a disk or drive.
- Select Source and Destination Drives: Choose your HDD as the source drive and the SSD as the destination. Ensure you’ve selected the correct drives to prevent data loss.
- Configure Cloning Options: Depending on your software, you may have options to adjust settings like partition sizes or to perform a sector-by-sector clone.
- Start the Cloning Process: Begin the cloning process and wait for it to complete. This could take anywhere from a few minutes to several hours, depending on the amount of data you are transferring.
- Verify the Clone: Once the process is complete, it’s a good idea to use the software to verify that the clone was successful.
Following these steps will help ensure that your hard drive is cloned correctly to your new SSD. However, if you’re transferring to a larger SSD, you may need to adjust the partitions afterward to take full advantage of the additional space.
Many cloning tools provide an option to resize partitions during the cloning process, allowing you to maximize the available space. This feature is particularly useful when upgrading to a substantially larger SSD.
5. Post-Cloning Adjustments
After successfully cloning your hard drive to SSD, a few adjustments may be necessary to optimize your new drive. First, you should set your SSD as the primary boot device in your BIOS settings. This step is crucial to ensure your operating system loads from the SSD and not the old HDD.
Next, consider enabling the TRIM command if it isn’t already activated. TRIM helps maintain SSD performance over time by allowing the operating system to inform the SSD which blocks of data are no longer in use, thus optimizing storage space. You can usually enable TRIM through your SSD management software or operating system settings.
Additionally, you might want to check your SSD’s firmware version and update it if necessary. Keeping the firmware up to date can enhance performance and reliability, as manufacturers often release updates that fix bugs or improve efficiency.
Another important step is to configure your system to prevent unnecessary writes to the SSD. This can involve disabling features like hibernation and reducing the frequency of system restore points. By minimizing unnecessary write operations, you can extend the lifespan of your SSD.
6. Common Issues During Cloning
While cloning your hard drive to SSD is generally a straightforward process, there can be complications. One common issue is the destination SSD not showing enough space due to hidden or unallocated partitions. If your SSD is smaller than your HDD, you may need to manually adjust which files or partitions to clone to fit into the available space.
Another issue may arise from software limitations. Some cloning tools may not support certain file systems or partition schemes. It’s essential to ensure that your software is compatible with the configurations and operating systems you’re working with. If you encounter errors, consult the software’s troubleshooting guide or forums for potential fixes.
If you experience a failure during the cloning process, don’t panic. Restarting your computer and attempting the cloning process again can sometimes resolve temporary issues. Additionally, ensure that both your HDD and SSD are functioning correctly without any hardware failures.
Lastly, be aware of potential issues with Windows activation. After cloning, some users may find that Windows requires re-activation due to the change in hardware. If you encounter this, simply follow the prompts to reactivate your copy of Windows using your original product key.
7. Benefits of Cloning Over Fresh Install
You might wonder why you should clone your hard drive to SSD instead of performing a fresh installation of your operating system and programs. The primary advantage of cloning is convenience. Cloning transfers all your settings, applications, and files seamlessly, saving you significant time and effort.
Additionally, if you have specific software configurations or customizations, a fresh installation would require you to redo all of that setup. With cloning, you can immediately benefit from an SSD’s speed without the hassle of reinstalling everything from scratch. For users with extensive software or games, cloning is often the preferred choice.
Statistically speaking, many users report that the process of cloning saves them several hours compared to a fresh installation. According to a survey conducted by TechRadar, approximately 85% of users preferred cloning as their method of migrating to SSD due to time efficiency and ease of use. (See: What is a solid-state drive?.)
It’s important to mention that while cloning offers numerous benefits, it may carry over any existing issues from your old HDD. If your HDD had problems like malware or corrupted files, these can also transfer to the SSD. In such cases, a fresh installation might be preferable to ensure a clean slate.
8. Maintaining Your SSD for Longevity
Once you’ve cloned your hard drive to SSD and are enjoying the performance benefits, it’s essential to maintain your SSD properly for longevity. Regularly monitor the drive’s health using tools provided by the manufacturer or third-party applications. These tools can track wear levels and predict when the drive might fail.
It’s also a good practice to avoid filling your SSD to capacity. Keeping around 10-20% of the drive free can help maintain speed and prevent performance degradation. Regularly deleting unnecessary files and uninstalling unused applications will help keep your SSD running smoothly.
Additionally, consider enabling power-saving features on your SSD. Most SSDs have built-in power management settings that help optimize power consumption, especially on laptops. Lowering power consumption can reduce wear and extend the overall lifespan of the drive.
Another aspect of SSD maintenance is performing regular backups. While SSDs are more reliable than HDDs, no storage solution is infallible. Keeping a regular backup schedule can ensure that your data is safe in case of unexpected drive failure.
9. Alternatives to Cloning
If cloning doesn’t seem like the right option for you, there are alternatives to consider. One such method is to perform a fresh installation of your operating system directly onto your SSD. This option allows for a clean slate, free from the clutter or potential issues that may have accumulated over time on your HDD.
However, keep in mind that a fresh install also means you’ll need to reinstall all your applications and transfer your files manually. This process can be time-consuming, especially if you have a lot of data. Another alternative is using cloud storage solutions for important files, allowing you to start fresh without the burden of physical data transfer.
Additionally, some users opt for a hybrid approach. They may choose to install only essential applications fresh on the SSD while performing a selective cloning of key data files from the HDD. This method can help strike a balance between the efficiency of cloning and the cleanliness of a fresh installation.
For users who are concerned about potential legacy issues, using a virtual machine (VM) can also be an option. By running older programs in a VM, you can avoid transferring unwanted data while still retaining access to necessary software.
10. Frequently Asked Questions (FAQ)
What is the difference between cloning and imaging a drive?
Cloning creates an exact, usable copy of a drive, which can be booted immediately after the process. Imaging, on the other hand, creates a compressed file backup of the drive’s contents, which typically requires restoration to a drive before it can be used.
Can I clone a larger HDD to a smaller SSD?
Yes, but only if the data being cloned fits within the smaller SSD’s available space. You can selectively clone only certain files or partitions to achieve this. (See: Solid-state drive research topics.)
How long does the cloning process take?
The duration of the cloning process depends on the amount of data being transferred and the speed of both the HDD and SSD. It can take anywhere from a few minutes to several hours. Generally, faster SSDs with a higher data transfer rate will complete the cloning process quicker.
Will cloning my hard drive transfer all my software licenses?
Most software licenses tied to your hardware will typically transfer during cloning. However, some applications may require re-activation or a new license if they detect a significant hardware change.
What should I do if my SSD is not recognized after cloning?
If your SSD isn’t recognized, ensure it’s properly connected and powered. You can also access the BIOS/UEFI settings to check if the SSD is detected there. If problems persist, you may need to troubleshoot the cloning process or format the SSD.
11. What to Expect After Cloning
After cloning your hard drive to an SSD, you’ll notice several immediate performance improvements. Boot times will be significantly reduced, often taking less than 30 seconds compared to the minute or more with an HDD. Applications will launch faster, and file transfers will occur in a fraction of the time. In benchmarks, users have reported applications loading up to 70% faster on SSDs compared to their previous HDDs.
However, there can be some adjustment periods. For example, if you were accustomed to slower speeds, the sudden improvements might take some getting used to. You may find yourself clicking on applications faster than they can load, leading to an entirely new experience with your machine. It’s essential to reset your expectations and explore the enhanced capabilities your new SSD offers.
Additionally, some users notice that their systems feel more stable and responsive, especially during intensive tasks like gaming or video editing. This is due to the SSD’s ability to manage multiple requests more efficiently than HDDs. It’s not uncommon to experience a boost in productivity as the system can handle multitasking better.
12. Tips for a Smooth Transition
To ensure a smooth transition to your new SSD, consider these tips:
- Keep your software updated: After cloning, always check for updates for your operating system and applications. This ensures compatibility and performance optimization.
- Utilize SSD features: Take advantage of built-in features like over-provisioning, which sets aside space on your SSD for better management of write operations.
- Know your usage patterns: Adjust your habits based on the new capabilities of your SSD. For instance, if you’re used to managing files inefficiently on an HDD, take the time to reorganize on your SSD for optimal performance.
- Explore SSD-specific tools: Many SSD manufacturers offer tools for monitoring and maintaining their drives. Utilize these tools to track health and performance metrics regularly.
13. Conclusion: Make the Switch Today
Upgrading from an HDD to an SSD is one of the most impactful changes you can make to improve your computer’s performance. Cloning your hard drive to SSD offers a fast and efficient way to make this transition without the hassle of reinstalling your operating system and applications.
With the right preparation, software, and post-cloning adjustments, you can enjoy the benefits of significantly faster load times and improved responsiveness. Don’t wait any longer—take the leap and experience the difference an SSD can make in your daily computing tasks.
“`
Trending Now
Frequently Asked Questions
What is the best way to clone a hard drive to an SSD?
The best way to clone a hard drive to an SSD is by using cloning software, which allows you to transfer your entire operating system, applications, and files seamlessly. Popular tools include Macrium Reflect, Acronis True Image, and EaseUS Todo Backup. These programs guide you through the cloning process, ensuring a smooth transition to your new SSD.
Do I need special software to clone my hard drive to an SSD?
Yes, special cloning software is recommended for cloning a hard drive to an SSD. This software facilitates the accurate transfer of your operating system and data, minimizing the risk of errors. Many SSD manufacturers also provide their own cloning tools, which can be tailored to work optimally with their drives.
How long does it take to clone a hard drive to an SSD?
The time it takes to clone a hard drive to an SSD varies based on the amount of data being transferred and the speed of the drives involved. Typically, the process can take anywhere from 30 minutes to several hours. Using faster SSDs and high-quality cloning software can help reduce the overall time significantly.
Can I clone a failing hard drive to an SSD?
Cloning a failing hard drive to an SSD is risky and may not always be successful. If the hard drive is experiencing severe issues, data corruption may occur during the cloning process. It’s best to use data recovery tools first to salvage important files before attempting a clone, or consult a professional for assistance.
What are the benefits of upgrading from HDD to SSD?
Upgrading from HDD to SSD provides multiple benefits, including significantly faster data access speeds, quicker boot times, and a more responsive system. SSDs are also more durable and energy-efficient, with no moving parts, reducing the risk of mechanical failures. Additionally, the decreasing price of SSDs makes them an affordable upgrade for improved performance.
What did we miss? Let us know in the comments and join the conversation.