How to equalize audio
“`html
Equalizing audio is a crucial skill for anyone working with sound, whether you’re a musician, podcaster, or sound engineer. It involves adjusting the balance of different frequency components in an audio signal, allowing you to create a polished final product that resonates with your audience. In this guide, we’ll explore how to equalize audio effectively, covering essential techniques, tools, and best practices.
1. Understanding Audio Frequencies
Before diving into the practical aspects of how to equalize audio, it’s vital to understand the concept of audio frequencies. Sound is a wave, and its frequency is measured in Hertz (Hz). The human ear can hear sounds ranging from about 20 Hz to 20,000 Hz (20 kHz). This frequency range can be divided into several categories:
- Sub-bass: 20 Hz to 60 Hz
- Bass: 60 Hz to 250 Hz
- Low Midrange: 250 Hz to 500 Hz
- Midrange: 500 Hz to 2 kHz
- Upper Midrange: 2 kHz to 4 kHz
- Treble: 4 kHz to 20 kHz
Each of these frequency ranges contributes to the overall sound. For example, sub-bass provides depth and power, while treble enhances clarity and brightness. By understanding these frequencies, you can make informed decisions about how to equalize audio for different uses.
2. The Basics of Equalization
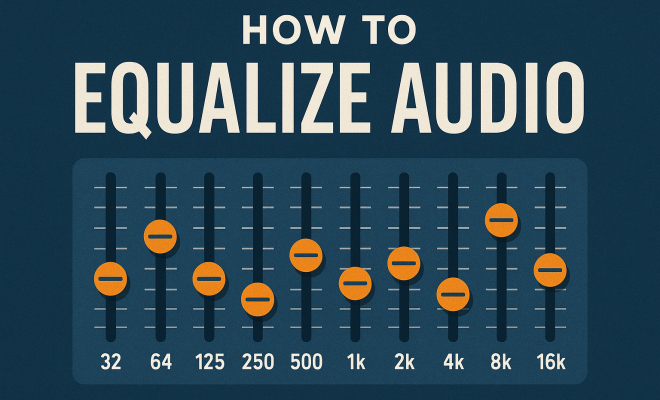
Equalization (EQ) is a process that allows you to manipulate the sound of an audio signal. The primary goal of EQ is to enhance the quality of audio by adjusting the levels of different frequency ranges. EQ can be categorized into two main types: parametric EQ and graphic EQ.
Parametric EQ provides flexibility, allowing you to select specific frequencies and adjust their gain, bandwidth, and type of filter (such as low-pass, high-pass, notch, etc.). In contrast, graphic EQ features fixed frequency bands with sliders, which makes it easier to make broad adjustments across a range of frequencies. Knowing which type of EQ to use depending on your needs is essential for mastering how to equalize audio effectively.
3. The Role of EQ in Different Audio Environments
When considering how to equalize audio, it’s crucial to understand the context in which the audio will be played. The characteristics of different environments and playback systems can significantly influence the EQ settings you choose. For instance:
- Live Sound: In a live setting, you might need to boost certain frequencies to compensate for sound absorption by walls and audience members.
- Studio Recording: In a controlled studio environment, you might focus on fine-tuning individual tracks to achieve clarity and balance.
- Home Listening: Home audio systems often have their own colorations; thus, adjustments may differ based on the speaker and room acoustics.
Understanding the unique demands of your audio environment can help you make more effective EQ choices that enhance the listening experience.
4. Common EQ Techniques
When learning how to equalize audio, mastering various techniques can help you achieve better sound quality. Here are some common EQ techniques:
- Cut Before You Boost: A good rule of thumb is to cut frequencies rather than boost others. This can help to avoid cluttering the mix and ensure a more balanced sound.
- Use the Q Factor: The Q factor determines the width of the frequency band being adjusted. A lower Q will affect a broader range of frequencies, while a higher Q will be more precise, targeting a narrow band. Adjusting the Q can help you get the desired effect without affecting surrounding frequencies.
- Notch Filtering: If a particular frequency is problematic, such as feedback in live sound, using a notch filter allows you to surgically remove that frequency without altering others.
These techniques can significantly enhance your ability to create a clear and professional audio mix.
5. Choosing the Right Tools
To effectively equalize audio, you’ll need the right tools. There are numerous software and hardware options available to help you achieve the desired sound. Here’s a breakdown of some popular tools:
- Digital Audio Workstations (DAWs): Programs like Pro Tools, Logic Pro, and Ableton Live come with built-in EQ plugins that allow for precise adjustments.
- Standalone EQ Plugins: Tools like FabFilter Pro-Q, Waves Q10, and iZotope Ozone offer advanced features for more serious sound designers.
- Hardware Equalizers: In professional settings, you may find analog EQs, which can impart a warmer sound due to their circuitry.
Choosing the right tool often depends on personal preference and the specific needs of your project. Experimenting with different EQ tools can help you find what best suits your style and workflow. (See: Equalization in audio processing.)
6. Practical Steps on How to Equalize Audio
Now that you have a foundational understanding of EQ, let’s delve into practical steps on how to equalize audio effectively. Here’s a straightforward approach:
- Analyze the Audio: Start by listening carefully to your audio track. Identify which frequencies are lacking or overpowering.
- Apply EQ Settings: Use a parametric EQ to target specific frequencies. Begin with broad cuts or boosts, and then refine your adjustments.
- Use Reference Tracks: Listening to professionally mixed tracks can guide your EQ decisions. Compare your audio with these references to ensure balance.
- Iterate and Fine-tune: EQ is an iterative process. After making adjustments, listen again and tweak as necessary until you’re satisfied with the sound.
These steps emphasize a systematic approach, ensuring that you develop a keen ear for sound while honing your technical skills.
7. Avoiding Common Pitfalls
As you learn how to equalize audio, it’s essential to recognize common mistakes that can lead to poor sound quality. Here are some pitfalls to avoid:
- Over-EQing: Too many boosts or cuts can lead to an unnatural sound. Aim for subtlety and avoid extreme adjustments.
- Ignoring the Context: Always consider how the audio will be consumed. A mix that sounds good on headphones might not translate well to speakers.
- Neglecting Room Acoustics: The room where you mix can significantly affect your perception of sound. Investing in acoustic treatment can vastly improve your mixing environment.
Being aware of these common pitfalls can help you maintain a clear vision of your audio goals and produce professional-quality sound.
8. The Future of Audio Equalization
As technology continues to evolve, so does the field of audio equalization. Innovations such as AI-driven EQ tools and algorithms that adapt in real-time are emerging. These advancements allow for more precise and automated corrections, making it easier for producers to achieve the perfect sound.
Moreover, the rise of immersive audio formats like Dolby Atmos and spatial sound is also influencing equalization techniques. As audio becomes more three-dimensional, techniques for equalizing audio will need to adapt to create a more enveloping listening experience.
Staying informed about these trends and embracing new technologies will be vital for anyone interested in mastering how to equalize audio.
9. Advanced EQ Techniques
Once you’ve mastered the basics of equalizing audio, you may want to explore some advanced techniques to further enhance your audio productions. Here are several strategies:
- Dynamic Equalization: This technique involves using EQ that reacts to the audio signal level. For instance, if a certain frequency gets too loud, the EQ will automatically pull it down, ensuring a more balanced sound without losing the dynamic range.
- Mid/Side Equalization: This method separates the mid (center) and side (stereo) signals, allowing you to EQ them independently. It’s especially useful for adding width to your mixes by enhancing the sides without affecting the center vocals or instruments.
- Frequency Masking Solutions: When multiple sounds occupy the same frequency range, they can mask each other, making it hard to hear everything clearly. Using EQ to carve out specific spaces for each instrument can help avoid this problem and improve overall clarity.
These advanced techniques can significantly refine your audio mixing abilities and elevate your projects to a professional level.
10. Practical EQ Tips from the Pros
Learning from experienced audio engineers can provide valuable insights into effective EQ practices. Here are some tips that professionals often share:
- Trust Your Ears: While visual representations of audio (like waveforms and EQ graphs) are helpful, they shouldn’t replace your ears. Trusting what you hear is crucial for effective mixing.
- Take Breaks: Extended mixing sessions can lead to ear fatigue. Taking short breaks helps reset your hearing and allows you to return to your work with fresh perspective.
- Use High-Quality Monitoring: Investing in good studio monitors or headphones can make a significant difference in how accurately you hear your mixes. Your monitoring setup can greatly influence your EQ decisions.
- Keep it Simple: More isn’t always better. Sometimes, the best EQ decisions are the simplest ones. Focus on clarity and avoid unnecessary complexity in your mixes.
These pro tips can help guide you as you continue to develop your equalization skills.
11. Real-World Examples of Effective Equalization
Nothing illustrates the importance of proper EQ like real-world examples. Here are a few scenarios where effective equalization made all the difference: (See: Understanding audio frequencies.)
- Vocal Mixing: In a popular rock band’s album, the producer noticed that the vocals were getting lost in the mix. By applying a slight boost around 3 kHz, the vocals were brought forward, enhancing their clarity and presence within the overall track.
- Podcast Clarity: A podcast producer was struggling with background noise interfering with dialogue. Through targeted EQ cuts in the low-frequency range, the producer reduced rumble and made the voices stand out without sounding thin.
- Live Performance: At a music festival, the sound engineer faced feedback issues due to a particular microphone placement. Using a notch filter to cut the offending frequency helped eliminate the feedback, allowing the band to perform without interruption.
By examining these examples, it’s evident how critical effective equalization is in various audio contexts.
12. Frequently Asked Questions about Equalizing Audio
As you explore how to equalize audio, you might have several questions. Here’s a compilation of frequently asked questions to help clarify your understanding:
What is the best way to start equalizing audio?
The best way to start is by getting familiar with the frequency ranges and how they affect sound. Listen to different tracks, and try to identify which frequencies stand out and which don’t. Practice using EQ on your recordings to get hands-on experience.
Can I use EQ in real-time during live performances?
Yes, many digital mixing consoles and audio interfaces allow for real-time EQ adjustments during live performances. This capability is essential for adapting to changing acoustics and audience responses.
How often should I EQ my recordings?
EQ should be applied whenever necessary. After tracking, during mixing, or even in the mastering stage. However, always ensure that you’re not over-EQing; subtle adjustments usually yield the best results.
Are there specific EQ settings for different instruments?
While there’s no one-size-fits-all answer, certain frequency ranges are typically associated with specific instruments. For instance, boosting the low end around 80 Hz can enhance a kick drum’s thump, while cutting around 300 Hz might help clean up vocals. It’s best to experiment and trust your ears.
What role does EQ play in mastering?
During mastering, EQ is used to enhance the overall tonal balance of a track. It helps ensure that all elements blend well and sound cohesive across different playback systems. Mastering EQ adjustments are often more subtle than those made during mixing.
Can I use EQ to fix bad recordings?
While EQ can help improve the sound of poor recordings, it’s not a magic solution. It can address certain issues, like reducing harshness or enhancing clarity, but it won’t completely fix fundamental problems with the original recording.
13. Advanced Strategies for Equalization
To continue sharpening your skills in how to equalize audio, consider diving into some advanced strategies. Here are a few to explore:
- Frequency Sweeping: This technique involves boosting a frequency band significantly and sweeping it across the spectrum to identify problematic or resonant frequencies. Once identified, you can make targeted cuts or adjustments.
- Using Reference Frequencies: Familiarize yourself with standard frequencies associated with different instruments. For example, electric guitars often occupy the 1 kHz to 4 kHz range. Adjusting these frequencies can help them find their place in the mix.
- Consider Loudness and Dynamics: When equalizing, consider how loudness impacts perception. A louder sound can mask others. Balancing dynamics alongside EQ can lead to a more harmonious track.
Implementing these advanced strategies can offer a more nuanced approach to your equalization efforts. (See: Techniques for equalizing audio.)
14. Case Studies in Equalization
Analyzing how established artists and engineers tackle equalization can provide invaluable learning opportunities. Here are some case studies:
- Adele’s “Hello”: The mixing engineer used careful EQ cuts to reduce muddiness in the lower frequencies, allowing Adele’s powerful vocals to shine without overwhelming the mix. Vocal presence was emphasized around 4 kHz, making it more prominent in the overall track.
- Daft Punk’s “Get Lucky”: In this track, the mix engineer employed sidechain EQ to allow the bassline to breathe alongside the kick drum. This allowed both elements to coexist without overshadowing one another while maintaining the song’s groove.
- Taylor Swift’s “Shake It Off”: The producer utilized high-pass filtering on the vocals to remove unnecessary low-end rumble, resulting in a cleaner sound that matched the upbeat nature of the track.
These case studies illustrate the thoughtful application of EQ in professional music production, showcasing the impact of strategic equalization.
15. Emerging Technologies in Audio Equalization
The landscape of audio equalization is rapidly evolving thanks to emerging technologies. Here are some noteworthy trends:
- AI-Powered EQ: New software is beginning to employ artificial intelligence to analyze audio tracks and suggest EQ settings based on learned patterns. This technology can streamline workflows and help beginners make informed decisions.
- Real-Time Analysis Tools: Advanced plugins provide real-time frequency analysis, allowing engineers to visualize their adjustments as they make them. This can be especially useful during live sound situations.
- Integration with Virtual Reality: With the rise of VR audio, equalization techniques are adapting to create immersive sound environments. 3D audio EQ strategies are still in their infancy but are growing in importance as technologies advance.
Staying ahead of these trends can keep your skills relevant as the industry evolves.
16. Your Equalization Journey
As you embark on your journey to mastering how to equalize audio, remember that learning is a continuous process. Regular practice, feedback from peers, and keeping up with industry changes can make a significant difference in your growth. Don’t be afraid to experiment and push boundaries. Every mix you work on is an opportunity to improve your skills.
17. Conclusion: Perfecting Your Equalization Skills
Learning how to equalize audio is a journey that combines both art and science. By understanding frequency ranges, mastering various EQ techniques, and using the right tools, you can enhance your audio production skills significantly. Avoiding common pitfalls and keeping abreast of technological advancements will further refine your abilities.
Ultimately, the goal is to create clear, balanced, and engaging audio that resonates with your audience. With practice and dedication, you’ll become proficient at equalizing audio, paving the way for successful sound projects.
“`
Trending Now
Frequently Asked Questions
What is audio equalization?
Audio equalization (EQ) is the process of adjusting the balance of different frequency components in an audio signal. It helps enhance the quality of sound by manipulating the levels of specific frequency ranges, allowing for a polished final product suitable for various applications like music production, podcasting, or sound engineering.
How do I equalize audio for beginners?
For beginners, start by understanding the different frequency ranges: sub-bass, bass, midrange, upper midrange, and treble. Use a parametric or graphic EQ to adjust these frequencies based on your audio needs. Make small adjustments and listen critically to find the right balance that enhances your audio.
What are the types of equalizers?
There are two main types of equalizers: parametric EQ and graphic EQ. Parametric EQ allows for precise control over specific frequencies, gain, and filter types, while graphic EQ features fixed frequency bands with sliders for broader adjustments. Choosing the right type depends on your specific audio needs.
Why is equalization important in audio production?
Equalization is crucial in audio production because it helps to enhance and balance the sound quality of recordings. By adjusting frequency levels, you can eliminate muddiness, enhance clarity, and ensure that the audio resonates well with the audience, resulting in a more professional final product.
What frequency ranges should I focus on when equalizing audio?
When equalizing audio, focus on the key frequency ranges: sub-bass (20-60 Hz) for depth, bass (60-250 Hz) for warmth, low midrange (250-500 Hz) for body, midrange (500 Hz-2 kHz) for presence, upper midrange (2-4 kHz) for clarity, and treble (4-20 kHz) for brightness. Each range contributes differently to the overall sound.
What’s your take on this? Share your thoughts in the comments below — we read every one.