3 Ways to Make a Circuit
Introduction:
A circuit is an essential building block in the field of electronics. It is a closed loop through which electric current flows to perform various tasks. Circuits can be as simple as those found in a flashlight or as complex as those built into supercomputers. In this article, we will discuss three ways to make a circuit, including breadboarding, stripboard (or veroboard), and printed circuit boards (PCBs).
1. Breadboarding:
A breadboard is a plastic board filled with holes that are connected in rows or columns to create paths for electricity. These holes allow for the insertion of electronic components such as resistors, capacitors, and transistors. To create a circuit on a breadboard, follow these steps:
I. Gather the necessary components based on your circuit design.
II. Place the components onto the breadboard in the appropriate locations according to your schematic.
III. Use jumper wires to connect the components and establish electrical pathways.
IV. Double-check your connections and ensure everything matches your schematic.
V. Connect the power supply and test your circuit.
The main advantage of using a breadboard is that it allows for quick prototyping without having to solder any connections.
2. Stripboard (Veroboard):
A stripboard comprises of a grid of holes with conductive strips on one side, offering permanent circuit construction with soldered connections. To make a circuit on a stripboard:
I. Design your circuit layout and transfer it onto the stripboard.
II. Cut the stripboard to size if necessary, allowing some space beyond the borders of your circuit for easier handling.
III. Carefully place your components on the stripboard according to your design.
IV. Solder each component’s lead into its corresponding hole on the conductive side of the stripboard.
V. Use a cutting tool or small drill bit to break any unwanted connections between strips.
VI. Check your solder joints for completeness and test the circuit for functionality.
Stripboards offer more permanence than breadboards but require soldering. It’s an excellent choice for intermediate-level projects or when you need multiple copies of a particular circuit.
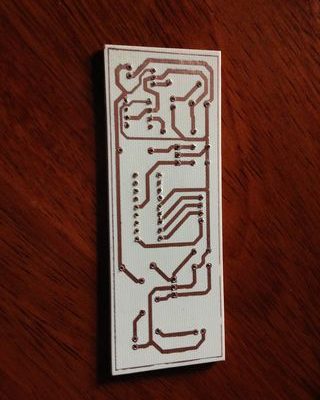
3. Printed Circuit Boards (PCBs):
PCBs are professionally manufactured boards with predetermined traces that connect components to form circuits. Creating a custom PCB involves these steps:
I. Design your circuit using computer-aided design (CAD) software, export it in the required format (such as Gerber).
II. Choose a PCB manufacturer and submit your design files for fabrication.
III. Once you receive your custom-made PCB, carefully place all of the components following the silkscreen markings on the board.
IV. Solder each component lead to its corresponding pad on the PCB.
V. Inspect the circuit for any errors and test its functionality.
Though requiring more effort in design and production, PCBs provide increased durability and reliability compared to breadboards and stripboards, making them suitable for intricate or mass-produced projects.
Conclusion:
Whether you’re new to electronics or an experienced hobbyist, various methods can be employed for making circuits based on your needs. By understanding these three methods: breadboards, stripboards (veroboard), and PCBs, you can choose the most appropriate approach depending on your project’s complexity, requirements, and desired permanence.