3 Simple Ways to Connect a Laptop to a Projector

Introduction:
Connecting your laptop to a projector can seem like a daunting task, especially when faced with a variety of cables and settings. Fear not! With this guide, you’ll learn three simple ways to connect a laptop to a projector, making it easy for you to share presentations, movies, or other content with ease.
1. HDMI Connection:
One of the most common and straightforward methods for connecting a laptop to a projector is through an HDMI (High-Definition Multimedia Interface) cable. This connection supports both video and audio transmission.
Steps to connect using HDMI:
– Turn off both your laptop and projector.
– Locate the HDMI port on both devices.
– Connect one end of the HDMI cable to the laptop’s HDMI port and the other end into the projector’s HDMI port.
– Turn on your laptop and projector.
– On your laptop, press the appropriate key combination (usually Fn + F-key) to switch display modes or adjust your display settings.
– Adjust the projector settings if needed. You should now see your laptop screen displayed on the projector.
2. VGA Connection:
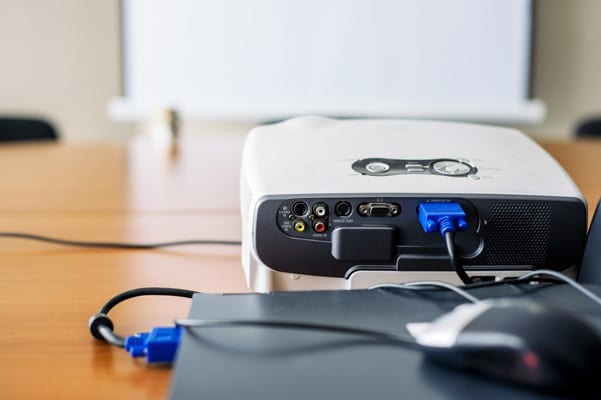
If your devices don’t have HDMI ports, another option is connecting them with a VGA (Video Graphics Array) cable. VGA technology is older and only supports video transmission; thus, an additional audio cable may be required for sound output.
Steps to connect using VGA:
– Turn off your laptop and projector.
– Find the VGA ports on both devices.
– Connect one end of the VGA cable to the laptop’s VGA port and the other end into the projector’s VGA port.
– If necessary, connect an audio cable from your laptop’s headphone or line-out jack to the audio input on the projector or external speakers.
– Power on your devices and adjust display settings accordingly.
3. Wireless Connection:
Increasingly popular are wireless solutions such as Miracast, Chromecast, or Apple TV to connect a laptop to a projector without cables. This method might require compatible devices and a stable Wi-Fi connection.
Steps to connect wirelessly:
– Ensure your laptop and projector (or wireless display adapter) both support wireless screen mirroring.
– Turn on your laptop and projector.
– On your laptop, enable Wi-Fi and screen mirroring. For Windows devices, look for the “Connect” option in the action center. Mac users can enable AirPlay (if connecting to an Apple TV).
– Pair to the desired projector or adapter, and your laptop screen should now appear on the projector.
Conclusion:
Whether you prefer wired or wireless methods, these three simple techniques will help make connecting your laptop to a projector hassle-free. With the right cables or compatible devices, you’ll be able to share content effortlessly and enhance presentations, meetings, or movie nights.


