Ways to Fix Print Screen Not Working
Print Screen is a feature on Windows computers that allows users to take a screenshot of their computer screen. However, sometimes the option may not work properly. In this article, we will discuss some ways to fix Print Screen not working.
1. Check if the button is working. Pressing the “Print Screen” button does not show any visible indication that a screenshot was captured because it is only saved on your computer’s clipboard. To verify if the button is working, click on the start button, search for Paint and click open. Once Paint is open, press “Ctrl+V” or right-click and select “Paste” to paste the captured image. If it is pasted successfully, then the button is working correctly.
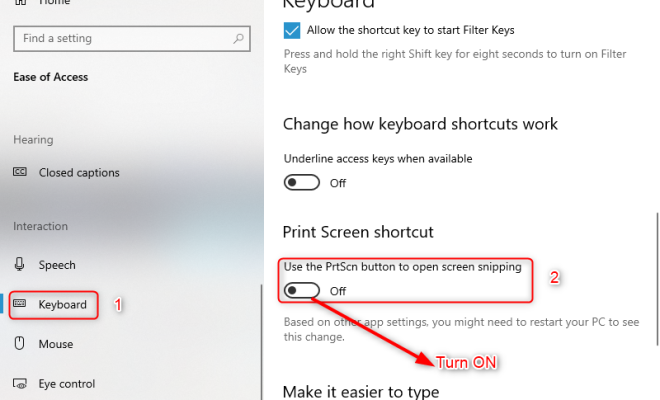
2. Check the Keyboard Settings. The Print Screen button on your keyboard may have been reprogrammed or disabled, resulting in the Print Screen not working. Check your keyboard’s settings to be sure the button is not disabled or assigned to something else. To check these settings, open the control panel by typing “Control Panel” in the search bar on your PC.
3. Use Snipping Tool. Snipping Tool is a great alternative for taking screenshots. It is a built-in program in Windows that allows you to take screenshots, crop, and annotate them. To access the Snipping Tool, press the “Windows” key, type in “Snipping Tool,” and select the program from the search results.
4. Update Your Keyboard Driver. If the Print Screen button still doesn’t work, it could be due to an outdated driver. Check your keyboard manufacturer’s website and download the latest driver version for your keyboard model.
5. Restart Your Computer. Sometimes, simply restarting your computer can fix any issues you are having with the Print Screen button.
6. Try Third-Party Apps. In case the Print Screen button continues to malfunction, another option is to use third-party software. Numerous alternative apps, such as Lightshot, Snagit, and Greenshot, can capture screenshots and save them in different formats.

