The Best Way to Clean Your Air Fryer
Air fryers have revolutionized the way we cook, providing a healthier alternative to traditional frying methods. Just like any other appliance, however, they require regular maintenance to function at their best. Here’s the most effective way to clean your air fryer.
Step 1: Let it cool
Always allow your air fryer to cool completely before cleaning. This is important both for safety and to prevent any damage to the appliance’s components.
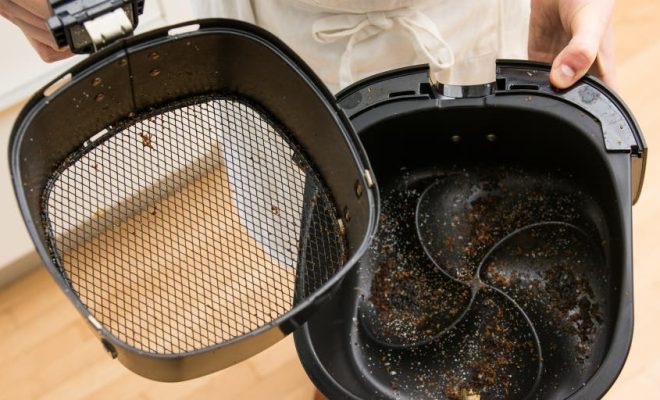
Step 2: Remove the parts
Take out the basket, tray, and pan. Some air fryers also have a removable heating element. If yours does, refer to the manufacturer’s instructions for removal and cleaning guidelines.
Step 3: Wipe down the interior
Using a soft sponge or cloth dampened with warm water and mild dish soap, wipe down the inside of the air fryer. Avoid using abrasive materials or harsh chemicals that can damage the non-stick coating.
Step 4: Wash the basket, tray, and pan
These components can often be washed in the dishwasher if they are dishwasher-safe. If not, soak them in hot soapy water for about 10 minutes before scrubbing gently with a non-abrasive sponge or brush. Rinse thoroughly and let them dry.
Step 5: Clean tough spots
If there are baked-on spots or stubborn grime, create a paste with baking soda and water. Apply this gently to affected areas, let it sit for about 20 minutes, then scrub and rinse off.
Step 6: Wipe down exterior
With a damp cloth, clean the outside of the air fryer. Use a gentle cleaner if necessary; avoid any scouring pads or aggressive chemicals that can scratch or harm the finish.
Step 7: Reassemble once dry
Ensure all components are completely dry before reassembling the air fryer. This will help prevent any mold or mildew from forming in moist areas.
Regular cleaning after each use will keep your air fryer in good condition and ensure that your food comes out tasting great every time. Remember to consult your air fryer’s instruction manual for any specific guidelines related to your model.