Simple Ways to Grow Conkers: 13 Steps
Conkers are the seeds of the horse chestnut tree, and growing them can be a fun and rewarding hobby for both children and adults. By following these 13 simple steps, you will be able to grow a healthy horse chestnut tree in your garden or yard.
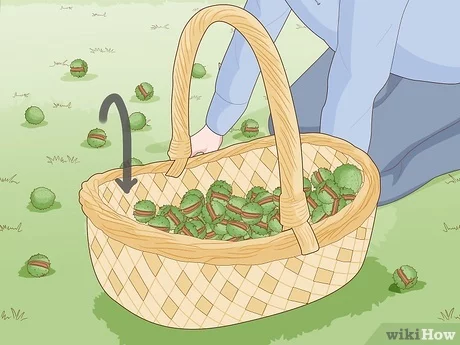
1. Collect conkers: The first step in growing conkers is to collect them during autumn when they naturally fall from the horse chestnut tree. Look for shiny, brown, healthy-looking seeds with no signs of rot or damage.
2. Test viability: Place the collected conkers in a bucket of water. Viable conkers will sink to the bottom, while non-viable ones will float. Discard the floating conkers and keep the sinking ones for planting.
3. Stratify the seeds: Conkers need a period of cold treatment, or stratification, before they will germinate. Place the viable conkers in a plastic bag with moist sand or peat moss, making sure they are not touching each other. Store the bag in a refrigerator for approximately 90 days.
4. Prepare planting pots: After stratification, use small planting pots (about 4 inches / 10 cm in diameter) filled with well-draining soil or compost mix. Provide ample drainage by placing gravel or small stones at the bottom of each pot.
5. Plant conkers: Place one conker per pot on top of the soil mix and gently press it down so that half of it is covered by the soil.
6. Watering routine: Water the pots thoroughly after planting and maintain consistent moisture levels throughout germination, being careful not to overwater or let them dry out.
7. Germination process: Keep the pots in a cool but frost-free area during winter months when germination typically begins. Patience is key as this process can take anywhere from six weeks to several months.
8. Monitor growth: Once your conker seedlings have emerged from the soil, gradually introduce them to sunlight. Place the pots in a sheltered area exposed to partial sunlight for at least a week before moving to direct sunlight.
9. Harden off: As spring approaches, gradually acclimate your seedlings to outdoor conditions. Start by placing them outside during the day and bringing them indoors at night for approximately two weeks.
10. Choose planting location: Select a suitable planting area in your garden that receives full sunlight and has well-draining soil. Horse chestnut trees require space to grow, so ensure they are planted at least 20 feet (6 meters) apart from other trees or structures.
11. Transplant seedlings: Once they have reached 8 – 12 inches (20 – 30 cm) in height and have developed a strong root system, transplant the seedlings into their permanent planting location. Gently remove the seedlings from their pots, being careful not to damage their roots, and plant them at the same depth as they were in the pot.
12. Post-planting care: Continue to water your conker tree throughout its first year of life, ensuring it is properly hydrated during hot, dry periods.
13. Prune and maintain: After its first year of growth, begin pruning your horse chestnut tree annually during winter months to maintain its size and structure according to your preferences.
By following these simple steps, you are on your way to raising a healthy and thriving horse chestnut tree in your own backyard. Enjoy watching it grow and flourish over the years while collecting conkers each autumn for future generations of trees!