
How to Wire a Telephone: 12 Steps
Introduction:
Wiring a telephone may sound like a daunting task, but with just 12 easy steps, you can become an expert at connecting a telephone in your home or office. Follow this guide to learn all you need to know about wiring a telephone.
Step 1: Gather the necessary tools
Before beginning the process, make sure to gather all the necessary tools. You’ll need a wire stripper, flat-head and Phillips-head screwdrivers, RJ11 modular plugs, and most importantly, the proper telephone wire.
Step 2: Choose the appropriate wire
Choosing the correct wire is crucial for setting up your telephone. Standard residential telephones use four conductor wires (red, green, yellow, and black). For office phones, six conductors (blue, orange, green, brown, slate) may be needed.
Step 3: Prepare the wire
Now that you’ve selected the correct wire type for your telephone system, cut it down to the desired length. Keep in mind that it’s always better to have extra wire; you can always shorten it later if needed.
Step 4: Strip the outer insulation
Using your wire stripper tool, gently strip away approximately two inches of outer insulation from one end of the cable. This will reveal the individual colored wires inside.
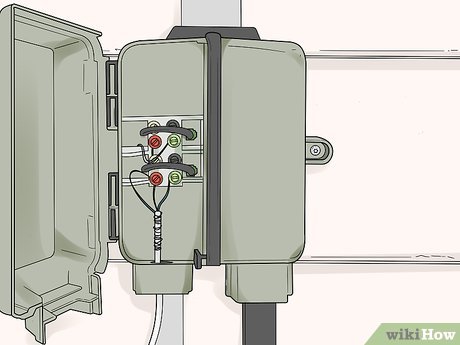
Step 5: Separate and arrange colored wires
Inside the cable, separate each colored conductor. Lay them out in order according to their respective pins within an RJ11 modular plug (red-green-yellow-black).
Step 6: Strip each individual conductor
With your wire stripper tool, carefully strip approximately half an inch of insulation from each colored conductor.
Step 7: Insert conductors into RJ11 modular plug
Following the color sequence (red-green-yellow-black), insert each exposed conductor into its respective slot within an RJ11 modular plug.
Step 8: Secure RJ11 modular plug
With the conductors inserted, ensure they’re fully seated in the RJ11 plug. Finally, using your flat-headed screwdriver, close the plug clamps tightly to secure the wires in place.
Step 9: Repeat steps 4 to 8 on the other end of the cable
Now that you’ve completed one end of your telephone cable, follow steps 4 through 8 once again at the opposite end of the wire.
Step 10: Plug cable into telephone
Once you’ve securely attached an RJ11 modular plug at both ends of your cable, connect one end into your phone’s line-in socket.
Step 11: Connect cable to wall jack
Find an available and compatible telephone wall jack within your home or office and plug in the other end of your newly created telephone cable.
Step 12: Test your connection
Lastly, to make sure everything is working correctly, pick up the phone and listen for a dial tone. If all is in order, congratulations – you’ve successfully wired a telephone!
Conclusion
Wiring a telephone doesn’t have to be a complex task. With these straightforward instructions and a bit of patience, you can save time and money by doing it yourself. Happy dialing!

