The Tech Edvocate

Top Menu

  • Advertisement
  • Apps
  • Home Page
  • Home Page Five (No Sidebar)
  • Home Page Four
  • Home Page Three
  • Home Page Two
  • Home Tech2
  • Icons [No Sidebar]
  • Left Sidbear Page
  • Lynch Educational Consulting
  • My Account
  • My Speaking Page
  • Newsletter Sign Up Confirmation
  • Newsletter Unsubscription
  • Our Brands
  • Page Example
  • Privacy Policy
  • Protected Content
  • Register
  • Request a Product Review
  • Shop
  • Shortcodes Examples
  • Signup
  • Start Here
    • Governance
    • Careers
    • Contact Us
  • Terms and Conditions
  • The Edvocate
  • The Tech Edvocate Product Guide
  • Topics
  • Write For Us
  • Advertise

Main Menu

  • Start Here
    • Our Brands
    • Governance
      • Lynch Educational Consulting, LLC.
      • Dr. Lynch’s Personal Website
      • Careers
    • Write For Us
    • The Tech Edvocate Product Guide
    • Contact Us
    • Books
    • Edupedia
    • Post a Job
    • The Edvocate Podcast
    • Terms and Conditions
    • Privacy Policy
  • Topics
    • Assistive Technology
    • Child Development Tech
    • Early Childhood & K-12 EdTech
    • EdTech Futures
    • EdTech News
    • EdTech Policy & Reform
    • EdTech Startups & Businesses
    • Higher Education EdTech
    • Online Learning & eLearning
    • Parent & Family Tech
    • Personalized Learning
    • Product Reviews
  • Advertise
  • Tech Edvocate Awards
  • The Edvocate
  • Pedagogue
  • School Ratings

logo

The Tech Edvocate

  • Start Here
    • Our Brands
    • Governance
      • Lynch Educational Consulting, LLC.
      • Dr. Lynch’s Personal Website
        • My Speaking Page
      • Careers
    • Write For Us
    • The Tech Edvocate Product Guide
    • Contact Us
    • Books
    • Edupedia
    • Post a Job
    • The Edvocate Podcast
    • Terms and Conditions
    • Privacy Policy
  • Topics
    • Assistive Technology
    • Child Development Tech
    • Early Childhood & K-12 EdTech
    • EdTech Futures
    • EdTech News
    • EdTech Policy & Reform
    • EdTech Startups & Businesses
    • Higher Education EdTech
    • Online Learning & eLearning
    • Parent & Family Tech
    • Personalized Learning
    • Product Reviews
  • Advertise
  • Tech Edvocate Awards
  • The Edvocate
  • Pedagogue
  • School Ratings
  • A Visitors Guide to Long Beach (CA), United States

  • A Visitor’s Guide to Fresno (CA), United States

  • A Visitors Guide to New Orleans (LA), United States

  • A Visitors Guide to Sacramento (CA), United States

  • A Visitors Guide to Lyon, France

  • JisuLife Ultra2 Portable Fan: A Powerful Multi-Function Cooling Solution

  • A Visitors Guide to Viña del Mar, Chile

  • A Visitors Guide to Århus, Denmark

  • A Visitors Guide to Bakersfield (CA), United States

  • A Visitors Guide to Aurora (CO), United States

How To
Home›How To›How to Wire a Car Stereo: 15 Steps

How to Wire a Car Stereo: 15 Steps

By Matthew Lynch
March 24, 2024
0
Spread the love

Introduction:

Wiring a car stereo might seem intimidating at first, but with the right tools and a step-by-step guide, it can be a straightforward DIY project. Here are 15 steps to help you wire a car stereo successfully and safely.

1. Gather your tools and materials:

Before starting, ensure you have all the necessary tools: wire strippers, crimping tool, voltage meter, Phillips head screwdriver, panel removal tool, and zip ties. You will also need a wiring harness, stereo mounting kit, and any additional wires or connectors as recommended by the manufacturer.

2. Disconnect the car battery:

To avoid any potential electrical hazards or damage to your vehicle’s electronics, disconnect both the positive and negative terminals of your car battery.

3. Remove the existing car stereo:

Carefully remove the trim around the radio using a panel removal tool. Unscrew or unclip any mounting brackets and slide out the existing radio. Don’t forget to disconnect any plugs or connectors on the backside of the unit.

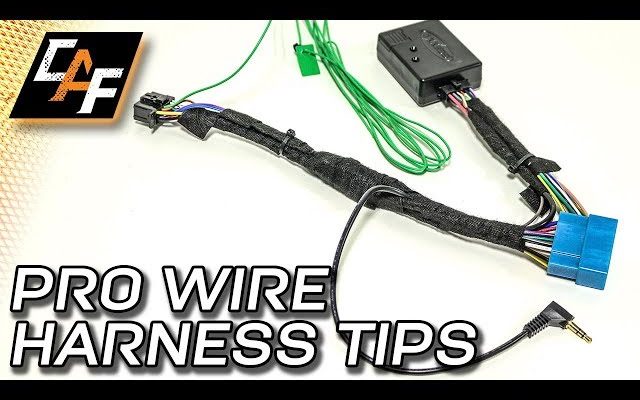
4. Identify the wiring harness:

Consult your new stereo’s manual to identify each wire in its wiring harness. Typical wire colors include red (12V switched), yellow (constant 12V), black (ground), and blue (remote turn-on). Also familiarize yourself with speaker cables, typically color-coded in pairs.

5. Connect the wiring harness adapter:

To simplify installation while avoiding modifications to your car’s factory wiring system, purchase an appropriate wiring harness adapter that connects directly to your car’s existing wiring configuration. Then attach it to the new stereo’s harness following color-coded instructions.

6. Crimp connections:

Use a crimping tool to secure each wire from the adapter to its corresponding wire in your new stereo’s harness. Crimped connections ensure a strong bond between your wires.

7. Insulate connections with heat shrink tubing or tape:

For added protection and security, apply heat shrink tubing or electrical tape around each connection to insulate and prevent short circuits.

8. Attach antenna cable and other connections:

With all speaker and power connections complete, connect the antenna cable, USB cables, or other accessories like steering controls to the back of your new stereo unit.

9. Line up your mounting kit:

Position your mounting kit as per the manufacturer’s instructions to fit your new stereo perfectly in your vehicle’s dash. Secure any necessary brackets or pieces to the stereo.

10. Test your car stereo:

Before completely installing the stereo into the dash, reconnect the car battery and test if your car stereo is operating correctly; turning on, speakers playing, and all accessories being functional.

11. Adjust equalizer settings:

After successful testing, adjust any equalizer settings for optimal sound tailored to your personal preferences.

12. Install stereo into dash:

Gently slide the connected car stereo unit into its allotted space in your dash until it clicks securely into place.

13. Reinstall trim:

Carefully reattach the radio trim and any other removed panels surrounding it using a panel removal tool or light pressure from your hands.
14. Organize any excess wiring:

With zip ties or adhesive clips, neatly secure excess wiring safely and tidily within the car.

15. Final check:

Start your vehicle and test out all features of your newly installed car stereo system: radio stations, CDs, MP3s, Bluetooth connectivity, etc.

Conclusion:

Congratulations! With this step-by-step guide on how to wire a car stereo, you’ve successfully upgraded your ride’s entertainment system. Now hit the road and enjoy crisp audio quality on your next adventure!

Previous Article

18 best luxury wedding venues in Portugal

Next Article

10 Best Shows on Peacock That Will ...

Matthew Lynch

Related articles More from author

  • How To

    3 Simple Ways to Avoid Shanks in Golf

    April 7, 2024
    By Matthew Lynch
  • How To

    How to Hang Mixtiles: 11 Steps

    October 19, 2023
    By Matthew Lynch
  • How To

    3 Ways to Dispose of a Damaged American Flag

    October 7, 2023
    By Matthew Lynch
  • How To

    3 Ways to Repair Wall Cracks

    October 3, 2023
    By Matthew Lynch
  • How To

    3 Ways to Be Friends with Your Parents

    December 20, 2023
    By Matthew Lynch
  • How To

    3 Ways to Dispose of Acrylic Paint

    October 27, 2023
    By Matthew Lynch

Search

Login & Registration

  • Register
  • Log in
  • Entries feed
  • Comments feed
  • WordPress.org

Newsletter

Signup for The Tech Edvocate Newsletter and have the latest in EdTech news and opinion delivered to your email address!

About Us

Since technology is not going anywhere and does more good than harm, adapting is the best course of action. That is where The Tech Edvocate comes in. We plan to cover the PreK-12 and Higher Education EdTech sectors and provide our readers with the latest news and opinion on the subject. From time to time, I will invite other voices to weigh in on important issues in EdTech. We hope to provide a well-rounded, multi-faceted look at the past, present, the future of EdTech in the US and internationally.

We started this journey back in June 2016, and we plan to continue it for many more years to come. I hope that you will join us in this discussion of the past, present and future of EdTech and lend your own insight to the issues that are discussed.

Newsletter

Signup for The Tech Edvocate Newsletter and have the latest in EdTech news and opinion delivered to your email address!

Contact Us

The Tech Edvocate
910 Goddin Street
Richmond, VA 23231
(601) 630-5238
[email protected]

Copyright © 2025 Matthew Lynch. All rights reserved.