How to Use Teflon Tape: 14 Steps

Introduction:
Teflon tape, also known as plumber’s tape or PTFE (Polytetrafluoroethylene) tape, is an essential tool for creating watertight seals on threaded pipes and fittings. This article will guide you through the process of applying Teflon tape, ensuring a secure and leak-free connection.
Step 1: Gather materials
Before you begin, gather the following materials:
– Teflon tape
– Pipe or fitting with threaded connections
– Adjustable wrench (optional)
Step 2: Clean threads
Make sure that the threads of pipes and fittings are clean from dirt, debris, or other contaminants. This will ensure a better bond between the tape and the threads.
Step 3: Choose the right tape
Choose the appropriate Teflon tape for your specific application. There are different thicknesses and densities available to suit various thread types and pressures.
Step 4: Identify thread direction
Identify whether your threads are right-handed or left-handed. Wrap the Teflon tape around the threads in the same direction as they tighten.
Step 5: Hold pipe securely
Securely hold the pipe or fitting steady while you apply the tape. If necessary, use an adjustable wrench for added stability.
Step 6: Start wrapping the tape
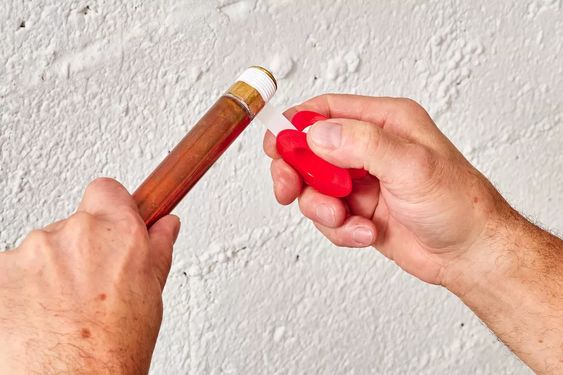
Place the end of the Teflon tape on one end of the thread and hold it securely with one hand.
Step 7: Wrap tightly and evenly
Wrap the tape tightly around the threads, ensuring an even coverage with no gaps or overlaps. The aim is to achieve at least two layers of coverage over all threads.
Step 8: Maintain tension
Keep enough tension on the tape throughout wrapping to avoid any unraveling or dislocation.
Step 9: Wrap in a clockwise direction
For right-handed threads, wrap in a clockwise direction (when looking at the end of the pipe), following the thread’s grooves as you wrap. For left-handed threads, wrap counter-clockwise.
Step 10: Overlap onto starting point
Once you’ve completed one full rotation, overlap the tape onto your starting point by about 1/8 inch (3mm). This creates a slight thickness that helps seal the threads.
Step 11: Trim excess tape
Continue wrapping until you reach the end of the threads. Trim the excess tape with scissors or simply tear it off with your fingers.
Step 12: Smooth and press the tape
Smooth and press down on the tape to ensure it adheres well to all thread surfaces.
Step 13: Assemble pipe connections
Screw together pipes and fittings while maintaining sufficient pressure, carefully avoiding cross-threading or overtightening, which could damage both components.
Step 14: Test for leaks
Once you have assembled your pipe connections, test them by turning the water or gas supply on and checking for any signs of leaks. If any leaks are detected, loosen the joint, readjust the Teflon tape, and re-tighten.
Conclusion:
By following these simple steps, you can apply Teflon tape properly to create a secure connection in your pipes and fittings. This will help prevent leaks and create a safe and efficient plumbing system for your home improvement projects or professional work.


