Master Your DSLR Camera: A Comprehensive Tutorial
“`html
Are you ready to take your photography to the next level? With a Digital Single-Lens Reflex (DSLR) camera, you can capture stunning images with incredible detail and creativity. This DSLR camera tutorial will equip you with the knowledge to understand, operate, and maximize the potential of your DSLR, regardless of your experience level.
1. Understanding the Basics of a DSLR Camera
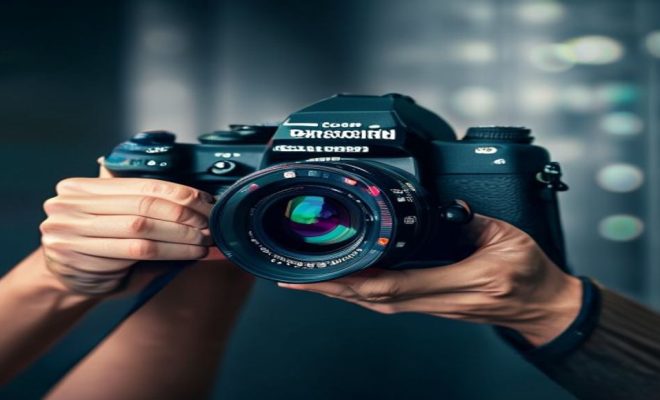
A DSLR camera combines the optics and mechanisms of a single-lens reflex camera with a digital imaging sensor. Unlike compact cameras, DSLRs provide you with the ability to change lenses, adjust settings manually, and produce high-quality images. Key components include:
- Image Sensor: This is the heart of the camera where light is converted into electronic signals. DSLRs typically feature either APS-C or full-frame sensors, impacting image quality and depth of field.
- Viewfinder: The reflex mirror system allows you to see exactly what the lens sees. When you take a shot, the mirror flips up, and light hits the sensor instead.
- Interchangeable Lenses: DSLRs offer different lenses for various photography styles, including wide-angle for landscapes and macro for close-ups.
Understanding these components will help you appreciate the versatility of your DSLR and how each part contributes to your photography experience.
2. Getting to Know Your Camera Settings
Every DSLR camera comes with a plethora of settings that can affect your photos dramatically. Familiarizing yourself with these settings is crucial:
- Aperture: Refers to the size of the lens opening, affecting the depth of field. A wider aperture (lower f-number) blurs the background, while a narrower aperture (higher f-number) keeps more of the scene in focus.
- Shutter Speed: Determines how long the camera’s sensor is exposed to light. Faster shutter speeds freeze motion, while slower speeds can create motion blur, adding dynamism to your shots.
- ISO: Controls the camera’s sensitivity to light. A lower ISO is optimal in well-lit conditions, while a higher ISO is useful in low light but can introduce noise.
Mastering these settings allows you to manipulate how your images appear, giving you creative control over your photography.
3. Composition Techniques for Stunning Images
While technical settings are essential, composition plays a significant role in photography. Here are a few techniques to consider:
- Rule of Thirds: Imagine dividing your frame into nine equal parts. Place points of interest along these lines or at their intersections for a more balanced composition.
- Leading Lines: Use natural lines in your environment—like roads, rivers, or pathways—to lead the viewer’s eye toward the subject.
- Framing: Use elements in your scene to create a frame around your subject. This technique draws attention and adds depth to your photos.
By implementing these compositional strategies, you can elevate your photography from ordinary to extraordinary.
4. Exploring Different Shooting Modes
Your DSLR features various shooting modes that cater to different scenarios. Understanding these modes will enable you to choose the right one for your photography style: Related reading: camera comparison review.
- Auto Mode: Ideal for beginners, this mode automatically adjusts settings for you. However, it limits your creative control.
- Aperture Priority (Av or A): This mode allows you to set the aperture while the camera automatically adjusts the shutter speed. It’s great for controlling depth of field.
- Shutter Priority (Tv or S): You choose the shutter speed, and the camera selects the aperture. Perfect for action shots where you want to freeze motion.
- Manual Mode (M): For the most control, this mode lets you adjust both shutter speed and aperture. It’s perfect for those wanting to experiment and learn.
Experimenting with these modes can help you understand how they affect your photography and when to use them. (See: Digital Single-Lens Reflex Camera.)
5. Lighting: The Photographer’s Best Friend
Lighting is the cornerstone of quality photography. Understanding how to leverage natural and artificial light will enhance your images. Here are some tips:
- Golden Hour: The soft, warm light during sunrise or sunset is often considered the best for photography. It can add a magical touch to landscapes and portraits alike.
- Using Reflectors: Reflectors can help bounce light onto your subject, filling in shadows and creating a more balanced exposure.
- Experiment with Flash: While natural light is ideal, knowing how to use an external flash or built-in flash can improve your shots in less-than-ideal lighting conditions.
Effective use of lighting can dramatically alter the mood and quality of your photographs.
6. Post-Processing: Elevating Your Photos
After taking photos, post-processing is where you can truly refine your images. Software like Adobe Lightroom or Photoshop allows for extensive editing possibilities:
- Basic Adjustments: Tweak brightness, contrast, and saturation to enhance the overall look of your image.
- Crop and Straighten: Cropping helps improve composition post-shoot, while straightening can correct any tilts in your images.
- Filters and Presets: Applying filters or presets can give your photos a unique look, setting the mood and feel you want to convey.
Post-processing is an integral part of modern photography, allowing you to add your personal touch to each image.
7. Choosing the Right Lens for Your Needs
One of the greatest advantages of a DSLR camera is the ability to switch lenses. Understanding which lens to use for different scenarios can significantly impact your photography:
- Standard Zoom Lens: Typically the kit lens, it offers versatility for everyday photography, perfect for beginners.
- Prime Lenses: Fixed focal length lenses that often provide better image quality and wider apertures, great for portraits and low-light situations.
- Telephoto Lens: Ideal for wildlife or sports photography, it allows for close-up shots from a distance.
- Macro Lens: Perfect for capturing intricate details in subjects like flowers or insects.
Choosing the right lens for your photography needs can help elevate your work and expand your creative options.
8. Practice Makes Perfect: Tips for Improvement
Becoming proficient with your DSLR takes time and practice. Here are some tips to keep improving your skills:
- Challenge Yourself: Try different photography styles, like landscape, portrait, or street photography, to expand your skill set.
- Join a Photography Community: Engaging with other photographers can provide new insights, feedback, and inspiration.
- Analyze Your Work: Regularly review your photos to identify areas for improvement. Consider what works and what doesn’t in your compositions.
By consistently practicing and seeking feedback, you’ll find your photography skills grow exponentially.
9. Understanding Depth of Field
Depth of field (DoF) refers to the zone of acceptable sharpness within an image. Mastering DoF can dramatically affect how your subjects are perceived within a photograph. Here’s what you need to know:
- Shallow Depth of Field: Achieved with a wide aperture (e.g., f/1.8), it blurs the background and foreground, isolating the subject. This is particularly effective in portrait photography.
- Deep Depth of Field: Utilized with a smaller aperture (e.g., f/16), this keeps more of the image in focus, making it ideal for landscapes where detail is important throughout the scene.
Understanding how to adjust your aperture settings will allow you to control DoF effectively, enhancing the storytelling of your images. (See: Digital Camera Guide by NY Times.)
10. Understanding Exposure Triangle
The exposure triangle is a fundamental concept in photography that encompasses aperture, shutter speed, and ISO. These three elements work together to determine the exposure of your images:
- Aperture: As discussed, it controls the amount of light entering the camera and influences depth of field.
- Shutter Speed: It determines how long the sensor is exposed to light. A fast shutter speed reduces light intake and freezes motion, while a slow shutter speed increases light intake and can create motion blur.
- ISO: It’s the camera’s sensitivity to light. Increasing the ISO allows for shooting in lower light but at the risk of introducing noise.
Balancing these three elements is key to achieving the desired exposure in your photographs, and understanding their interaction is essential for any photographer.
11. Photography Styles to Explore
Once you grasp the basics of your DSLR, you might want to explore various photography styles. Each style has its own nuances and techniques:
- Landscape Photography: Focused on capturing natural scenes. Utilize wide-angle lenses to capture expansive views and pay attention to the time of day for optimal lighting.
- Portrait Photography: Centered on capturing individuals or groups. Prime lenses often work best for portraits, as they can produce soft backgrounds and highlight the subject.
- Macro Photography: Ideal for photographing small subjects at close range. A dedicated macro lens is invaluable for this style, allowing you to capture intricate details.
- Street Photography: Focuses on capturing everyday life in public spaces. Be ready to shoot spontaneously and consider your composition carefully.
- Wildlife Photography: Requires a telephoto lens to capture animals in their natural habitats. Patience and a good understanding of animal behavior can greatly enhance your success.
Exploring these styles can help you find your niche and develop your unique photographic voice.
12. Frequently Asked Questions (FAQ)
What’s the best entry-level DSLR for beginners?
Many brands offer excellent entry-level DSLRs. Consider models like the Canon EOS Rebel T7 or the Nikon D3500. These cameras are user-friendly and offer great image quality.
How do I clean my DSLR camera?
Cleaning your DSLR is crucial for maintaining image quality. Use a soft, dry microfiber cloth for the lens and a blower for dust on the sensor. For deeper cleaning, consider professional service.
What’s the difference between DSLR and mirrorless cameras?
DSLRs use a mirror system to reflect light into the optical viewfinder, while mirrorless cameras lack this system, resulting in a more compact design. Mirrorless cameras often have faster shooting speeds and enhanced video capabilities.
How often should I upgrade my DSLR?
Upgrading depends on your needs. If your current camera is limiting your creative expression or if newer features are beneficial for your photography style, then it might be time to consider an upgrade.
Can I use my DSLR for video recording?
Absolutely! Most DSLRs offer video recording capabilities with impressive quality. Be sure to familiarize yourself with settings like frame rate and resolution to optimize your video shoots. (See: Harvard University Resources.)
How do I prevent camera shake when shooting?
To prevent camera shake, use a tripod, increase your shutter speed, or stabilize your hands against a solid surface. The rule of thumb is to shoot at a shutter speed that is at least as fast as the focal length of your lens.
13. Mastering Advanced Techniques
Once you’re comfortable with the basics, it’s time to explore some advanced techniques that can further enhance your photography skills:
- Long Exposures: This technique involves using a slow shutter speed to create stunning effects like silky water in waterfalls or light trails from cars at night. A tripod is essential for this technique to avoid camera shake.
- HDR Photography: High Dynamic Range (HDR) photography combines multiple images taken at different exposures to create a single image with a greater dynamic range of luminosity. This technique is particularly useful for landscapes where you want to capture both bright skies and dark shadows.
- Focus Stacking: Focus stacking is used in macro photography to achieve a greater depth of field. Multiple images are taken at different focus points and combined in post-processing to ensure every detail is sharp.
- Using Filters: Filters can help you control light entering the lens. Polarizing filters reduce glare and enhance colors, while neutral density filters allow for longer exposures even in bright conditions.
Incorporating these advanced techniques into your photography will not only enhance the quality of your images but also expand your creative options.
14. Understanding White Balance
White balance is crucial for capturing colors accurately. Different light sources can emit varying color temperatures, which can affect the colors in your photos. Here’s how to manage white balance effectively:
- Auto White Balance: Most DSLRs have an automatic setting that works well for casual shooting. However, it may not always provide the most accurate results.
- Preset Modes: Your camera likely has preset white balance modes for different lighting situations, such as daylight, cloudy, tungsten, and fluorescent. Familiarize yourself with these to quickly adapt to changing conditions.
- Custom White Balance: For the most accuracy, consider using a gray card to set a custom white balance. This method allows you to take control over the colors in your images, especially in tricky lighting situations.
Mastering white balance will enhance your images, bringing them closer to how you see the world.
15. Conclusion: Take Your Skills Further
Armed with this comprehensive DSLR camera tutorial, you’re now better prepared to dive into the world of photography. Whether you’re capturing landscapes, portraits, or street scenes, understanding the principles behind your camera will help you create images that resonate. As you continue to practice and explore different styles and techniques, you’ll find your unique photographic voice. So grab your DSLR, get out there, and start shooting — the world is waiting for your unique perspective!
“`
Trending Now
Frequently Asked Questions
What is a DSLR camera and how does it work?
A DSLR camera combines a single-lens reflex system with a digital imaging sensor. It uses a reflex mirror to allow you to see what the lens sees through the viewfinder. When you take a photo, the mirror flips up, exposing the sensor to light and capturing the image.
What are the key features of a DSLR camera?
Key features of a DSLR camera include an image sensor, interchangeable lenses, and a reflex mirror system. These components allow for high-quality images, versatility in photography styles, and precise control over settings like aperture, shutter speed, and ISO.
How do I adjust the settings on my DSLR camera?
To adjust settings on your DSLR, familiarize yourself with the controls for aperture, shutter speed, and ISO. The aperture affects depth of field, shutter speed influences motion capture, and ISO adjusts the camera's sensitivity to light, impacting image quality.
What is the importance of aperture in photography?
Aperture is crucial in photography as it controls the lens opening size. A wider aperture (lower f-number) creates a blurred background, enhancing subject focus, while a narrower aperture (higher f-number) keeps more of the scene in sharp focus, affecting the overall composition.
What types of lenses can I use with a DSLR camera?
DSLR cameras support various interchangeable lenses tailored to different photography styles. Common types include wide-angle lenses for landscapes, telephoto lenses for distant subjects, and macro lenses for extreme close-ups, allowing photographers to explore diverse creative possibilities.
Agree or disagree? Drop a comment and tell us what you think.