Master Audacity: Your Complete Guide to Audio Editing
“`html
In the realm of audio editing, few tools are as powerful and accessible as Audacity. Whether you’re a budding podcaster, an audio enthusiast, or simply someone looking to enhance their sound editing skills, understanding how to use Audacity can be a game-changer. This free, open-source software has become a go-to for many thanks to its versatility and robust feature set. This guide will walk you through the essential aspects of Audacity, covering its features, practical tips, and how it can serve your audio editing needs.
1. Getting Started with Audacity
Before diving into the intricacies of how to use Audacity, it’s crucial to set up the software on your computer. Audacity is compatible with Windows, macOS, and Linux, making it accessible to a wide audience. You can download it from the official Audacity website. Make sure to download the latest version to benefit from the most recent features and security updates.
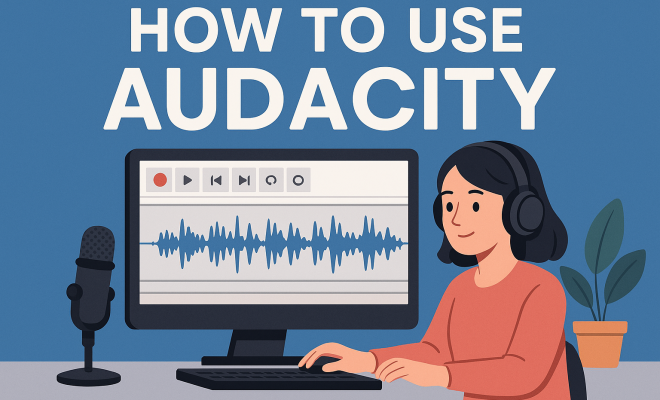
Once installed, familiarize yourself with the user interface. The layout may seem overwhelming at first, but you’ll find that the main features are organized logically. The toolbar contains buttons for common functions like play, pause, and stop, while the menu bar offers access to more advanced options. Spend a few minutes exploring the interface to get comfortable before jumping into editing.
As you begin, consider customizing the interface to suit your workflow. You can rearrange the toolbar icons, create a workspace that feels intuitive, and even adjust the size and layout of the tracks displayed on your screen. This personalization can greatly enhance your editing efficiency and overall experience.
2. Recording Audio in Audacity
Recording your voice or any other sound in Audacity is straightforward. To start, connect your microphone and select it as the input device in Audacity’s preferences. Click on the microphone icon on the toolbar to begin recording. You’ll see the waveform of your audio appear in real-time, which is essential for visualizing your sound. Remember to speak clearly and maintain a consistent distance from the microphone to ensure high-quality audio.
Once you’ve finished recording, you can stop by clicking the stop button. Audacity allows you to record multiple takes; just ensure you’re in the right track before hitting record again. This feature is particularly useful for podcasters or musicians who may want to layer sounds or vocals.
It’s worth mentioning that using a pop filter can significantly improve the quality of your recordings. This inexpensive tool helps to eliminate plosive sounds, ensuring a cleaner audio track. Additionally, consider using headphones while recording to prevent sound feedback or bleed into your microphone.
3. Importing Audio Files
Not all audio editing involves recording from scratch. Audacity makes it easy to import pre-existing audio files. To do this, go to File > Import > Audio, and select the file you want to edit. Audacity supports a variety of formats, including WAV, MP3, and AIFF, though importing MP3 files might require the LAME encoder.
After importing, your audio will be displayed on the timeline. Here, you can cut, copy, paste, or delete sections as needed. Understanding how to manipulate these clips is crucial in achieving seamless edits and transitions, so take your time to experiment with different methods.
When importing files, pay attention to their sample rates. If you’re mixing multiple tracks, ensuring they all share the same sample rate can prevent audio quality issues. You can check and change the sample rate in the lower-left corner of the Audacity interface.
4. Editing Audio Tracks
Once you’ve recorded or imported your audio, the real fun begins. Audacity offers a robust suite of editing tools that allow you to refine your sound effectively. You can use the selection tool to highlight specific sections of audio, enabling you to cut out mistakes or unnecessary parts. The Effects menu is where you can apply various sound alterations like reverb, equalization, or noise reduction.
For example, if you’ve recorded in a noisy environment, applying the noise reduction effect can dramatically improve your audio quality. Just select a portion of the noise, go to Effect > Noisе Reduction, and follow the steps to reduce unwanted sounds. Experimenting with the effects will help you learn how to use Audacity to its fullest potential. (See: Audacity audio editor overview.)
Another powerful tool is the Compressor, which helps to balance audio levels. By reducing the dynamic range, you can ensure that quieter sounds are amplified while louder sounds are kept in check. This is particularly useful for voice recordings, where you want consistent volume throughout.
5. Working with Multiple Tracks
One of Audacity’s standout features is its ability to handle multiple audio tracks. This is particularly useful for projects that involve layering sounds, such as podcasts with multiple speakers or music tracks with various instruments. To add a new track, go to Tracks > Add New, and choose the type of track you need.
You can adjust the volume and panning for each track independently, giving you precise control over your audio mix. Use the Envelope Tool to create dynamic changes in volume throughout a track, which can enhance the listening experience. Understanding layering is critical when considering how to use Audacity effectively, especially for complex projects.
For musicians, using multiple tracks allows for rich arrangements. For example, you can record a guitar part on one track, vocals on another, and then add drums in a separate track. This separation makes it easier to mix and edit each element without affecting the others.
6. Exporting Your Finished Project
After spending time polishing your audio, exporting your project is the final step. Audacity allows you to export your project into various formats. To export, go to File > Export, and choose your desired format, such as WAV or MP3. If you select MP3, you may need the LAME encoder, which is easy to install.
Remember to adjust the bit rate settings for MP3 files to balance quality and file size. A higher bit rate results in better sound quality but larger file sizes, so consider your audience and platform when making your decision. With your audio exported, you can now share your work with the world!
Additionally, consider exporting in different formats for various uses. For instance, WAV files are excellent for archiving as they preserve quality, while MP3s are better for online sharing. Understanding these nuances can help you reach your audience effectively.
7. Utilizing Keyboard Shortcuts
Efficiency is key in audio editing, and Audacity offers numerous keyboard shortcuts that can significantly speed up your workflow. For instance, pressing R starts recording, while Spacebar toggles play and stop. Familiarizing yourself with these shortcuts can save you a lot of time, especially during longer projects.
You can view and customize these shortcuts by going to Edit > Preferences > Keyboard. Tailoring them to your workflow can help you find a rhythm that works for you. As you become more adept at using Audacity, these shortcuts will become second nature, allowing you to focus more on the creative aspects of your audio projects.
Moreover, consider creating a cheat sheet of your most-used shortcuts. Keeping this handy can serve as a quick reference during editing sessions, helping you to maintain your workflow without interruption.
8. Exploring Advanced Features
Once you’ve mastered the basics of how to use Audacity, it’s time to explore its advanced features. One such feature is the ability to use plugins, which can expand the software’s capabilities significantly. There are numerous third-party plugins available that provide additional effects, instruments, and tools that can enhance your audio editing experience.
Another advanced aspect is the Spectrogram view, which allows you to analyze and visualize sound frequencies in detail. This is particularly useful for sound engineers or anyone looking to dive deeper into audio analysis. Understanding these advanced features can take your audio projects to the next level, enabling you to create professional-quality content.
Consider also utilizing the Label Tracks, which allow you to add notes and comments to your audio timeline. This feature is incredibly helpful for larger projects, enabling you to keep track of ideas or necessary edits as you work through your audio files. (See: Using Audacity in health communication.)
9. Accessing Online Resources and Communities
The journey of learning how to use Audacity can be greatly enhanced by accessing online resources. There are countless tutorials, forums, and videos available that offer insights into different features and techniques. Platforms like YouTube have extensive video guides that walk you through specific tasks, making it easier to visualize the process.
Additionally, joining Audacity user groups or forums can provide support and inspiration. Engaging with a community can help you troubleshoot issues, share your projects, and receive feedback from others. The collective knowledge can empower you to push the boundaries of what you can achieve with Audacity.
Don’t overlook social media platforms either; many audio editing professionals share tips and tricks on Twitter, Instagram, and Reddit. By following these channels, you can stay updated on new features, plugins, and techniques that can enhance your audio projects.
10. Common Audio Editing Techniques in Audacity
When learning how to use Audacity, mastering common audio editing techniques will boost your proficiency. Here are a few essential techniques that can transform your audio editing experience:
- Fade In and Fade Out: Gradually increasing or decreasing the audio volume at the beginning or end of a track can create a polished sound. To apply a fade effect, select the desired section, navigate to Effect > Fade In or Fade Out.
- Trimming Audio: If you have long recordings, trimming down to the essentials can improve engagement. Simply select the section you want to keep, then go to Edit > Remove Special > Split Cut to remove the unwanted parts while keeping the selected portion.
- Amplifying Audio: If your recording is too quiet, you can amplify it. Select the audio you want to enhance, then go to Effect > Amplify, and enter the desired amplification level.
In addition to these techniques, consider applying equalization to enhance specific frequency ranges. For example, boosting the mid-range frequencies can improve vocal clarity, while cutting some lower frequencies can eliminate muddiness in the audio. The ability to tailor sound is one of Audacity’s standout features.
11. Understanding Audio Formats and Their Uses
When you start working with Audacity, understanding the various audio formats can help you choose the best one for your projects. Here are some common formats:
- WAV: A standard format for uncompressed audio files, offering high quality but larger file sizes. Ideal for editing and archiving.
- MP3: A compressed audio format that reduces file size significantly with minimal loss of quality. Perfect for sharing music and podcasts online.
- AIF: Mainly used on Apple devices, AIF files maintain high quality and are often used in music production.
Choosing the right format depends on the intended use of your audio. For example, if you’re creating a podcast, MP3 is often the best choice due to its smaller size and compatibility with various platforms.
Additionally, consider using FLAC (Free Lossless Audio Codec) if you want a compressed format that retains high quality. This is an excellent option for music production where audio fidelity is critical.
12. Common Issues and Troubleshooting Tips
As you learn how to use Audacity, you might encounter some common issues. Here are a few problems and their solutions:
- No Sound While Recording: Ensure that your microphone is properly connected and recognized by Audacity. Check the input settings in Preferences.
- Audio Lag: If you experience lag during playback, try reducing the buffer size in Preferences under the Recording tab.
- Effects Not Applying: Ensure you’ve selected the correct audio portion before applying effects. Some effects might require the audio to be in a specific format.
If you encounter persistent issues, checking Audacity’s official forum or FAQ can provide additional solutions. Often, other users have faced similar problems, and you can find troubleshooting advice tailored to your specific issue.
13. FAQs About Using Audacity
What operating systems are compatible with Audacity?
Audacity is compatible with Windows, macOS, and Linux. This cross-platform availability makes it accessible for users across different systems.
Do I need to pay for Audacity?
No, Audacity is completely free and open-source. You can download and use it without any cost. (See: Research on Audacity and audio editing.)
Can I use Audacity for music production?
Absolutely! Audacity is a great tool for music production, allowing you to record, edit, and mix audio tracks. Many musicians and producers use it for various projects.
Is Audacity suitable for podcast editing?
Yes, Audacity is widely used for podcast editing. Its features allow you to record, edit, and enhance audio easily, making it ideal for podcasters.
How can I improve audio quality in Audacity?
You can improve audio quality by using effects like Noise Reduction, Equalization, and Compression. Experimenting with different settings can yield the best results for your recordings.
Can I recover deleted audio files in Audacity?
If you’ve accidentally deleted audio within Audacity, you might be able to recover it using the Undo function (Ctrl + Z). However, if you’ve closed Audacity, the chances of recovery are slim. Regularly saving your projects can help mitigate this issue.
14. Final Thoughts on Mastering Audacity
Mastering how to use Audacity may seem daunting at first, but with practice and exploration, it becomes a powerful tool in your audio arsenal. Whether you’re editing podcasts, creating music, or simply experimenting with sound, Audacity has the tools you need to produce high-quality audio.
As you continue to hone your skills, remember that the key is experimentation. Don’t be afraid to try new techniques or explore different plugins. With its vast capabilities and supportive community, Audacity stands as one of the most versatile audio editing tools available today.
To further enhance your skills, consider enrolling in online courses or workshops focused on audio editing and production. These structured learning opportunities can provide additional insights and techniques that you might not discover on your own.
Lastly, keep creating! The more you use Audacity, the more comfortable you’ll become, and your audio projects will only get better from here.
“`
Trending Now
Frequently Asked Questions
How do I get started with Audacity?
To get started with Audacity, download the latest version from the official Audacity website and install it on your computer. Familiarize yourself with the user interface, which includes a toolbar for common functions and a menu bar for advanced options. Customize the layout to enhance your workflow before diving into audio editing.
What features does Audacity offer?
Audacity offers a wide range of features for audio editing, including recording capabilities, waveform visualization, and various editing tools like cut, copy, and paste. Additionally, it supports multiple audio formats and effects, making it versatile for both beginners and advanced users.
Can I record audio with Audacity?
Yes, you can easily record audio with Audacity. Simply connect your microphone, select it as the input device in the preferences, and click the microphone icon on the toolbar to start recording. You'll see the audio waveform appear in real-time as you record.
Is Audacity free to use?
Yes, Audacity is completely free to use. It is an open-source software, which means you can download, install, and use it without any cost. This accessibility makes it a popular choice for anyone interested in audio editing.
How can I customize the Audacity interface?
You can customize the Audacity interface by rearranging toolbar icons, adjusting the layout of tracks, and modifying the workspace to suit your editing style. This personalization can improve your efficiency and make the editing process more comfortable.
What did we miss? Let us know in the comments and join the conversation.