Capture the Cosmos: Your Guide to Milky Way Photography
“`html
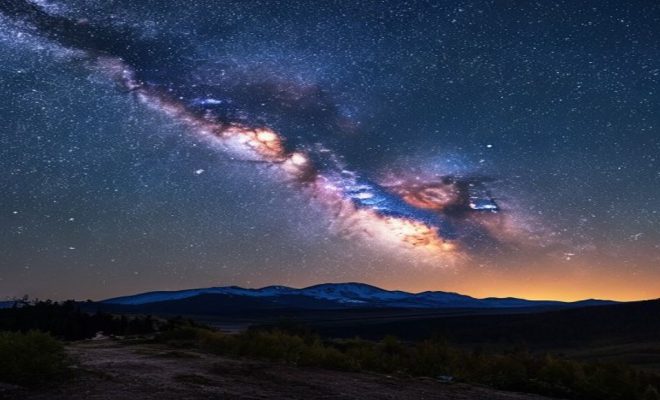
The Milky Way, with its sweeping bands of stars and celestial beauty, has fascinated humans for centuries. For photographers, capturing its grandeur is both a challenge and a dream. If you’re eager to learn how to photograph the Milky Way, you’re in the right place. This guide breaks down everything you need to know, from gear selection to post-processing techniques, ensuring your photos of our galaxy are nothing short of breathtaking.
1. Selecting the Right Location
The first step in successfully capturing the Milky Way is choosing the right location. You’ll want to find an area with minimal light pollution. Cities and towns are notorious for their bright lights, which can obscure the stars. Use apps like Light Pollution Map or Dark Sky Finder to identify dark sites in your vicinity.
National parks and remote areas tend to be the best spots. Places like Yosemite and Joshua Tree are known for their dark skies and stunning landscapes. When scouting locations, consider how the landscape will complement your shots—mountains, trees, or water bodies can add depth and interest to your photographs. There’s a fuller look at the fight against light pollution.
Don’t overlook the importance of accessibility. Some beautiful dark sky locations may require long hikes or off-road driving. It’s essential to assess your physical ability and time constraints. Being prepared with maps or GPS coordinates can save you from getting lost in unfamiliar territories.
2. Timing Your Shoot
Timing is crucial when it comes to astrophotography. The best time to photograph the Milky Way is during the new moon phase, as the absence of moonlight allows for a clearer view of the stars. Check lunar calendars to plan your outing accordingly.
Additionally, the Milky Way is most visible during specific seasons. In the Northern Hemisphere, the core is best seen from late spring to early fall. In contrast, the Southern Hemisphere offers better views during the winter months. Knowing the right seasons enhances your chances of capturing stunning images.
Weather conditions also play a significant role. Clear, cloudless nights are ideal for astrophotography. Be sure to check weather forecasts leading up to your shooting date. A little flexibility can go a long way; if forecasts predict clouds on your chosen night, consider rescheduling to ensure you get the best possible conditions.
3. Understanding Your Gear
Your camera gear plays a critical role in the outcome of your Milky Way photographs. A DSLR or mirrorless camera with a wide-angle lens is essential. A lens with a maximum aperture of at least f/2.8 will allow more light into the camera, which is crucial for low-light conditions.
Don’t forget about a sturdy tripod! Stability is key in astrophotography to avoid any blurring from movement. Investing in a remote shutter release can also minimize camera shake during long exposures. Lastly, consider using a camera with good performance at high ISO settings, as you’ll need to adjust your sensitivity to light to capture the stars effectively.
Consider additional accessories too. A flashlight with a red filter can preserve your night vision while setting up. Lens cleaning kits are handy in case of dew or dust, which can obscure your shots. Similarly, spare memory cards are essential, as astrophotography often involves taking multiple shots to get that perfect image.
4. Camera Settings to Capture the Milky Way
Getting the right camera settings can make or break your Milky Way shots. Start with manual focus; autofocus often struggles in low-light conditions. Set your lens to infinity, and fine-tune the focus manually, checking the results on your camera’s display.
For the exposure settings, a common starting point is ISO 3200, a shutter speed of 20-30 seconds, and an aperture of f/2.8. You may need to adjust these settings based on your specific conditions and camera. Using the 500 Rule can help you avoid star trails: divide 500 by the focal length of your lens to find the maximum exposure time in seconds.
Experimenting beyond the basics can yield unique results. Try bracketing your exposures—taking multiple shots at different settings—to capture a wider range of light. This technique can help you create stunning HDR images later in post-processing, showcasing more detail in both the shadows and highlights of your scene. (See: National Park Service Dark Sky Parks.)
5. Composition Techniques
Composition is an art form in itself. To create visually striking images of the Milky Way, consider the rule of thirds when framing your shot. This technique involves dividing your frame into nine equal sections and placing key elements along these lines or at their intersections.
Incorporating foreground elements can add depth and interest. Silhouetted trees, rocks, or even a person can create a sense of scale and context in your image. Also, think about leading lines that draw the viewer’s eye into the photograph, guiding them through the scene.
Don’t be afraid to get creative with angles. Shooting from different heights or perspectives can transform a standard shot into something extraordinary. A low-angle shot might capture more of the foreground, while shooting from a higher vantage point can help establish the vastness of the night sky.
6. Using Post-Processing Techniques
Post-processing is where you can really make your Milky Way photos pop. Software like Adobe Lightroom and Photoshop allows you to adjust exposure, contrast, and color balance. A common technique is stacking multiple images to reduce noise and enhance details.
Start by adjusting the white balance to bring out the colors of the stars. You can also play with the clarity and vibrance sliders to enhance the overall look. Be careful not to overdo it; subtlety often yields the best results. Creating a starry sky that feels ethereal yet realistic is the goal.
Consider using noise reduction tools during processing. Even with the best settings, high ISO images can introduce graininess that detracts from the beauty of the Milky Way. Balancing noise reduction with detail preservation can enhance your final image quality significantly.
7. Safety and Preparedness
Photographing the Milky Way often requires traversing remote areas, so safety should always be a priority. Make sure to let someone know your plans, and always carry a flashlight or headlamp, as well as extra batteries for your camera. Cold weather can drain batteries quickly, so keeping spares on hand is wise.
Dress appropriately for the conditions, as nighttime temperatures can drop significantly. It’s also a good idea to bring snacks and water, as you may be out for several hours. Familiarize yourself with the area before heading out, and be aware of any wildlife that might be active during the night.
Bringing a portable chair or blanket can also enhance your comfort while waiting for the perfect shot. It allows you to sit back and enjoy the night sky, which can be an awe-inspiring experience in itself. Plus, it keeps you focused on your photography instead of your discomfort.
8. Joining the Astrophotography Community
Engaging with other astrophotographers can provide valuable insights and inspiration. Online forums, social media groups, and local clubs often share tips, techniques, and even locations that others have found successful. Sites like Flickr or Instagram can also give you a sense of what’s possible.
Participating in workshops or meetups can accelerate your learning process. You’ll benefit from hands-on experience, guidance from knowledgeable mentors, and the camaraderie of like-minded individuals who share your passion for the stars.
Don’t forget about online tutorials and courses. Many seasoned astrophotographers offer webinars or instructional videos that delve deeper into specific techniques. Supporting your learning journey with these resources can enhance your skills and broaden your understanding of the craft.
9. Embracing Your Unique Style
As you gain experience in how to photograph the Milky Way, don’t forget to embrace your unique perspective and style. Each photographer has different tastes, and experimenting with various techniques can help you find what resonates with you.
Consider how you might incorporate your personal interests into your astrophotography. Whether it’s a specific type of landscape, a particular color palette, or a specific composition technique, these elements can help define your photographic style. Remember, the journey of capturing the cosmos is just as important as the final image. (See: NASA Hubble Space Telescope Science.)
Through practice, patience, and a touch of creativity, you can elevate your astrophotography skills. The enchanting views of the Milky Way await—you just need to be prepared to seize the moment!
10. Common Challenges and How to Overcome Them
Astrophotography is not without its challenges. You may encounter issues like light pollution, weather changes, or equipment malfunctions. To counter light pollution, consider using filters designed specifically for astrophotography. These can help minimize the unwanted glow from surrounding lights, allowing for clearer shots of the Milky Way.
Weather can be unpredictable, but don’t let it deter you. Always have a backup plan. If your intended location is clouded over, having a list of alternative sites can ensure you still get the chance to shoot on a clear night. Flexibility is key in adapting to changing conditions.
Equipment issues can arise too. Always test your gear before heading out. Familiarize yourself with your camera settings so you can troubleshoot quickly if something goes wrong. Keeping a small toolkit with essential items can save you a lot of headaches on the field.
11. FAQs About Photographing the Milky Way
What is the best time of year to photograph the Milky Way?
The best time to photograph the Milky Way varies by location, but in general, late spring through early fall in the Northern Hemisphere, and winter months in the Southern Hemisphere, provide optimal visibility.
Do I need a special lens for astrophotography?
A wide-angle lens with a low aperture (f/2.8 or lower) is ideal for capturing the Milky Way. This allows more light to enter the camera, which is crucial for clear shots in low-light conditions.
How can I avoid star trails in my photos?
To avoid star trails, use the 500 Rule to determine the maximum exposure time based on your lens focal length. Alternatively, consider using a star tracker, which moves with the stars to keep them sharp during longer exposures.
Is it necessary to shoot in RAW format?
Shooting in RAW is highly recommended for astrophotography. RAW files capture more detail and provide greater flexibility in post-processing compared to JPEGs, allowing you to adjust exposure and color balance more effectively.
How do I focus my camera in the dark?
Manual focus is best in dark conditions. Set your lens to infinity, then adjust slightly while checking results on your camera’s display. Using live view can help you achieve precise focus on distant stars.
Can I photograph the Milky Way with a smartphone?
While smartphones have improved in low-light photography, capturing the Milky Way requires advanced settings typically found on DSLRs or mirrorless cameras. However, some smartphones have astrophotography modes that can produce decent results with a stable setup.
How long should my exposure be when photographing the Milky Way?
The exposure time can vary based on your lens focal length and the 500 Rule. Generally, exposures between 20-30 seconds are good starting points. Use a remote shutter release or timer to minimize camera shake during the shot.
What should I do if I encounter wildlife while photographing?
Staying aware of your surroundings is critical. Make noise while walking to alert animals of your presence. If you spot wildlife at your location, maintain a safe distance and avoid startling them.
12. Understanding the Milky Way’s Structure
The Milky Way is more than just a collection of stars; it’s a sprawling galaxy composed of billions of stars, gas clouds, and dust, all held together by gravity. Understanding its structure can help you appreciate the beauty you’re capturing on camera. The galaxy is primarily a barred spiral, with its arms winding out from the central bulge. These arms contain a high concentration of stars, making them particularly stunning to photograph. (See: Scientific Research on Astrophotography.)
At the heart of the Milky Way lies a supermassive black hole known as Sagittarius A*, which can be fascinating to think about while shooting long exposures of the galaxy. The area around the core, known as the Galactic Center, is rich in star formation and offers spectacular views, especially when viewed through a telescope or a long exposure photograph.
13. Exploring Astrophotography Techniques
Beyond the basics of photographing the Milky Way, there are various techniques you can use to enhance your images. One popular method is called star trails photography, which involves taking a series of long exposures and stacking them to create a path of stars as they move across the night sky. This technique can produce stunning results, showcasing the rotation of the Earth and adding a dynamic element to your images.
Another technique is time-lapse photography, where you take a series of images over a period and then compile them into a video. This can effectively show the movement of stars and clouds over time. Software like Adobe Premiere Pro or specialized astrophotography software can help you stitch these images together into a seamless video.
14. Incorporating Other Celestial Events
If you want to elevate your Milky Way photography, consider incorporating other celestial events into your shoots. Events such as meteor showers, lunar eclipses, or even the appearance of planets can add a unique twist to your images. For example, capturing a meteor shower against the backdrop of the Milky Way can create an awe-inspiring composition.
Keep an eye on astronomy calendars or apps that notify you of upcoming celestial events. Planning your shoots around these events can lead to spectacular photographs that stand out in your portfolio.
15. Recommended Resources for Further Learning
To truly master the art of photographing the Milky Way, consider exploring additional resources. There are numerous books, podcasts, and online courses available that focus specifically on astrophotography. Some recommended books include “Night Photography: Finding Your Way in the Dark” by R. H. Williams and “Photographing the Milky Way” by Chris Baker.
Online communities can also be incredibly beneficial. Websites like Astrophotography.com and Reddit’s astrophotography subreddit provide forums for asking questions, sharing work, and learning from others’ experiences. YouTube is another great resource, as many professional photographers share their tips and techniques through tutorials and behind-the-scenes videos.
16. Final Thoughts
Photographing the Milky Way is a unique blend of technical skill and creative vision. With the right preparation, gear, and understanding of the celestial beauty above, you can create stunning images that not only capture the grandeur of our galaxy but also your personal artistic expression. Remember to enjoy the process—every outing into the night sky is an opportunity to learn, explore, and connect with the universe.
By taking the time to understand these aspects of astrophotography, you can significantly improve your chances of capturing the magnificent beauty of the Milky Way. Happy shooting!
“`
Trending Now
Frequently Asked Questions
What is the best time to photograph the Milky Way?
The best time to photograph the Milky Way is during the new moon phase when there is minimal moonlight. In the Northern Hemisphere, the core is most visible from late spring to early fall, while in the Southern Hemisphere, winter months offer the best views.
How do I choose a location for Milky Way photography?
To choose a location for Milky Way photography, find areas with minimal light pollution, such as national parks or remote sites. Use apps like Light Pollution Map or Dark Sky Finder to locate dark skies, and consider how the landscape will enhance your shots.
What equipment do I need for Milky Way photography?
For Milky Way photography, you'll need a camera with manual settings, a wide-angle lens with a large aperture, a sturdy tripod, and possibly a remote shutter release to avoid camera shake. A flashlight for setup and extra batteries are also essential.
How can I reduce light pollution when shooting the Milky Way?
To reduce light pollution while shooting the Milky Way, select dark sky locations away from city lights, use apps to identify these areas, and consider shooting during new moon phases to minimize ambient light interference.
What techniques are important for shooting the Milky Way?
Important techniques for shooting the Milky Way include using a wide aperture to capture more light, adjusting your shutter speed to avoid star trails, and focusing on distant stars. Post-processing techniques can also enhance your final images.
What did we miss? Let us know in the comments and join the conversation.