How to Save in Lightroom: 13 Steps

Introduction: Adobe Lightroom is a powerful software that helps photographers manage, edit and organize their photos with ease. One crucial aspect of the process is knowing how to save your work effectively. In this article, we will discuss 13 essential steps on how to save in Lightroom.
1. Import Photos: Start by importing your photos into Lightroom. Click the “Import” button at the bottom left corner of the screen and select the source folder containing your images.
2. Create a Collection: Organize your photos by creating a collection. Click the “+” sign next to “Collections” in the left panel and choose “Create Collection.” Give it a name and click “Create.”
3. Cull Your Images: Review and delete any unwanted images by selecting them and hitting the delete key on your keyboard or clicking “Delete” from the right-click context menu.
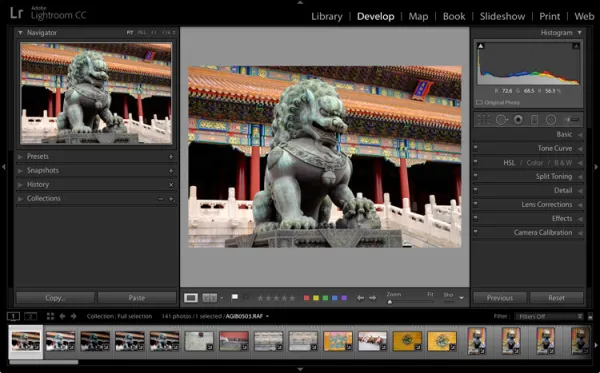
4. Edit Your Photos: Navigate to the “Develop” module by pressing “D” on your keyboard, or clicking on it from the top right corner. Apply desired adjustments, such as exposure, contrast, and cropping.
5. Create Virtual Copies (Optional): If you want to create multiple versions of an image with different edits, right-click the thumbnail and select “Create Virtual Copy.” Virtual copies save hard drive space by storing edits separately, without creating duplicate files.
6. Apply Presets (Optional): Apply custom or built-in presets for faster editing. Select your desired preset from the left panel under “Presets.”
7. Save Metadata: To save all metadata information (including edits) in a separate .xmp file, press Ctrl+S (Cmd+S on macOS). This allows you to synchronize edits across different applications or backup measures while maintaining non-destructive changes.
8. Export Your Photos: To export a finalized image, select it and click the “Export” button at the bottom left corner. This opens a new window with various export settings.
9. Choose Destination Folder: In the “Export Location” panel, choose where you want to save your final image by clicking the “Choose” button next to “Export To.”
10. Rename Files (Optional): In the “File Naming” panel, select a naming template for your exported images. You can customize your own template using metadata tokens or use Lightroom’s presets.
11. Choose Image Format: In the “File Settings” panel, choose the desired image format (JPEG, TIFF, DNG, etc.) and configure quality/compression settings.
12. Apply Output Sharpening (Optional): In the “Output Sharpening” panel, choose whether to apply post-export sharpening and select its settings (Screen, Matte Paper or Glossy Paper).
13. Click Export: Review all your export settings and click the “Export” button at the bottom right of the window. Lightroom will save your edited image in the specified location.
Conclusion: Mastering how to save your work in Lightroom is fundamental for managing an efficient and organized workflow. By following these 13 steps, you can ensure that your images are properly edited, organized, and ready for sharing or printing in no time!


