The Tech Edvocate

Top Menu

  • Advertisement
  • Apps
  • Home Page
  • Home Page Five (No Sidebar)
  • Home Page Four
  • Home Page Three
  • Home Page Two
  • Home Tech2
  • Icons [No Sidebar]
  • Left Sidbear Page
  • Lynch Educational Consulting
  • My Account
  • My Speaking Page
  • Newsletter Sign Up Confirmation
  • Newsletter Unsubscription
  • Our Brands
  • Page Example
  • Privacy Policy
  • Protected Content
  • Register
  • Request a Product Review
  • Shop
  • Shortcodes Examples
  • Signup
  • Start Here
    • Governance
    • Careers
    • Contact Us
  • Terms and Conditions
  • The Edvocate
  • The Tech Edvocate Product Guide
  • Topics
  • Write For Us
  • Advertise

Main Menu

  • Start Here
    • Our Brands
    • Governance
      • Lynch Educational Consulting, LLC.
      • Dr. Lynch’s Personal Website
      • Careers
    • Write For Us
    • The Tech Edvocate Product Guide
    • Contact Us
    • Books
    • Edupedia
    • Post a Job
    • The Edvocate Podcast
    • Terms and Conditions
    • Privacy Policy
  • Topics
    • Assistive Technology
    • Child Development Tech
    • Early Childhood & K-12 EdTech
    • EdTech Futures
    • EdTech News
    • EdTech Policy & Reform
    • EdTech Startups & Businesses
    • Higher Education EdTech
    • Online Learning & eLearning
    • Parent & Family Tech
    • Personalized Learning
    • Product Reviews
  • Advertise
  • Tech Edvocate Awards
  • The Edvocate
  • Pedagogue
  • School Ratings

logo

The Tech Edvocate

  • Start Here
    • Our Brands
    • Governance
      • Lynch Educational Consulting, LLC.
      • Dr. Lynch’s Personal Website
        • My Speaking Page
      • Careers
    • Write For Us
    • The Tech Edvocate Product Guide
    • Contact Us
    • Books
    • Edupedia
    • Post a Job
    • The Edvocate Podcast
    • Terms and Conditions
    • Privacy Policy
  • Topics
    • Assistive Technology
    • Child Development Tech
    • Early Childhood & K-12 EdTech
    • EdTech Futures
    • EdTech News
    • EdTech Policy & Reform
    • EdTech Startups & Businesses
    • Higher Education EdTech
    • Online Learning & eLearning
    • Parent & Family Tech
    • Personalized Learning
    • Product Reviews
  • Advertise
  • Tech Edvocate Awards
  • The Edvocate
  • Pedagogue
  • School Ratings
  • A Visitors Guide to Long Beach (CA), United States

  • A Visitor’s Guide to Fresno (CA), United States

  • A Visitors Guide to New Orleans (LA), United States

  • A Visitors Guide to Sacramento (CA), United States

  • A Visitors Guide to Lyon, France

  • JisuLife Ultra2 Portable Fan: A Powerful Multi-Function Cooling Solution

  • A Visitors Guide to Viña del Mar, Chile

  • A Visitors Guide to Århus, Denmark

  • A Visitors Guide to Bakersfield (CA), United States

  • A Visitors Guide to Aurora (CO), United States

Assistive Technology
Home›Assistive Technology›How to Replace Switches on Mechanical Keyboard

How to Replace Switches on Mechanical Keyboard

By Matthew Lynch
June 8, 2023
0
Spread the love

Mechanical keyboards are the preferred choice for many enthusiastic typists and gamers who demand durability, tactile feedback, and customization options. However, like any other technology, mechanical keyboards can wear out or malfunction over time. One of the most common issues is switch failure, which can be caused by debris, oxidation, or physical damage. Fortunately, replacing switches on a mechanical keyboard can be a straightforward and rewarding process, even for beginners. In this article, we will provide a step-by-step guide on how to replace switches on a mechanical keyboard.

Step 1: Gather your tools and switches

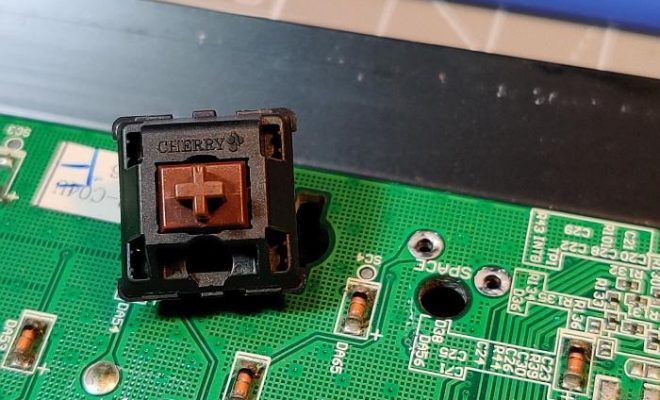
Before starting the replacement process, you will need some basic tools and materials. These include a screwdriver, a soldering iron, a desoldering pump or wick, a pair of tweezers, and replacement switches. Make sure to choose switches that are compatible with your keyboard’s model and layout, and measure their dimensions and pin spacing to ensure a snug fit. You can find replacement switches on online marketplaces or from reputable manufacturers such as Cherry MX, Kailh, Gateron, or Outemu.

Step 2: Remove the keycaps and screws

To access the switches, you need to remove the keycaps and screws that hold the keyboard together. Use a keycap puller or a small tool like a paper clip to gently lift off each keycap, starting from the corners and working your way towards the center. Be careful not to damage or bend the key stems, which can affect the typing experience. Once you have removed all the keycaps, flip the keyboard over and locate the screws that hold the top plate or the PCB (printed circuit board) to the bottom plate or the case. Use a screwdriver to unscrew each screw, but keep them organized and labeled to avoid confusion later.

Step 3: Access the switches and desolder them

Once you have removed the top plate or the PCB, you should be able to access the switches from the underside. Depending on the keyboard’s design, some switches may be mounted on a plate, while others may be soldered directly to the PCB. In either case, you need to desolder the old switches to remove them. Heat up your soldering iron and touch the tip to the solder joints of each switch, using a desoldering pump or wick to suck up the melted solder. Be careful not to damage the PCB or the switch pins, and use a pair of tweezers to gently pull out the old switch once the pins are free.

Step 4: Install the replacement switches

Once you have removed all the old switches, you can proceed to install the replacement switches. Make sure to align them properly with the plate or the PCB, and gently push them in until they click into place. Be careful not to bend or break the switch pins, and ensure that the switches are level and flush with the plate or the PCB. If necessary, you can test each switch by pressing it down and observing whether the stem registers the keystroke.

Step 5: Solder the replacement switches

Once you have installed all the replacement switches, it’s time to solder them in place. Apply a small amount of solder to each switch pin and its corresponding pad on the PCB, using your soldering iron and solder wire. Ensure that the solder joints are shiny and smooth, and that there are no bridges or cold joints that can cause connectivity issues. Be patient and precise, and take breaks if necessary to avoid fatigue or overheating.

Step 6: Reassemble the keyboard

Once you have soldered all the replacement switches, you can reassemble the keyboard by reversing the steps you took in disassembly. Screw the top plate or the PCB back onto the bottom plate or the case, and tighten the screws evenly and snugly. Replace the keycaps by aligning each stem with its switch and pressing down gently until it clicks into place. Test each key by typing various characters and observing whether they register correctly.

Congratulations! You have successfully replaced the switches on your mechanical keyboard. With the right tools and technique, this process can be enjoyable and satisfying, and can breathe new life into an old or faulty keyboard. Remember to take proper precautions when handling soldering irons and other tools, and to seek help if you encounter any difficulties or doubts. Happy typing!

Previous Article

How to Fix ‘Not Registered on Network’ ...

Next Article

How to Replay on Snapchat

Matthew Lynch

Related articles More from author

  • Assistive Technology

    How to Get Rid of Annoying Instagram Ads

    July 15, 2023
    By Matthew Lynch
  • Assistive Technology

    How to Resync an Apple Watch

    June 8, 2023
    By Matthew Lynch
  • Assistive Technology

    Ways to Save Text Message Conversations on Your iPhone

    June 14, 2023
    By Matthew Lynch
  • Assistive Technology

    Ways to Fix the dxgmms2.sys Error in Windows 11

    June 10, 2023
    By Matthew Lynch
  • Assistive Technology

    How to Build a Random Number Generator in Google Sheets

    June 22, 2023
    By Matthew Lynch
  • Assistive Technology

    How to Fix the Windows 11 Version 22H2 Update Not Installing

    June 23, 2023
    By Matthew Lynch

Search

Login & Registration

  • Register
  • Log in
  • Entries feed
  • Comments feed
  • WordPress.org

Newsletter

Signup for The Tech Edvocate Newsletter and have the latest in EdTech news and opinion delivered to your email address!

About Us

Since technology is not going anywhere and does more good than harm, adapting is the best course of action. That is where The Tech Edvocate comes in. We plan to cover the PreK-12 and Higher Education EdTech sectors and provide our readers with the latest news and opinion on the subject. From time to time, I will invite other voices to weigh in on important issues in EdTech. We hope to provide a well-rounded, multi-faceted look at the past, present, the future of EdTech in the US and internationally.

We started this journey back in June 2016, and we plan to continue it for many more years to come. I hope that you will join us in this discussion of the past, present and future of EdTech and lend your own insight to the issues that are discussed.

Newsletter

Signup for The Tech Edvocate Newsletter and have the latest in EdTech news and opinion delivered to your email address!

Contact Us

The Tech Edvocate
910 Goddin Street
Richmond, VA 23231
(601) 630-5238
[email protected]

Copyright © 2025 Matthew Lynch. All rights reserved.