How to Propagate Clematis
Clematis is a popular flowering vine that adds a touch of elegance and beauty to any garden. With its luxurious blooms and diverse selection of species, it’s no wonder many gardeners are eager to propagate clematis. In this article, we will guide you through the step-by-step process of propagating clematis through cuttings and layering.
1. Choosing the right time
The best time to propagate clematis is during the summer months, when the plant is actively growing and has plenty of new shoots. This ensures that your cuttings will have a healthy start before they are separated from the parent plant.
2. Propagating clematis through cuttings
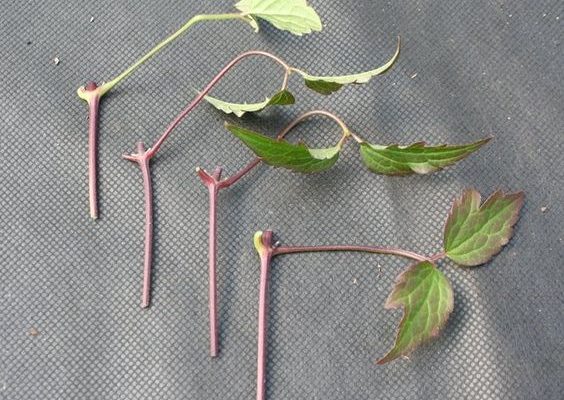
Step 1: Select a healthy stem with at least two pairs of leaves for your cutting. Make sure the shoot hasn’t bloomed yet, as this will give your cutting more energy to grow roots.
Step 2: Cut the stem at a 45-degree angle, just below a leaf node (the area where new growth emerges).
Step 3: Remove all but the top two leaves to limit moisture loss and place the cutting in a container filled with water for about an hour to prevent air pockets from forming in the stem.
Step 4: Prepare a potting mix specifically designed for rooting cuttings or equal parts peat moss, perlite, and vermiculite.
Step 5: Dip the end of your cutting in rooting hormone powder. This will encourage faster root growth.
Step 6: Make a hole in your pre-moistened potting mix and insert your cutting up to its first leaf node, gently firming the soil around it.
Step 7: Place your pot in a tray or saucer filled with water to keep the soil consistently moist during the rooting process.
Step 8: Cover your cutting with a plastic bag or dome to create a humidity chamber, and place the pot in a warm, bright location but out of direct sunlight.
Step 9: Keep an eye on the moisture levels, and water as needed. Roots should start forming after four to six weeks. Gently tug on your cutting after this period – if it resists, roots have started to form!
3. Propagating clematis through layering
Step 1: Select a flexible, healthy stem that can easily reach the ground without breaking.
Step 2: Choose a point along the stem with several leaf nodes present. Make a small incision into the stem and apply rooting hormone on the cut.
Step 3: Dig a shallow hole (about 2-3 inches deep) and bury the cut area in the soil, anchoring with a U-shaped wire or hairpin if necessary. Make sure that the tip of the stem is above the ground.
Step 4: Water well and maintain consistent moisture over several months, letting roots develop.
Step 5: Once roots are established, sever the stem from the parent plant carefully using pruning shears and transplant your new clematis to its desired location.
That’s all it takes! By following these steps, you’ll be able to propagate your clematis vines successfully and add more vibrant beauty to your garden. Happy gardening!