How to Practice Gesture Drawing: 9 Steps

Introduction:
Gesture drawing is a crucial skill for artists to develop, as it allows them to quickly capture the essence of a subject’s form and motion. The goal of gesture drawing is not to create a polished, finished piece, but rather to focus on the fundamental elements of the subject, such as its silhouette and structure. If you want to improve your drawing abilities and better understand human anatomy, here are nine steps to help you practice gesture drawing.
Step 1: Gather Your Materials
Select a medium that you find comfortable and quick for sketching. Popular choices are pencils, charcoal, or even a digital tablet. You’ll also need paper or a sketchbook to create your drawings.
Step 2: Warm-Up
Before diving into gesture drawing, do some warm-up exercises to prepare your arm muscles and sharpen your focus. Try drawing simple lines and shapes, circles or rapid scribbles for about 5-10 minutes.
Step 3: Choose a Subject
Gesture drawings can be made from live models, photographs, or even real-life scenes. It’s helpful to vary your subject matter regularly so that you can practice capturing different types of movement and poses.
Step 4: Set a Time Limit
Keeping your sessions brief helps you focus on the essential qualities of your subject. Usually, gesture drawings range from 30 seconds to 2 minutes per pose. As you gain more experience, try reducing the amount of time spent on each sketch.
Step 5: Observe Before Drawing
Take a moment to study the pose before starting your sketch. Identify the dominant lines and angles in the subject’s body structure and mentally plan how you’ll interpret them in your drawing.
Step 6: Capture the Essence
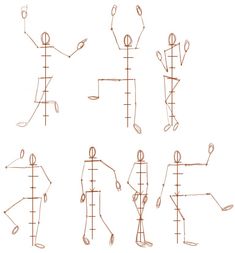
Start by sketching out the overall shape of the body with quick, light strokes. Focus on capturing the fluidity and movement without worrying about small details or anatomical accuracy.
Step 7: Add Structure
Once you’ve established the overall form, add a few structural lines to indicate the position of the subject’s limbs and torso. These lines should convey the weight and balance of the pose.
Step 8: Refine Your Drawing
If time allows, you can add more detail to your drawing while still maintaining a loose, gestural style. Keep a light touch and avoid overworking any features or body parts.
Step 9: Review and Learn
After completing a series of gesture drawings, evaluate your work and look for areas where you can improve. Take note of any repetitive mistakes or patterns to address in future practice sessions.
Conclusion:
Gesture drawing is an essential tool for artists who want to improve their observational skills and become more adept at capturing movement and expressing emotion. Follow these nine steps to practice gesture drawing effectively and watch your artistic abilities grow.


