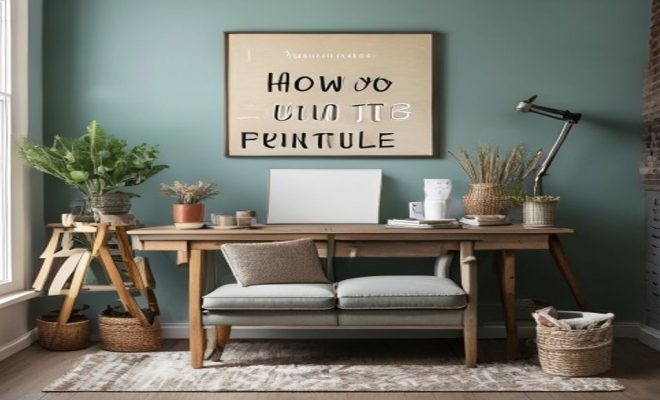
How to paint furniture
“`html
Are you looking to breathe new life into an old piece of furniture? Painting can transform even the most tired items into stunning focal points in your home. Whether it’s a vintage dresser, an outdated coffee table, or a simple chair, mastering the right furniture painting techniques can elevate your DIY game. In this comprehensive guide, we’ll explore various techniques, essential tips, and the significance of preparation in furniture painting, ensuring you achieve the best results possible.
1. Understanding Different Furniture Painting Techniques
Before you dive into painting, it’s crucial to understand the different techniques available. Each method has its own aesthetic and practical advantages. Here are a few popular options:
- Brush Painting: This traditional technique allows for precise application of paint. It’s perfect for small details and intricate designs but may require more time and effort to achieve a smooth finish.
- Spray Painting: For a quick and even coat, spray painting is unmatched. It’s particularly useful for larger surfaces but can be tricky for beginners due to overspray and the need for proper ventilation.
- Roller Painting: Using a foam roller can cover large areas quickly and efficiently. It is best suited for flat surfaces and results in a smooth, even finish.
- Stenciling: This technique adds an artistic touch by applying patterns or designs with stencils. It’s ideal for personalizing furniture and creating unique looks.
- Chalk Paint: Known for its matte finish and ease of use, chalk paint adheres well to various surfaces without the need for extensive prep work. It’s a favorite among DIY enthusiasts.
Understanding these techniques will help you choose the right approach for your project, depending on the furniture type, desired finish, and your skill level.
2. Preparing Your Furniture for Painting
Successful furniture painting begins long before the brush touches the surface. Proper preparation is key to achieving a beautiful finish that lasts. Here’s what you need to do:
- Clean the Surface: Remove any dust, grease, or grime. A simple mix of soap and water can do the trick. For stubborn stains, consider using a degreaser.
- Sanding: Lightly sand the surface to create a rough texture that helps the paint adhere better. Use a fine-grit sandpaper (around 220-grit) for a smooth finish. Remember to wipe away any dust after sanding.
- Prime if Necessary: If you’re painting over a stained or glossy surface, using a primer can help ensure the paint adheres properly. This step is particularly important for darker paints over lighter colors.
- Repair Any Damage: Fill in any scratches, dents, or holes with wood filler and sand it smooth. This attention to detail will ensure a flawless finish.
By taking the time to prepare your furniture, you’ll set yourself up for a successful painting experience.
3. Choosing the Right Paint for Your Project
Not all paints are created equal, and selecting the right type is essential for durability and finish. Here are some options:
- Latex Paint: Water-based latex paints are easy to clean and come in a variety of finishes. They’re ideal for indoor furniture and are less odorous compared to oil-based paints.
- Oil-Based Paint: Known for its durability, oil-based paint provides a hard finish but requires mineral spirits for cleanup. It’s great for high-traffic furniture but takes longer to dry.
- Chalk Paint: As mentioned earlier, chalk paint is user-friendly and creates a lovely matte finish. It’s perfect for a vintage look and can be distressed for added character.
- Spray Paint: If you’re looking for convenience and speed, spray paint is an excellent choice. Just be sure to use it in a well-ventilated area and apply thin, even coats.
When choosing your paint, consider the furniture’s location (indoors or outdoors), its use (high-traffic or decorative), and the finish you desire. Test small samples if necessary to find your perfect match.
4. Essential Tools and Supplies
Having the right tools at your disposal can make all the difference in your painting project. Here’s a list of essential supplies:
- Paintbrushes: Invest in high-quality brushes of varying sizes. A wide brush works well for large areas, while a smaller brush is ideal for detailed work.
- Roller and Tray: If you choose to roller paint, get a foam roller and a tray for easy application.
- Spray Paint Canisters: For spray paint projects, ensure you have a canister with a comfortable nozzle for control.
- Sandpaper: As mentioned, use fine-grit sandpaper for prepping surfaces.
- Drop Cloths and Painter’s Tape: Protect your work area and create clean lines with painter’s tape. Drop cloths will safeguard your floors from spills.
- Sealer or Topcoat: To protect your finished piece, consider applying a sealant or topcoat once the paint dries. This will enhance durability and add a sheen to your work.
Gathering these tools before you begin will streamline the painting process and help you stay organized.
5. Techniques for Applying Paint
Once you’ve prepared your furniture and gathered your supplies, it’s time to start painting. Here are some techniques to keep in mind: (See: Lead safety in home renovations.)
- Thin Coats: Apply paint in thin layers. It’s better to do multiple coats than one thick coat, which can lead to drips and an uneven finish.
- Brush Technique: Use long, even strokes when brush painting. Start from one side and work your way to the other, avoiding going back over areas that have begun to dry.
- Roller Technique: Use the roller to apply paint in a “W” pattern, then fill in the gaps without lifting the roller. This ensures even coverage.
- Spray Technique: Hold the spray can about 8-12 inches from the surface and use steady, sweeping motions. Apply several light coats instead of one heavy coat.
Proper application technique is crucial to achieving a professional-looking finish. Don’t rush this step; take your time to ensure each layer is even and well-distributed.
6. Drying and Curing Times
After applying your first coat of paint, you might be eager to see the finished product. However, patience is vital. Here’s what you should know about drying and curing times:
- Drying Time: Most paints will dry to the touch in about 30 minutes to 1 hour, but this can vary based on humidity and temperature.
- Curing Time: While the paint may feel dry, it can take several days to fully cure. This means it reaches its maximum hardness and durability.
- Re-coating: Wait at least 2-4 hours between coats, depending on the paint type. Always refer to the manufacturer’s instructions for specific guidance.
Allowing adequate drying and curing time is essential to prevent smudging and ensure the longevity of your finish.
7. Finishing Touches and Distressing Techniques
Once your paint has dried, you can add some final touches to enhance the look of your furniture. Consider these options:
- Sealing the Paint: Apply a clear sealer or topcoat to protect your paint job. This step is crucial for high-use items to prevent scratches and stains.
- Distressing: For a vintage or rustic look, lightly sand edges or areas where wear would naturally occur. This technique can add character and depth to your piece.
- Adding Hardware: New knobs or handles can completely change the look of a piece. When you paint, consider upgrading the hardware to match your new finish.
These finishing touches can elevate your furniture design and make it a unique piece in your home.
8. Maintenance and Care for Painted Furniture
After you’ve successfully painted your furniture, it’s important to understand how to maintain it. Proper care will prolong the life of your paint job. Here are some tips:
- Cleaning: Use a soft cloth to dust and a damp cloth for cleaning. Avoid harsh chemicals that can damage the paint.
- Avoid Direct Sunlight: Keep painted furniture out of direct sunlight to prevent fading and discoloration over time.
- Repairing Chips: If you notice chips or scratches, touch them up promptly to prevent them from worsening.
Taking these simple steps will help your painted furniture stay beautiful for years to come.
9. Current Trends in Furniture Painting
Furniture painting trends evolve constantly, reflecting changes in interior design and consumer preferences. Here are some current trends to consider:
- Bold Colors: Vibrant shades like emerald green, navy blue, and deep burgundy are making a statement in furniture design.
- Two-Tone Designs: Combining two complementary colors on a single piece can add interest and depth.
- Natural Finishes: Many homeowners are gravitating towards more natural, organic looks, opting for earthy tones and matte finishes.
- Geometric Patterns: Stenciling geometric shapes can add a modern twist to traditional furniture pieces.
Staying updated on trends can help ensure your painted furniture aligns with current styles, making your home feel fresh and contemporary.
10. Inspiration for Your Next Furniture Painting Project
Feeling inspired yet? There are countless resources to spark your creativity:
- Social Media: Platforms like Pinterest and Instagram are treasure troves of ideas, showcasing unique furniture transformations and DIY projects.
- DIY Blogs: Many bloggers share their furniture painting journeys, complete with tutorials and tips. Find a few favorites to follow for ongoing inspiration.
- Local Workshops: Consider participating in a local DIY workshop. Many home improvement stores and craft shops offer classes on furniture painting techniques.
Your next furniture painting project is just around the corner. With the right techniques, tools, and a bit of creativity, you can transform any piece of furniture into a stunning work of art. So, gather your supplies and get to work! (See: Expert tips on painting furniture.)
11. Advanced Furniture Painting Techniques
If you’re looking to take your furniture painting skills to the next level, consider experimenting with some advanced techniques. These methods can add dimension and uniqueness to your projects:
- Ombre Effect: This trendy style involves blending multiple shades of paint from light to dark for a beautiful gradient effect. Achieving the ombre look requires patience and a steady hand, but the results can be stunning.
- Color Washing: This technique involves applying a thin layer of diluted paint over a base coat to create a translucent effect. It’s perfect for adding depth and a soft, textured look to furniture.
- Decoupage: Adding decorative paper, fabric, or even printed images can create a completely unique piece. Use a decoupage medium to adhere the materials and seal them with a topcoat.
- Metallic Finishes: For a touch of glamour, consider using metallic paint or a metallic glaze over a base color. This can give your furniture a sophisticated sheen.
These advanced techniques require practice, but they can elevate your furniture projects and set your creations apart from the ordinary.
12. Eco-Friendly Painting Options
As awareness of environmental issues grows, many DIY enthusiasts are seeking eco-friendly options for their furniture painting projects. Here are some sustainable alternatives:
- Low-VOC or No-VOC Paints: These paints contain fewer volatile organic compounds, reducing harmful emissions and odors. They’re a healthier choice for indoor air quality.
- Natural Paints: Brands like Earthborn and Auro offer paints made from natural ingredients like clay, chalk, and plant oils. They come in a variety of colors and finishes.
- Recycled Paints: Some companies specialize in recycling leftover paints to create new products, giving them a second life and reducing waste.
- DIY Paint: Create your own paint using natural materials like milk, casein, or even homemade chalk paint using plaster of Paris. This can be both an eco-friendly and cost-effective option.
By choosing eco-friendly options, you can feel good about your furniture projects while minimizing your environmental impact.
13. Furniture Painting Mistakes to Avoid
Even experienced DIYers can make mistakes during furniture painting projects. Here are common pitfalls to be aware of, along with tips to avoid them:
- Skipping the Prep Work: Don’t underestimate the importance of proper preparation. Skipping steps like cleaning, sanding, and priming can lead to peeling paint and poor adhesion.
- Using the Wrong Paint: Always ensure that the paint you choose is appropriate for the type of furniture and its intended use. For example, outdoor furniture needs weather-resistant paint.
- Failing to Test Colors: Always try a small sample of your paint color on a hidden area of the furniture. Colors can look different in various lighting conditions.
- Rushing the Process: Painting takes time; don’t rush through coats or drying times. Patience is key to achieving a smooth, professional finish.
Being mindful of these potential mistakes can save you time and frustration, leading to a successful painting project.
14. Frequently Asked Questions about Furniture Painting Techniques
Got questions? Here are some answers to common inquiries about furniture painting techniques:
What paint is best for furniture?
The best paint for furniture depends on the type of piece and the desired finish. Chalk paint and latex paint are popular choices for their ease of use and variety. For durability, consider oil-based paints.
Can I paint over stained wood?
Yes, but you should always prep the surface by cleaning, sanding, and priming it first to ensure the paint adheres properly.
How do I achieve a smooth finish?
To achieve a smooth finish, apply thin coats of paint and sand lightly between layers. High-quality brushes or rollers can also contribute to a flawless appearance.
Is it necessary to use a primer?
Using a primer is recommended, especially when painting over stained or glossy surfaces. It helps with adhesion and can prevent bleed-through of stains or colors.
How long does painted furniture last?
With proper preparation, application, and maintenance, painted furniture can last many years. High-quality paint and topcoats can enhance durability significantly.
Can I distress painted furniture after it dries?
Yes, distressing can be done after the paint dries. Use fine-grit sandpaper to gently wear away the edges and create a vintage look.
What can I do if my paint is peeling?
If your paint is peeling, it’s essential to remove the flaking areas, sand the surface, and reapply a primer before repainting. This ensures proper adhesion for the new coat.
15. Tips for Success in Furniture Painting Techniques
Before you embark on your next furniture painting project, keep these tips in mind to maximize your success:
- Choose the Right Environment: Select a well-ventilated and dust-free area for your project. This helps with drying times and minimizes contamination from dust or debris.
- Invest in Quality Supplies: While it might be tempting to skimp on materials, high-quality brushes and paints often yield better results and longevity.
- Plan Your Design: Sketching out your design or color scheme beforehand can prevent costly mistakes and help you visualize the final product.
- Practice on Scrap Materials: If you’re trying a new technique, practice on a piece of scrap wood or an old item. This can help you refine your skills without risking your main project.
- Be Mindful of Weather Conditions: If you’re painting outdoors, be aware of humidity and temperature. High humidity can extend drying times, while extreme heat can cause paint to dry too quickly, resulting in cracks.
16. Final Thoughts on Furniture Painting Techniques
Furniture painting is a fulfilling and creative endeavor that can breathe new life into your home décor. Whether you’re a beginner or an experienced DIYer, there’s always something new to learn. Armed with the right techniques, tools, and a bit of creativity, you can transform any piece of furniture into a stunning work of art. Remember to take your time, enjoy the process, and don’t be afraid to experiment. Happy painting!
“`
Trending Now
Frequently Asked Questions
What are the best techniques for painting furniture?
Some of the best techniques for painting furniture include brush painting for detailed work, spray painting for quick coverage, roller painting for large surfaces, stenciling for artistic designs, and using chalk paint for a matte finish. Each method has its unique advantages depending on the project.
How do I prepare furniture for painting?
Preparing furniture for painting involves cleaning the surface, sanding to ensure proper adhesion, and priming if necessary. This essential prep work helps achieve a smooth and durable finish, making your paint job last longer.
Can I use spray paint on furniture?
Yes, spray paint can be used on furniture and is excellent for achieving an even coat quickly. However, it requires careful application to avoid overspray and should be done in a well-ventilated area for safety.
What is chalk paint and why is it popular?
Chalk paint is a type of paint known for its matte finish and ease of use. It adheres well to various surfaces without extensive prep work, making it a favorite among DIY enthusiasts for furniture projects.
How do I achieve a smooth finish when painting furniture?
To achieve a smooth finish when painting furniture, use high-quality brushes or rollers, apply thin coats of paint, and allow adequate drying time between layers. Sanding lightly between coats can also enhance the smoothness of the final result.
Have you experienced this yourself? We’d love to hear your story in the comments.