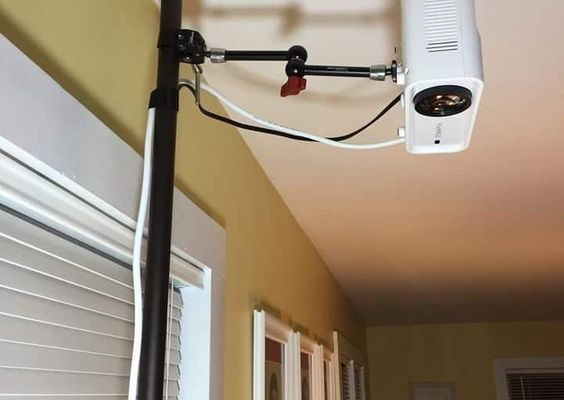
How to Mount a Projector: 14 Steps

Step 1: Choose a location
Before you begin the mounting process, decide where you want to place your projector. Pick an area with ample space for the screen and seating, ensuring there is minimal ambient light interference.
Step 2: Check the projector type
Determine whether your projector is compatible with ceiling or wall mounts. Consult your projector’s manual or manufacturer’s website to ensure proper compatibility.
Step 3: Measure throw distance and align the screen
Calculate the throw distance — the distance between the lens and the screen — using your projector’s specifications. Then, align the screen to maximize image quality at that distance.
Step 4: Select a mount
Choose a projector mount that suits your needs based on mounting style, flexibility, and weight capacity. Investigate options for accessible cable management, too.
Step 5: Gather tools and materials
Assemble necessary tools (drill, stud finder, level, measuring tape) and materials (mounting hardware, screws) for the installation process.
Step 6: Locate ceiling joists or studs (if wall-mounted)
Use a stud finder to identify structural support points like joists or studs. This ensures a secure mount that can safely hold your projector’s weight.
Step 7: Mark holes for drilling
Using your chosen mount as a guide, mark hole locations on the ceiling or wall with a pencil.
Step 8: Drill pilot holes
Drill pilot holes at your marked locations to ensure proper alignment and prevent mistakes when securing the mount hardware.
Step 9: Secure mounting bracket
Insert necessary screws into the pilot holes and attach the mounting bracket securely. Double-check alignment with a level before tightening screws fully.
Step 10: Attach adjustable arm (if applicable)
If using an adjustable ceiling mount, connect the telescoping arm or extension pole to ensure proper height adjustments for optimum image clarity.
Step 11: Attach projector to mount plate
Following the instructions provided by your mount manufacturer, attach the projector to the mounting plate. This may involve connecting brackets or aligning slide tracks.
Step 12: Connect projection hardware to the mount
Attach the projector and mounting plate to the ceiling or wall bracket. Depending on your mounting hardware, this may involve sliding, clipping, or tightening screws.
Step 13: Adjust projector alignment
Once your projector is securely mounted, take the time to adjust its alignment with the screen using onboard controls such as keystone correction and lens shift.
Step 14: Conceal cables and finish
Tidy up any visible cables using cable clips, conduit, or other cable management solutions. Test your newly mounted projector to make sure it works correctly and provides a crisp image.
And there you have it – you’ve successfully mounted your projector in 14 steps! Now it’s time to sit back, relax, and enjoy the ultimate home theater experience.


