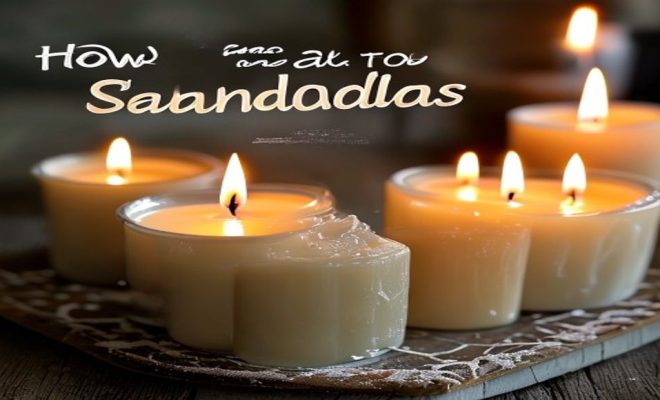
How to make candles
“`html
Candle making is not just an art; it’s a rewarding hobby that allows you to explore your creativity while producing beautiful and aromatic pieces that can transform any space. Whether you’re looking to create a cozy atmosphere at home or seeking a new craft to pursue, learning how to make candles can be both fun and fulfilling. In this comprehensive guide, we’ll dive deep into the world of candle making, covering everything from the types of wax to the methods of pouring.
1. The History of Candle Making
Candle making has a rich history that traces back thousands of years. The earliest known use of candles dates back to ancient Egypt, where rushes were soaked in animal fat. The Romans later improved upon this technique, creating beeswax candles that burned longer and cleaner. During the Middle Ages, monks began to produce candles for use in their monasteries, which also became a source of income. By the 19th century, the introduction of stearin and paraffin made candle making more accessible to the general public, leading to the widespread popularity we see today.
Understanding the history of candles is essential as it provides insight into how different materials and techniques have evolved. Each era brought advancements that influenced the types of candles we use today, from decorative to functional pieces. This historical background also emphasizes the cultural significance of candles, often associated with rituals, celebrations, and ambiance.
2. Essential Supplies for Candle Making
To get started with how to make candles, you’ll need a few key supplies. The primary materials include wax, wicks, and fragrance oils. Here’s a breakdown of the essentials:
- Wax: The most common types are paraffin, soy, beeswax, and palm wax. Each has unique properties affecting burn time, scent throw, and appearance.
- Wicks: Choose the right wick size and material based on your wax type and candle size for optimal burning.
- Fragrance Oils: These are used to add scent to your candles. High-quality oils will ensure a pleasant aroma without being overpowering.
- Color Dyes: If you want colored candles, you can use dye chips or liquid dyes made specifically for candle making.
- Containers or Molds: You can use glass jars, metal tins, or silicone molds depending on your desired candle shape.
Other supplies include a double boiler for melting wax, a thermometer to monitor temperatures, and safety gear like gloves and goggles. Knowing what you need upfront will streamline your candle-making process.
3. Understanding Different Wax Types
When exploring how to make candles, the type of wax you choose significantly impacts your final product. Here’s a closer look at the most popular options:
- Paraffin Wax: This is the most widely used wax for candle making due to its affordability and excellent scent-holding properties. However, it’s a byproduct of petroleum and may not appeal to those seeking eco-friendly options.
- Soy Wax: A popular choice for those looking for a natural alternative, soy wax is made from soybeans and burns cleanly. It’s also biodegradable and offers a good scent throw.
- Beeswax: This natural wax is known for its beautiful golden hue and sweet honey scent. It’s the cleanest burning wax available but is often more expensive than other options.
- Palm Wax: Another natural option, palm wax creates unique crystalline patterns as it cools, resulting in stunning visual effects. However, it’s essential to source palm wax sustainably to avoid contributing to deforestation.
Choosing the right wax type depends on your preferences, both in terms of environmental impact and the characteristics you desire in your candles. Each wax has its unique benefits that can enhance your candle-making experience.
4. Choosing the Right Wick
Wick selection is crucial in how to make candles successfully. If your wick is too small, it won’t throw enough light or scent; if it’s too big, it may cause excessive soot and uneven burning. Here’s what to consider: (See: Candle history and evolution.)
- Wick Size: Wicks come in various sizes, and selecting the right one is vital. Many suppliers provide recommendations based on the diameter of the candle.
- Wick Material: Common materials include cotton, wood, and hemp. Cotton wicks are versatile and widely used, while wood wicks provide a unique crackling sound and aesthetic.
- Wick Coating: Some wicks can be pre-coated with wax to help them burn more evenly. For homemade candles, you might need to choose wicks that suit your wax type.
Experimenting with different wicks can yield various results, and it’s always a good idea to conduct a burn test before finalizing your candle design.
5. The Candle-Making Process
Now that you have your supplies, it’s time to dive into the candle-making process. Here’s a step-by-step guide on how to make candles at home:
- Prepare Your Workspace: Ensure your area is clean and organized. Lay down newspaper or an old cloth to catch any spills and protect surfaces.
- Melt the Wax: Using a double boiler, melt your chosen wax to the appropriate temperature (usually around 170-180°F for most waxes).
- Add Fragrance and Color: Once the wax is melted, remove it from heat and let it cool slightly before adding fragrance oils and color, stirring gently.
- Prepare the Wick: While the wax is cooling, secure the wick to the bottom of your container or mold using a wick sticker or hot glue.
- Pour the Wax: When the wax temperature is right (around 140-150°F), carefully pour it into your container or mold, leaving some space at the top.
- Secure the Wick: Use a wick holder or a pencil laid across the top of the container to keep the wick centered as the wax sets.
- Let It Cool: Allow the candle to cool completely, which may take several hours depending on the size.
- Trim the Wick: After cooling, trim the wick to about ¼ inch above the wax surface.
- Label and Cure: If you wish to label your candles, now is the time. Allow your candles to cure for a few days for optimal scent throw before burning.
This process can be tailored based on personal preferences and experimentation as you become more comfortable with the art of candle making.
6. Safety Tips for Candle Making
While learning how to make candles can be enjoyable, safety should always be a priority. Here are essential safety tips to keep in mind:
- Work in a Well-Ventilated Space: Melting wax can release fumes. Ensure your workspace is well-ventilated to avoid inhaling any harmful vapors.
- Use Heat-Resistant Containers: Always choose containers that can withstand high temperatures. Glass, metal, or silicone are great choices.
- Monitor Temperatures: Use a thermometer to keep track of wax temperatures, avoiding overheating, which can lead to dangerous situations.
- Wear Protective Gear: Gloves and goggles are advisable to protect your skin and eyes from spills and splashes.
- Keep a Fire Extinguisher Nearby: This is a precautionary measure in case of accidents. Safety should always come first!
By following these safety tips, you can enjoy the process of candle making without any risks.
7. Creative Ideas for Custom Candles
Once you’ve mastered the basics of how to make candles, you can let your creativity run wild. Here are some unique ideas to inspire your next projects:
- Layered Candles: Create visually stunning candles by pouring different colored wax layers, allowing each layer to harden before adding the next.
- Scent Blending: Experiment with blending different fragrance oils for unique scent combinations that reflect your personality or mood.
- Decorative Embeds: Consider embedding dried flowers, herbs, or crystals in your candles for an artistic touch.
- Seasonal Themes: Make candles that reflect the seasons. Think pumpkin spice for fall or refreshing citrus for summer.
- Personalized Labels: Create custom labels for gifting or selling your candles, adding a personal touch that can elevate your product.
These creative ideas can help you develop your own signature style, making your candles stand out.
8. Common Mistakes to Avoid
Even seasoned candle makers can run into issues. Here are common mistakes to be aware of as you learn how to make candles:
- Incorrect Wick Size: Using a wick that is too small or too large can affect burning quality and scent throw. Always match the wick size to your candle size and wax type.
- Overheating Wax: If wax is overheated, it can lose its scent and become discolored, or worse, create a fire hazard. Use a thermometer for accurate temperature control.
- Poor Mixing of Fragrance: If fragrance oils are not mixed thoroughly, the scent may not distribute evenly, resulting in a weak aroma.
- Not Allowing Candles to Cure: Burning candles too soon can lead to poor scent throw. Curing allows fragrances to fully integrate into the wax.
By being mindful of these common pitfalls, you can improve your candle-making skills and produce higher-quality candles.
9. Current Trends in Candle Making
The candle-making industry has seen a resurgence in popularity, particularly in recent years as people seek sustainable and homemade alternatives for home decor and gifts. Here are some current trends: (See: Safety tips for candle use.)
- Sustainability: More consumers are opting for eco-friendly materials, such as soy and beeswax, and seeking sustainable packaging options.
- Handmade Aesthetics: The charm of handmade products continues to draw buyers. Unique designs and artisanal touches are highly sought after.
- Interactive Experiences: Workshops and online tutorials have become popular, allowing people to learn the craft of candle making in an engaging way.
- Aromatherapy Candles: With increased awareness of wellness, candles infused with essential oils for relaxation or energy are climbing in popularity.
Staying aware of these trends will not only keep your candle-making relevant but also inspire you to innovate and create products that resonate with current consumer interests.
10. Advanced Techniques in Candle Making
Once you’ve gained confidence in the basic candle making process, you might want to explore some advanced techniques that can elevate your creations. Here are a few to consider:
- Container Candles: Explore the use of different containers, such as ceramics, tin cans, or even repurposed glass jars. Each material can affect the candle’s burn time and scent throw, providing new aesthetics and functionalities.
- Gel Candles: Gel wax allows you to create transparent, colorful candles with embedded items visible through the wax. This technique offers a unique visual appeal and allows for creativity in what you can showcase within the candle.
- Natural Dyes: Instead of synthetic colorants, consider using natural dyes derived from plants, spices, and other organic materials. This approach not only creates beautiful colors but can also enhance the candle’s natural properties.
- Candle Carving: This artistic technique involves creating intricate designs and patterns on the surface of a hardened candle. While it requires skill and practice, it can lead to stunning pieces that serve as beautiful decor or gifts.
- Creating Scent Layers: By pouring layers of different scented wax, you can create a candle that offers a complex scent profile. As the candle burns, different fragrances are released at various stages, providing a dynamic aromatic experience.
11. Frequently Asked Questions (FAQ)
1. How long does it take for a candle to set?
The time it takes for a candle to set can vary depending on its size and the type of wax used. Generally, smaller candles can set in about 1-2 hours, while larger ones may take several hours or even overnight.
2. Can I use essential oils instead of fragrance oils?
Yes, essential oils can be used to scent candles, but they may not provide the same strong scent throw as synthetic fragrance oils. It’s often recommended to mix essential oils with a carrier oil or to use fragrance oils specifically designed for candle making to achieve the best results.
3. What should I do if my candle has air bubbles?
Air bubbles can occur during the pouring process. To minimize them, pour the wax slowly and at a consistent temperature. If bubbles form, you can gently reheat the surface of the candle with a heat gun or blow dryer to allow them to rise and pop.
4. How can I prevent my candles from tunneling?
Tunneling occurs when the wick burns down the center of the candle, leaving wax on the sides. To prevent this, allow the candle to burn long enough for the melt pool to reach the edges. Generally, this means burning the candle for one hour for every inch of its diameter.
5. Is it safe to burn candles in enclosed spaces?
While candles can create a cozy atmosphere, it’s important to ensure good ventilation, especially in enclosed spaces. Always keep candles away from flammable materials and never leave them unattended. (See: New York Times guide on candle making.)
6. How do I clean up wax spills?
If wax spills occur, allow it to cool and harden before attempting to remove it. You can scrape off the excess wax with a spatula, and then use paper towels and warm, soapy water to clean any residue left behind.
7. How long do homemade candles last?
The longevity of homemade candles depends on the type of wax used and how they’re stored. Generally, well-made candles can last from six months to a year if kept in a cool, dark place away from direct sunlight.
12. Resources for Further Learning
If you’re eager to expand your candle-making knowledge beyond this guide, here are some valuable resources:
- Books: Look for books on candle making that offer detailed techniques and recipes for various types of candles.
- Online Courses: Websites like Udemy and Skillshare offer video tutorials on advanced candle-making techniques and business aspects.
- Local Workshops: Check community centers or craft stores for candle-making classes where you can learn hands-on from experienced instructors.
- Social Media Groups: Join Facebook groups or follow Instagram accounts dedicated to candle making for tips, inspiration, and community support.
- YouTube Channels: Many candle makers share their expertise and tutorials on YouTube, providing visual guidance on techniques and creative ideas.
13. The Benefits of Candle Making
Candle making offers a variety of benefits beyond just the satisfaction of creating something beautiful. Here are some of the advantages you can enjoy from engaging in this hobby:
- Stress Relief: The process of melting wax, mixing scents, and pouring candles can be therapeutic. Engaging in a creative activity allows you to unwind and escape daily stressors.
- Personalization: When you learn how to make candles, you can create custom scents and designs tailored to your preferences or as gifts for loved ones, making every piece unique.
- Cost-Effective Gifts: Homemade candles can serve as thoughtful, budget-friendly gifts for any occasion. With minimal investment, you can produce high-quality candles that friends and family will appreciate.
- Entrepreneurial Opportunities: If you find a passion for candle making, you might consider turning it into a small business. The demand for handmade candles is continually growing, and being able to market your unique creations can be very rewarding.
14. Tips for Selling Your Candles
If you’re thinking about taking your candle-making skills to a commercial level, here are some tips to help you get started:
- Market Research: Understand your target audience and what types of candles are trending. This can help you create products that meet consumer demand.
- Branding: Develop a strong brand identity, complete with a logo, packaging, and a cohesive style. This sets your products apart from competitors and builds trust with customers.
- Online Presence: Use social media platforms and e-commerce websites to showcase and sell your candles. High-quality images and engaging content can attract potential buyers.
- Feedback and Improvement: Encourage customer reviews and feedback to improve your products. Constructive criticism can help you refine your offerings and enhance customer satisfaction.
Incorporating these insights and techniques into your candle-making journey will empower you to create beautiful, fragrant candles that reflect your unique style. Whether you’re making them for yourself, as gifts, or to sell, mastering how to make candles brings both joy and creativity into your life.
“`
Trending Now
Frequently Asked Questions
What materials do I need to make candles?
To make candles, you'll need essential materials such as wax (like paraffin, soy, beeswax, or palm wax), wicks appropriate for your chosen wax, and fragrance oils for scent. Additional supplies may include a double boiler for melting wax, a thermometer, and containers or molds for shaping your candles.
How do I choose the right wick for my candle?
Choosing the right wick involves considering the type of wax and the size of your candle. Wicks come in various sizes and materials, and selecting one that matches your wax type ensures optimal burning. Generally, thicker wicks are suited for larger candles, while thinner wicks work better for smaller ones.
What types of wax are best for candle making?
The best types of wax for candle making include paraffin, which is widely used for its affordability; soy, known for its eco-friendliness and clean burn; beeswax, valued for its natural properties and long burn time; and palm wax, which offers a unique texture and appearance. Each type has distinct characteristics affecting scent throw and burn quality.
How can I make my candles smell stronger?
To enhance the scent of your candles, use high-quality fragrance oils and ensure you add the right amount relative to the wax type. A general rule is to add 1 ounce of fragrance oil per pound of wax. Additionally, allowing your candles to cure for a few days after pouring can improve scent throw.
What is the history of candle making?
Candle making dates back thousands of years, with its origins in ancient Egypt, where rushes were soaked in animal fat. The Romans advanced the craft with beeswax candles, and during the Middle Ages, monks produced candles for monasteries. The 19th century saw the introduction of stearin and paraffin, making candle making more accessible and popular.
Agree or disagree? Drop a comment and tell us what you think.