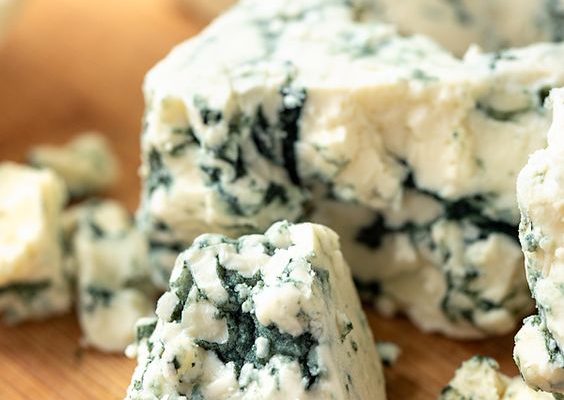
How to Make Blue Cheese

Introduction:
Blue cheese, a unique and piquant delight, is a must-try for cheese enthusiasts. Known for its distinct blue veins and bold, tangy flavor, it’s an excellent addition to any cheese platter or culinary masterpiece. In this article, we’ll explore the steps required to make your very own homemade blue cheese.
Ingredients:
1. 8 cups of raw milk
2. 1 packet of mesophilic starter culture
3. 1/16 tsp of Penicillium roqueforti
4. 2 tsp of calcium chloride (if using homogenized milk)
5. ½ tsp of liquid rennet
6. Non-iodized salt
Equipment:
1. Large stainless steel pot
2. Cheesecloth
3. Thermometer
4. Slotted spoon
5. Cheese forms (ideally with a follower to press)
6. Cheese cave or a stable environment to age the cheese
Step-by-Step Process:
Step 1: Warm the Milk
Heat the raw milk slowly in the stainless steel pot until it reaches a temperature around 85°F (29°C). Use a thermometer to ensure accuracy.
Step 2: Add Starter Culture and Penicillium Roqueforti
Add the mesophilic starter culture packet and Penicillium roqueforti powder to the milk, stirring gently for about one minute to distribute evenly.
Step 3: Wait for Fermentation
Cover the pot and let it sit undisturbed for about an hour at room temperature, allowing the milk to ripen as the bacteria work their magic.
Step 4: Add Rennet and Calcium Chloride (If Needed)
If using homogenized milk, add in calcium chloride before mixing in rennet. Otherwise, simply add rennet while stirring gently. Both additions will help initiate the coagulation process.
Step 5: Coagulate and Cut Curds
Allow the milk to coagulate for approximately 2 hours until a firm curd forms. Gently cut the curd into ½ inch cubes using a long knife.
Step 6: Stir and Drain Curds
Stir the cut curds gently for about 15 minutes so they release whey. Next, line a colander with cheesecloth and pour the curds and whey into it. Allow them to drain for about an hour, periodically stirring to prevent clumping.
Step 7: Mold the Cheese
Place the drained curds into cheese forms lined with fresh cheesecloth. Press the cheese gently using a follower, and let it sit overnight at room temperature.
Step 8: Salting
Remove the cheese from its mold, and lightly salt all sides before placing it in your cheese cave or designated aging area with a consistent temperature of 54-56°F (12-13°C) and humidity of around 90%.
Step 9: Aging
The blue cheese will need to age for approximately three months. During this time, turn the cheese regularly (about twice a week), allowing mold and flavor to develop evenly.
Step 10: Piercing the Cheese
After one month of aging, pierce holes throughout your blue cheese using a sterilized skewer, creating channels for air to circulate and promote blue mold growth. Continue turning it periodically as it matures.
Eventually, you’ll have your very own homemade blue cheese! Pair it with fresh fruits, crackers or crusty bread, some sweet preserves, or even enjoy it by itself as a delicious delicacy.


