How to Make a Tesla Coil: 13 Steps

Tesla coils are fascinating devices that produce high-voltage electrical shocks, often accompanied by impressive sparks. Invented by Nikola Tesla in 1891, these resonant transformers can create voltage levels that are much higher than their input. Follow these 13 steps to understand how to build a simple Tesla coil at home.
1. Gather materials: To make your Tesla coil, you will need the following items:
– PVC pipe (about 2 inches in diameter and around 10 inches long)
– Copper wire (22-24 AWG, magnet wire)
– Capacitors (ideally 0.1 µF)
– High voltage transformer (flyback or neon sign transformer)
– Aluminium foil
– Wire strippers
– Soldering equipment
– Safety gear
2. Prepare the PVC pipe: Drill two small holes in one end of the PVC pipe to allow the copper wire to pass through.
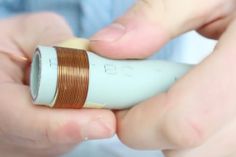
3. Wind the copper wire: Thread one end of the copper wire through one of the holes and wrap it around the PVC pipe, leaving a small gap between each winding. Keep wrapping until you reach the other hole, then secure the wire through this hole before trimming any excess.
4. Create a top load: Attach a piece of aluminium foil to the top of your PVC pipe, shaping it into a torus (doughnut shape) with electrical tape.
5. Assemble your capacitors: Connect your capacitors in parallel to create a bigger capacitance for higher voltage outputs.
6. Connect capacitors to the high-voltage transformer: Solder the output terminals of your high-voltage transformer to the leads of your combined capacitors.
7. Create primary and secondary circuits: Use a thick insulated wire or copper tubing to create loops around your PVC pipe, forming the primary coil circuit.
8. Safety checks: Make sure your primary and secondary coils are not touching each other, as this may cause malfunction or electric shocks.
9. Connect the bottom of the secondary coil to the capacitors: Solder a wire from the bottom of the copper winding on your PVC pipe to one lead of the capacitor.
10. Connect a ground wire: Attach a wire to the base of your Tesla coil, with the other end connected to an earth ground for stability.
11. Prepare for testing: Place your Tesla coil in an open, well-ventilated area without flammable materials nearby. Wear safety gear such as gloves and goggles to protect yourself from high-voltage shocks.
12. Power on and test: Connect your high-voltage transformer to a power source and switch on your Tesla coil. You should see sparks form at the top load when approaching it with a grounded object.
13. Enjoy your Tesla coil: Have fun safely experimenting with your Tesla coil’s effects on various objects, such as fluorescent lights, or by creating arcs between two points.
Remember that working with high voltages can be dangerous. Always take appropriate precautions and follow safety guidelines when building and operating a Tesla coil. If you’re not experienced with electronics, seek guidance from a professional or experienced hobbyist before attempting this project.


