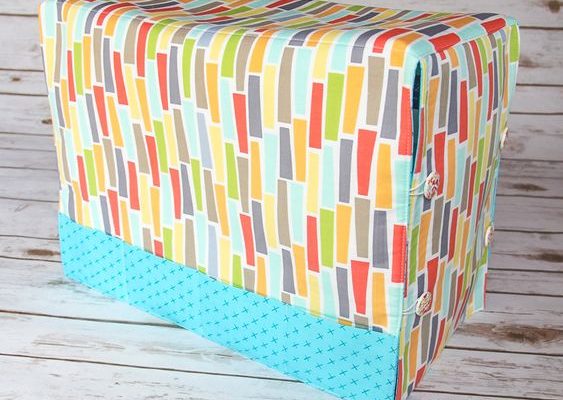
How to Make a Sewing Machine Cover

Introduction:
A sewing machine cover is a useful accessory to protect your machine from dust and debris when not in use. It also adds a touch of personality to your sewing space, allowing you to showcase your taste in fabric design or match the aesthetics of your workspace. In this article, we will guide you through the process of creating a custom sewing machine cover that perfectly fits your machine.
Materials Needed:
1. Measuring tape
2. Sewing machine
3. Fabric (preferably cotton or a similar material that holds its shape well)
4. Scissors
5. Straight pins
6. Thread (matching or complementary to your fabric choice)
7. Optional: fusible interfacing for added structure
Step 1: Measure Your Sewing Machine
Carefully measure the dimensions of your sewing machine to create accurate pattern pieces for the cover. You will need to measure the width, depth, and height of the machine (excluding any protruding knobs or levers). Add an additional inch each in width and depth for seam allowances.
Step 2: Cut Fabric Pieces
Using the measurements obtained in Step 1, cut out three fabric pieces:
– Piece A: Width x Height (for the front and back of the cover)
– Piece B: Depth x Height (for the sides of the cover)
– Piece C: Width x Depth (for the top of the cover)
Note that you will need two copies of Piece A and two copies of Piece B.
Optional: Cut out matching pieces from fusible interfacing and follow the manufacturer’s instructions to fuse it to your fabric pieces. This will add structure and stiffness to your sewing machine cover.
Step 3: Sew The Side Seams
Place one Piece A and one Piece B with their right sides together, aligning one height edge. Pin in place and sew along the edge with a straight stitch, using a half-inch seam allowance. Repeat this step for the second set of Pieces A and B.
Step 4: Attach The Top
Place the two assembled side panels with their right sides together, aligning the top edges. Place the Piece C on top, also with its right side facing down. Line up all the edges, and pin in place. Sew around the perimeter of Piece C using a half-inch seam allowance, making sure to catch all layers in the seam.
Step 5: Finish The Bottom Edge
Turn the cover right side out and press the seams for a clean finish. Fold the bottom edge of the cover under by half an inch and press in place. Sew around the entire bottom hem with a straight stitch to secure it.
Step 6: Customize Your Cover (Optional)
Feel free to add any trims, appliques, or other embellishments that suit your style. This could include adding a pocket for storage, creating labels or monograms, or incorporating unique design elements.
Conclusion:
With these simple steps, you have created a custom sewing machine cover that not only protects your investment but also adds a touch of personal flair to your sewing space. Now you can rest assured that your machine is safe from dust and debris while showcasing your creativity in every aspect of your craft.


