How to Make a Blooming Flower Time-Lapse: A Beginner’s Guide
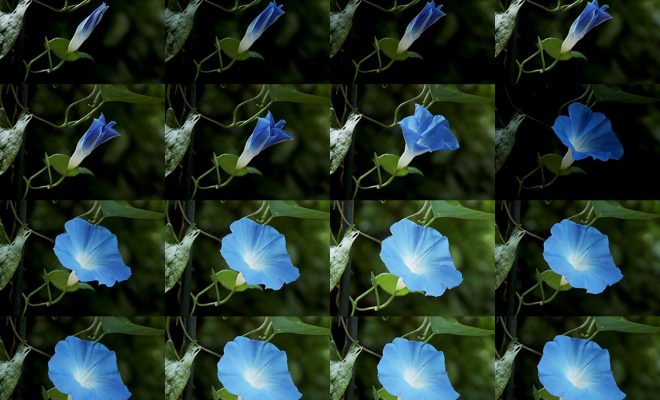
Capturing a blooming flower time-lapse can be an incredibly rewarding and visually stunning project. Whether you are a seasoned photographer or a complete beginner, creating a time-lapse of a flower opening up can be an exciting and accessible project. In this guide, we’ll give you some tips on how to create a blooming flower time-lapse that you can be proud of!
1. Choose Your Flower
First things first, you will need to choose a flower that you want to capture in your time-lapse. The best way to do this is to find a flower that has a defined blooming period. Some popular choices include tulips, daisies, and roses. Once you have selected your flower, you should make sure that it is healthy and well watered.
2. Set Up Your Camera
Now that you have your flower, it’s time to set up your camera. To take a time-lapse, you will need a camera that is capable of taking photos at predefined intervals. Many modern compact cameras and smartphones have built-in time-lapse features, but you can also use a DSLR camera or other professional-grade models. Once you have chosen your camera, set it up on a tripod, and make sure it is securely in place.
3. Determine Your Interval
The key to a successful time-lapse is to take photos at regular intervals. You should aim to take a photo every 5-10 seconds, depending on how quickly the flower is opening up. If you take too many photos, the time-lapse will appear choppy, but if you take too few, it will appear too fast.
4. Set Your Exposure
The next step is to set your exposure. Ideally, you should use manual exposure mode, which will ensure your camera exposure stays constant throughout shooting. Choose a fast shutter speed to capture the flower’s movement without blur, and a small aperture to help blur the background and focus on the flower itself.
5. Wait!
Now that everything is set up, it’s time to wait for the flower to bloom. This can take a few hours or even a few days, depending on the flower you have chosen. Be patient, and make sure to check on your camera regularly to make sure it is still taking photos. You can set an alarm on your phone to remind you to check on your camera.
6. Edit Your Time-Lapse
Once you have captured your time-lapse, it’s time to edit it. If you used a smartphone or compact camera, there are plenty of editing apps to choose from. If you used a DSLR camera, you can edit your time-lapse in software like Adobe Premiere or Final Cut Pro. You can also add music or sound effects to your time-lapse to enhance the overall effect.

