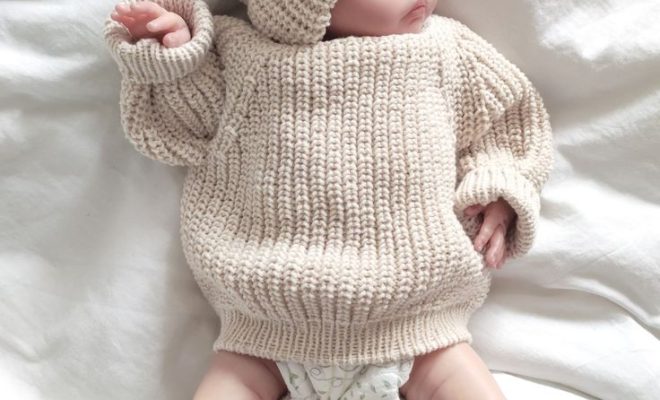
How to Knit a Baby Jumper
Introduction:
Knitting is a fulfilling and relaxing hobby that not only keeps you engaged, but also offers a way to create special, hand-crafted gifts for loved ones. A baby jumper is a classic project that can make a thoughtful present for expectant parents or keep your own little one warm and cozy. Follow our step-by-step guide to knit the perfect baby jumper.
Materials:
1. Baby yarn – choose soft, skin-friendly and machine-washable yarn. You will need approximately 200-300 grams depending on the size of the jumper.
2. Circular knitting needles (size 4mm)
3. Stitch markers
4. Stitch holder
5. Yarn needle
6. Scissors
7. Tape measure
Gauge and Sizing:
It is essential to create a gauge swatch before you begin knitting to ensure accurate sizing for your jumper. Using the size 4mm needles, knit stockinette stitch (alternating between knitting in the round and purling all the stitches) for approximately 20 to 30 rows. Measure the number of stitches per inch; ideally, you should have approximately 22 stitches over four inches.
Step-by-Step Instructions:
1. Cast on:
To start, cast on between 64 and 80 stitches (depending on the desired size) with your circular knitting needles using the long-tail cast-on method.
2. Ribbed Edge:
Create a ribbed edge by knitting one stitch, purling one stitch until the end of the row for at least four to six rows, depending on how thick you want the edge.
3. Main Body:
Knit in stockinette stitch for round knitting (knitting all stitches in every row) until the main body of the jumper measures roughly 6-8 inches from cast-on edge, depending on the size you have chosen.
4. Divider Rows and Sleeves:
To create the sleeves, add stitch markers every 16-20 stitches (depending on the size) and knit until you reach the first marker. Place all the stitches between two markers onto a stitch holder to be picked up later. Cast on an additional 4-6 stitches, then continue knitting until you reach the next marker. Repeat this process for the second sleeve.
5. Complete Main Body:
Continuing in stockinette stitch, knit the remaining body of the jumper while checking its length from where you cast-on those additional stitches under each arm. Once you have reached your desired length, knit another one-inch section using the ribbing pattern from step two to create a matching edge at the bottom of the jumper.
6. Sleeves:
Pick up and return held stitches for one sleeve to your circular needles and knit in stockinette stitch in the round until that sleeve is of a matching length to your desired body length, minus approximately one inch (since you will be adding ribbing at this stage). Then knit an inch of ribbing as done previously before binding off your stitches. Repeat these steps for the second sleeve.
7. Finishing Touches:
Using a yarn needle, sew together any remaining loose ends and trim excess yarn with scissors. You can now either leave your baby jumper as-is or add any personal touches like buttons or applique elements for a more unique design.
Conclusion:
With just a few simple steps and patience, you can create a beautiful, hand-knit baby jumper that’s perfect for gifting or keeping your little one cozy. Don’t forget to take pride in your work and share your creation with others to inspire them to try knitting too!