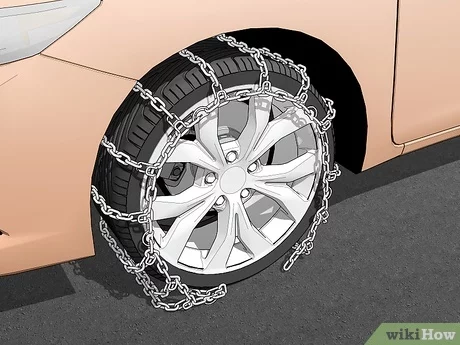
How to Install Snow Chains: 14 Steps

When winter arrives, and snow begins to accumulate on the roads, one of the most crucial safety measures you can take is installing snow chains on your vehicle’s tires. Snow chains provide increased traction and control on slippery surfaces, making driving in snowy conditions much safer. Follow these 14 steps to learn how to install snow chains correctly.
1. Purchase the right fit: To ensure a proper fit, check your vehicle owner’s manual or tire size located on the sidewall of the tire. Purchase chains specifically designed for your tire size.
2. Prepare your vehicle: Park your car on a level, solid surface away from traffic. Engage your parking brake and turn off your engine.
3. Layout the chains: Unpack your snow chains and lay them flat on the ground, untangling any links or twists. Ensure the metal hooks are facing upwards.
4. Identify the front and back: Check whether your chains have different sides for front and back installations.
5. Position the chains: Roll or carry the chains over to the tire that you will be installing them on first.
6. Drape the chains over your tires: Starting at one end, drape the chains over your tires, making sure they are evenly centered with an equal amount on each side.
7. Connect the ends inside: Reach behind the tire and fasten the inside cable or chain ends together using built-in fasteners.
8. Connect the outside ends: Move to the outside of the tire and pull both ends tight, fastening them securely together with built-in fasteners or tensioners.
9. Adjust for a snug fit: Adjust by pulling up slack in each section while ensuring even chain distribution across your tire tread.
10. Use chain tensioners (if needed): If provided with chain tensioners (like rubber “spider” or “X-shaped” devices), install as per manufacturer’s instructions to maintain consistent tension.
11. Check your alignment: Ensure the chains align with the center of the tire tread and make any adjustments needed for a proper fit.
12. Test drive: Get in your car and turn off the parking brake. Drive forward a few feet, checking for any rattling or loose chains.
13. Re-adjust chains if necessary: If you hear rattling or if the chains seem loose, stop, and re-adjust by either tightening built-in fasteners or re-installing tensioners.
14. Install on remaining tires: Repeat steps 5-13 for all remaining tires requiring snow chains.
Installing snow chains may seem like a daunting task, but it becomes relatively simple with practice. By following these 14 steps, you’ll be ready to face winter roads with increased safety and confidence.


